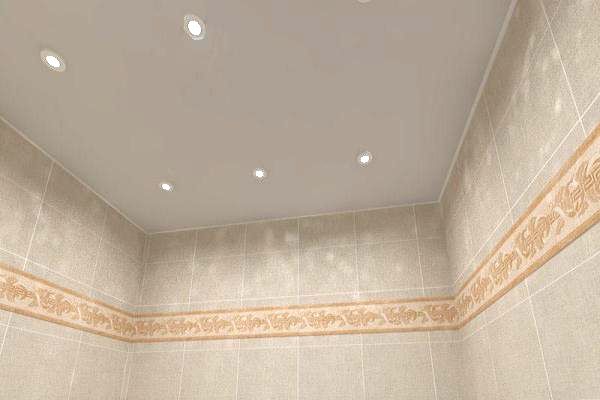
Suspended ceiling of plastic panels with hands. How to make a ceiling of plastic panels in the bathroom and in the kitchen
Plastic finishing panels are a material that differs from analogues with a set of low cost, simplicity of installation and good visual characteristics. The popularity of this material is constantly growing, as well as the range of plastic products. On the market you can meet a variety of panels - monophonic and multicolored, striped, into a cage, with different patterns and images.
However, if we are talking about the panels for the ceiling, the most popularity acquired parts of light shades. The surface of the parts can be a glossy or matte, rough or partially brilliant, which is achieved at the expense of small inserts. Since plastic panels are most often used in small roomsThe choice usually falls into glossy products - they create the illusion of the raised ceiling, as a result of which the room seems more spacious than it really is. In addition, the shiny panels reflect light, which allows you to slightly save on the capacity of lighting devices.
Advantages and disadvantages of plastic
You can use plastic in a residential building, there are two polar opinions. Some argue that this material is a danger to human health and violates right conditions Accommodation in the house. Others consider plastic completely harmless and quite suitable for use in residential premises. Before making a plastic ceiling, it is worth examining all the quality of the material used.
Delivering in this question, then all the opinions "against" plastic are not withstanding no criticism. In particular, it is immediately worth remembering that a huge amount of plastic products are used in everyday life - and they are used not only in industrial industries, but also medicine, and in the food industry. Various plastic objects in large quantities are found in the bathrooms, in kitchens and in residential areas, where plastic is represented by almost every household appliance.

Plastic itself is a monolithic material without any slots, gaps and pores. This quality suggests that it does not create favorable conditions for the development of bacteria and other microorganisms. Of course, in the presence of a nutrient medium, the bacteria can multiply on the surface of the plastic - but in this case, it is possible to get rid of them using a conventional cloth exposed in soapy water or disinfectant. An indirect sign of bacteriological safety of plastic products is the fact that they are permitted for use in medical institutions.
The second argument of opponents of plastic parts is high flammable. At first glance, it may seem that this is reasonable - plastic begins to actively burn at a temperature of above +360 degrees. But this argument, with a detailed study, the question cannot be called a lack of plastic - for example, wood fiber plates light up at a temperature of +250 degrees, i.e. The threshold of their fire is much lower. In addition, the open flame is dangerous not only in itself, but also because of smoke, which is allocated in the process - and in this indicator plastic bypasses its closest competitors, highlighting with 50% less smoke when burning.
The last imaginary disadvantage of plastic products is considered complete tightness. And this factor can also be not taken into account - the design of the ceiling is rarely absolutely hermetic, so the minimum air exchange will still be. Both in private houses, and in apartments, the issue of ventilation is solved very simply - in opposite edges, the ceiling is embedded on one lattice, each of which gives the ceiling the ability to "breathe". In addition, mounting the suspended ceiling of plastic indoors with high humidity (Bathrooms and Kitchens) Ventilation will have to be done necessarily, regardless of the material of the manufacture of the ceiling and the type of housing.
Classification of plastic ceiling panels
There are two main varieties of PVC panels:
- Ceiling, which have reduced weight and strength, because for the ceiling, high mechanical strength is irrelevant;
- Wall, more durable and rigid products that are expensive and are not designed for use on the ceiling (of course, they can be installed, but it is simply inappropriate).

Ceiling panels may vary with dimensions and surface views:
- Rank products - visually they resemble the usual lining, i.e. These are just stripes, only made of plastic;
- Seamless panels, which are almost a solid surface with practically imperceptible joints (the connection of the elements with each other is carried out due to the side connection of the type "spike-groove");
- Sheet ceiling plastic - Pretty rare and complex material in the processing, which is best suited for finishing columns or other nonlinear surfaces (practically not used in domestic construction).
Before collecting the ceiling of plastic panels, you need to choose the optimal option for specific conditions. Regardless of the type of panels, they all are easily humid cleaning and differ in good quality. Good panels May be stopped up to 10 years - and here we are talking only about visual characteristics, and the full service life may be an order of magnitude more.
Plastic panel ceiling
Installation of ceiling panels can be performed on two concept schemes:
- Suspended ceiling, which is equipped as a separate design;
- Standard plastic ceiling, in which all elements are attached directly to the main ceiling surface.

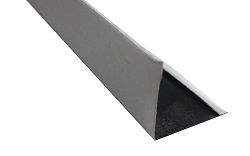
Regardless of the selected scheme, performing the installation of plastic on the ceiling, you need to use moldings. These elements are finishing profiles that are necessary to mask the ends and joints of the structure. The choice of the type and size of moldings directly depends on the configuration of the future ceiling and the features of the room.
Suspended ceiling
Suspended ceiling structures are a rather popular way to finish the ceiling, which has a number of characteristic advantages and disadvantages. The main advantage of such structures is the absence of the need to prepare the stroke for laying communications - and this is essential, because thanks to this, the installation of plastic panels on the ceiling is simplifiable.

On the other hand, the suspension plastic ceiling always takes itself a part of the free volume of the room. In the most successful scenario, such a ceiling will reduce the room level by 3 cm - but this is only subject to the installation of conventional lighting devices. To install the built-in lamps, the ceiling will have to be arranged at a distance of about 10 cm from the main level. The only way to reduce this distance is to use lED lampswhich, with sufficient and power, can replace traditional lighting.
Montage Karcasa
Before doing hinged ceiling From the panels, you need to assemble the frame for him:
- The main element of the design will be guides, as which are most often used standard profiles for mounting plasterboard sheets. In dry rooms, you can successfully use the usual profile for the ceiling of plastic panels, and for rooms with high humidity it is best to take galvanized products. However, you can go on a completely different way and make a frame of wooden bars with a cross section from 30x30 mm.
- Profile elements are attached along the perimeter of the room with level observance. Next, with the help of suspensions or bars in increments of 50-60 cm, intermediate guides are attached. All guides for the ceiling of plastic panels must be located strictly in terms of level. To align intermediate elements, it is worth pulling the thread between the parts of the perimeter and orient to them.
- If the suspension structure is located at a minimum distance from the main one, then the planks can be secured directly to the surface of the ceiling. To adjust the level in this case, you can use various lining from pieces of wood or plywood. It is necessary to calculate the design so that the corrugation could pass 3 cm thick under it.

Installation of starting strips
After assembling the carcass, you can do starting profiles:
- To work you need to take the ceiling molding. It is attached to the frame elements located around the perimeter of the room. The edges of moldings need to be cut off so that the angle is exactly 45 degrees. The length also needs to be calculated and measure very accurately - even the minimum deviation will lead to the appearance of noticeable cracks. Of course, small gaps can be masked with a putty, but much better to cut the items in advance so that they get to their place with a small space.
- To fix the bar, you can use glue composition or screws. Moldings are recommended to glue with liquid nails - in this case, the perfect joint is obtained. When using other mounting elements, the bar will be slightly turned forward.
- The edge, directed towards the wall, is covered by a zigzag glue band. The wall before the connection must be deguted. The bar is mounted in its place, tightly pressed over the entire length and is removed, after which glue remains on the wall surface. When it snacks a little (about 5 minutes), you can finally install the bar, be sure to check it on the alignment - until the glue is completely frozen, it can be corrected.
- When three profiles are glued, you need to leave them until the glue is completely frozen, which usually leaves from 8 to 12 hours. Then you can continue the installation. In the process of installation, liquid nails may be extruded, and they should not be removed immediately - they will smear along the wall and details of the ceiling. It is necessary to wait until the glue dryness is completely drying and gently cut the surplus with a sharp knife.

Fastening plastic panels
When previous works are completed, you can proceed directly to the installation of plastic panels:
- By mounting the suspended ceiling of plastic panels with your own hands, you must first need to determine the length of the panels. To do this, you need to measure the distance between the joints of the plinths and add about 1.5 cm. Cut the parts according to the length or width of the room are not necessary - in this case they will not go into the profile. With the perfect geometry of the room, you can cut a lot of details, but it is rare, so it is best to prepare the panels as they are attached.
- The first panel comes in three edges into molding. You need to install the panel thorns forward so that it connects to the bar. When using soft finishing profiles, the mounting shelf can be fed and creating certain difficulties. To get rid of this phenomenon, you can slightly fix this edge by self-draws. You can also use the spatula, refueling them the edge of the panel. Important moment - The panel must immediately go to the profile over the entire length. The mounted elements are immediately attached to the guides using a self-tapping screw or a construction stapler if the frame was collected from wooden elements.
- Further installation of a plastic suspended ceiling looks completely equally for each individual panel. First, one edge of the strip will be started with a 6-7 mm molding, then another is inserted. A mounted bar is aligned and carefully driven so that the lock goes into the groove. To check how well the band is installed, you need to look at it from below - if there is no noticeable clearance at the junction, then everything is in order.
- Installation of plastic panels on the ceiling with your own hands is best done with the assistant - it can hold the mounted panel until it is fixed by self-draws. Alone with this work it is more difficult to cope with this work, but the output is - to eliminate the deflection of the bar on the profile, you can stick small pieces of bilateral tape.
- By mounting suspended ceilings from plastic panels with your own hands, you need to remember that it is necessary to cut holes in each panel for lamps - and for this you need to know in advance where they will be installed. For cutting, you can use any suitable tool - for example, a drill with an annular nozzle. Insert the lamps, connect and check them immediately - after the complete assembly of the ceiling to spend this work simply will not be released.

Before making a suspended ceiling of plastic, you need to carefully disassemble the described technology and follow it when installing. However, at this stage, the installation of the construction does not end.
Installation of the last panel
At the stage of installation of the last plastic part there are a lot of problems. All these problems are associated with the size and features of the attachment of this element. However, with dimensions, everything is simple - the bar cuts up in accordance with the actual dimensions of the ceiling in its current form.

Further events can develop in two scenarios:
- Cropped panel is inserted into the glued starting profile or plinth. To make it possible, the panel must be cut so that it is 5-7 mm shorter than the existing gap - otherwise it will not be able to install it. Such an option to fasten the last band has a significant drawback - it ultimately turns into shorter than necessary. Over time, the strip will plunge a little into the molding, and a small gap between the last and the previous strip will arise on the ceiling.
- The band can not only insert, but also glue. In this case, when cutting, you need to observe the actual gap dimensions between the frame and the penultimate panel. The technology of sticking the strip looks like the same as with all other panels. The disadvantage of this method is that the last panel turns out to be fixed, and, if necessary, to get to the ceiling's insides will have to break it.

When all panels are mounted, it remains to install only the last plinth. Cut off from it mounting Planck And the corners are cut (be sure to under 45 degrees). Making sure that the plinth is cut correctly, it can be mounted with glue from two sides, and install in its place.
Seaming seams acrylic
With how to make a ceiling of plastic, everything is clear - but another stage remains, which in the overwhelming majority must be performed. We are talking about sealing seams with a white acrylic design. When using high-quality panels with proper geometry, you will not need to adjust the design.

The filling technology of the joints is quite simple:
- You need to take acrylic sealant and fill it with a mounting gun. Using the gun, you need to carefully close all the gaps, joints between panels, plinth and ceiling, as well as angular sections. As a rule, there are many noticeable cracks in the design, therefore it is good to walk all over the ceiling perimeter.
- Fill cracks need small sites Approximately 30-40 cm. All unnecessary in the process of sealing should be removed, and the seam is to align. Acrylic is characterized by a very high fascination rate, so it is necessary to correct it when applied. To eliminate the extra acrylic, you can use a soft cloth or just with your finger. The frozen excess is cut into the sharp edge of the spatula, after which everything is watched with a damp sponge and left until complete drying by 8-12 hours.
- Acrylic when frozen can decrease in the amount by dragging into the seam cavity. In this case, it is recommended to go around the entire perimeter of the design again. As a rule, two passes turn out to be enough for the full seal of the entire ceiling. The remaining divorces on the surface of the ceiling are wiped over with a damp sponge, and then the panels are polished with a soft cloth.
Fastening plastic panels to the main ceiling
If there is no need to align the main ceiling, then you can attach plastic panels directly to it. The sequence of work in this case fully coincides with the technology described above: the first thing is mounted by the starting profile, it is mounted in the size of the panel, which are attached with a step of no more than 50 cm.
The selection of fasteners in this case directly depends on the material from which the overlap is made:
- For wooden structures It is quite suitable for small nails or a construction staple brand;
- In the case of concrete, it will be best to assemble the frame and install it at a minimum distance from the ceiling, because the screws in such a ceiling will not go, and drill individual holes for the dowels too bit and inexpedient;
- Also relevant liquid nails remain relevant, but when they are used, it is necessary to take into account the factors that the design will eventually succeed.
Before making a plastic ceiling, you need to choose all the elements in advance and purchase them in the required quantity.
Lamps in plastic ceiling
The selection of the number of lamps and their design is the question is purely individual, therefore it is meaningless. Much more important is the choice of type of lamps and features of their nutrition. For plastic ceilings, lamps on 220 V, represented by incandescent lamps or cost-effective lamps, and lamps with a down transformer on 12 V - halogen and LED products are suitable.
Luminaires operating from the network 220 V and the incandescent power lamps over 40 W must be installed in the thermal insulation case. It's all about the heating of the lamp when working, because of what plastic can darken and deform plastic over time. In order to increase the temperature does not affect plastic, thermal insulation is used.

It is also necessary to pay attention to the safety rules when using the network 220 V. When installing the lamp in the bathroom or in the kitchen, it is necessary that it is protected from direct water hits. Of course, devices with such a degree of protection are expensive, and the dimensions of such lamps are large enough. To install moisture-resistant luminaires, it will be necessary when mounting the cutting frame to establish mortgages.
With halogen and LED lamps, the situation is somewhat simpler because they work from 12 V, and the rules of electrical safety in this case are not so strict. When using such lamps, the power is supplied through the automaton, be sure to be mounted independently of the type and characteristics of the lighting devices, on the transformer, and already from it directly to the lamps.
One transformer provides 4 lamp power, but the length of the wire between the lamp and the transformer should be not more than 2 m. This rule is due primarily to the stability and characteristics of the supply voltage - an increase in the length of the wire leads to a significant reduction in the lighting intensity. When installing in the bathroom, it can become a serious problem - the transformer will have to somehow hide.
Conclusion
The ceiling of plastic is quite a convenient, attractive and advantageous solution. The visual characteristics of such a design are good enough and are suitable for many styles, and ease of installation allows you to collect a plastic ceiling even in the absence of appropriate experience.
For finishing and building walls and the ceiling of bathrooms and kitchens was used mainly tile, paint, whitewash, washable wallpaper. Or was offered simultaneous use of two or three of the above-mentioned coatings.
But for about 15 years, plastic plastic plates from polyvinyl chloride are used, which have become very popular. Positive qualities have a lot of plastic plates:
- Comparatively easy installation, which can be performed alone even non-professional. The main thing is to be well managed with conventional and power tools.
- Speed \u200b\u200bmounting. Ceiling trim can be performed in a few hours.
- Color solution. Now on sale you can find the plates of classical and completely unthinkable colors. This will help you choose what you have sought.
- Outdoor plates. Arsenal plastic coatings are diverse. There are colors of wood of different breeds, a mirror coating. Panels are matte, shiny, glossy.
- Relatively inexpensive, if compared with conventional coating species (for example, with a tile).
- Easily processed. It cuts the knife or scissors.
- It helps reliably disguise wiring, pipes or surface irregularities.
Characteristics of PVC plates
- Width: 25-50 cm.
- Thickness: 5-10 mm.
- Length: 2.7-3.0 m or 6 m.
Polyvinyl chloride, like material for trim:
- sufficiently durable - it is difficult to break his hands;
- very plastic; not afraid of water;
- does not darken in the sun;
- does not conduct sound;
- clean environmentally;
- has some thermal insulation due to air channels inside;
- some species withstand a temperature of 70-80 degrees;
- easily cleaner;
- there is no smell.
On PVC panels can be directly mounted new-fashioned LED lamps.
Of the negative qualities, fragility and flammability of the material are distinguished.
With a big bending, it breaks, and with a random strike, a dent may appear on it.
Selection of panels and calculation of the amount of material
For a room with a height of 2.70 m and above, you can choose the panel of any color, but it is better to take pastel, neutral tones. For low room you need to take light colors or mirror plates. They give the visual effect of increasing volume.
Council: Do not confuse ceiling and wall panels.
This is a mistake of many individuals performing repair on their own. It is better to ask the seller. As a last resort, it is useful to know that the ceiling plates weigh less wall.
- Calculation of PVC plates, crossbar and plinth
Calculate the number of panels easily. The area of \u200b\u200bthe entire ceiling of the repaired room is sufficient (the product of the length of the room on its width) is divided into one PVC plate area. Then add 15-20%, which are necessary for embedding all the sorts of breaks.
For example, you make the bathroom repair. It has a riser installed in it, and a horizontal pipe passes under the ceiling. For such an option, which is often in old buildings, a special calculation is needed and 15-20% surplus will be just by the way.
Council: Panels Pliver parallel entrance door.
At the same time, if you start installing from the far wall, then each subsequent stove will hide the seam, which will allow to obtain the effect of almost seamless coating.
To calculate the length of the crossbar (metal profiles or rails of wooden), it is necessary to draw the ceiling plan diagram, reduced proportionally.
The main profiles metallic (or rail) must be located perpendicular to the inlet door. Between them should be withstanding the gap of 50-60 cm. According to the drawing, we determine the amount of crossbar, given and 4 pieces of rigid profiles, fixed around the perimeter of the room.
Plinth ceiling to calculate much easier. We measure the routing perimeter and buy the required amount, given the length of one baseline strip - 3 m.
If the ceiling must be reduced, then you must calculate the number of P-shaped plates fasteners.
For example:
The room has dimensions of 2.6x2.4 m, and the door is on the long side.
You chose the plates of 3.0x0.3 m.
To calculate this option, you can not divide the plates and ceiling areas, because the slab length overlaps the length of the room. It is only necessary to calculate how much PVC bands fit into the width of the room.
2.4 / 0.3 \u003d 8 bands.
The drawing of the room may look like this:
1 option - strengthening profiles directly on the ceiling of the room;
2 Option - the crossbars are fixed on P-shaped mounts (depicted by squares).

From the first drawing it can be seen that profiles (counting and 4 around the perimeter) are only 8.
To strengthen their ceiling and on the walls, you will need 16 dowels (two for each). Self-tapping screws are calculated based on the number of bands and profiles. PVC panels are fixed on each crossbar with two self-draws.
We had 8 bands, 4 crossmen. Side can not be considered. Panels are simply inserted into a special groove in the wall. Calculate:
8x4x2 \u003d 64 self-pressing + 36 to reserve (for an even account) \u003d 100 pieces.
On the second drawing on each P-shaped mount and on the side profiles on the walls, 2 dowels
On the mounting: 8x2 \u003d 16.
On the sidewalls: 4x2 \u003d 8.
Total - 24 dowel.
The strengthening of the bands is necessary, as in the first version of the 64 screws. But besides, you need 16 more screws to fix profiles on P-shaped plates - two for each.
Panels and types of plastic profiles
The strips are hollow and divided into sections. Because of this, they weigh so little. Stiffness vertical ribs are added to PVC sheets.

But the panels can be strengthened only on the plane. When the wall is reached, if you do not accept measures, the slot will remain. To eliminate this problem and exist PVC profiles. They are different speciesBut the following options for plastic profiles are most accumulated and used:

- Starting. Fastened along the walls (perimeter) for sealing the ends of the coating.
- F-profile. Climbs ends on protruding corners. For example, in some combined bathrooms, the toilet from the bath is separated by the wall. This profile will close the corners when switching from one part of such a bathroom to another.
- H - profile. Serves for dusting two panels (extension).
- Corner plastic external. It is used in eliminating the slots, both on the inner and external corners.
- Plinth ceiling. It serves to decorate and seal the ends, as well as the start.
- Universal PVC Corner. To eliminate gaps in the corners. It is just glued.
Preparation for installation and marking
Initially, it is necessary to clean the surface of the old ceiling from plaster and chipping. After all, dying elements, such as temperatures, the melt can damage the new surface or add pressure on the plates. It is necessary to thoroughly brand the old ceiling.
Lowering the ceiling, you need to take into account the sizes of the lighting devices used, the presence of various types of communications (pipes), protrusions (beams), hidden wiring or irregularities. Only after the accounting of these values \u200b\u200bdetermine the lowest point of the ceiling. From it and begin marking planes and frames.
- To the found point, put a ruler, we make lowering on the required distance and put the label.
- Blacks on the walls (around the perimeter, ranging from the label), a working line indicating the level of the plastic surface frame. This operation is performed by the twine (cord) painted with colored chalk. You can use the homemade water level or
- purchased - laser.
- Next, place the places of reference guides located on the walls. They should be strengthened on the walls of perpendicular entrance doors. Then, when installing PVC lanes, the seams will not be noticeable.
- Then we draw a line (retreating by 40-60 cm) for other profiles or, if it is necessary to reduce the ceiling level, for P-shaped elements.
After that, go to the design of the frame and strengthen the panels.
Mount the suspended ceiling of plastic panels
We begin with fixing the support guides. We establish one profile along the drawn line and drill the wall through it in two or three places, preparing holes for the dowels.

To connect the lamps (if there are several), it is desirable that the profiles have resolved from the ceiling by 1-1.5 cm, as a last resort, it is necessary to cut holes in them.
Protecting all four support guides on the walls, proceed to the installation of auxiliary profiles. If a decrease in the ceiling is envisaged, then it is necessary to install ceiling P-shaped fasteners.

They are installed on one or two dowels or an anchor with wedges (depends on the design) after 50-80 cm. And slightly flex from the ceiling. It is impossible to completely stop - they will interfere with putting profiles.
Additional profile under some angle insert one end to the main guide. Then we start the other end into the profile on the contrary, align the drawn line or on the P-shaped plates and screw the screws first to the wall guides, and then to the fasteners on the ceiling.


Jumpers can or not install or mounted or mounted in places of gravity (chandeliers and so on).

Strengthening, so all metal profiles perform the wire laying (lighting and power cables). For reliable insulation and fire safety, they are stretched through rubber or PVC hose. At the points of attachment of future lighting elements, loops are lowered (15 cm).
Installation plates
Council: Before assembly work Remove the film from PVC elements if it is available, and not you have to dy up it with the finished ceiling.
We begin to the main part of the work. Pre-band must be trimmed by an equal length of the room minus 5-10 mm. It is necessary to provide easy and fast installation. The installation process itself is performed as follows:
- The main guides are screwed with self-draws or a P-shaped profile or plinth ceiling with the same groove. On the side walls you can strengthen the PVC corner of a universal or starting profile.
- The polyvinyl chloride strip is set in the P-shaped PVC item. Many people cut off the latch, believing that it will be looked at the PVC profile. But this is a delusion.
- Strengthen the other side of the first PVC plate with self-drawn with an enlarged hat or with the help of special homemade fasteners cut from tin. These fasteners hold the strip with their tongue, which is clearly large squarethan a hat of any self-press and do not interfere with the next strip.

They are fixed as follows:
- paste a tongue in PVC grooves;
- presses the element along with the panel to the guide;
- fix.
Council: During the clutch, it makes sense to pre-drill fine (2-2.5 mm) drill the wings of the homemade element and the guide. Then the self-sufficiency will easily finish.
If you applied to the lattice lattice from a tree, then the wings of the homemade fastening element are screwed to it both sidewalls. If you have plasterboard profiles, then you can screw the fasteners to sidewalls or simply get the protruding parts of the wings and tightly press them to the plane of the sides of the rails of the pliers.
In the open groove of the first strip insert (in length) the response part of the second. Moreover, insert the angles of the second strip at first, so that one of them entered the castle of the first plate, and the second in the lateral profile PVC. Next, with a slight pressure, you will create in the groove and the entire strip, so that its second end entered the PVC element (start or corner) located on the opposite side wall.
It is necessary to act carefully otherwise you risk breaking part of the castle, gropped with screws or fasteners.
If the bands closed unevenly, then you should insert a thin bar, a wooden line or a piece of the response of the same PVC panel to the lock groove. By moving this item on the groove, careful tapping of the hammer, or a wooden bar to drive carefully strip until it stops.
If the plan on the strip is supposed to strengthen the lamp (point), then the hole for it can be cut out by any cutting tool immediately after installation. Only cuts must be careful not to overdo it. Next, remove the wires into the hole and connect the lamps, although it can be done and then.

You can perform this operation and on the floor before installation. First attach the panel to the ceiling, outline holes, pull on the floor, cut through, and then fasten. But it takes up too much time.
- Installation of the latest PVC panel
It is worth talking about this. The method described above is strengthened by all longitudinal elements other than the latter.
Some inexperienceful masters, to facilitate the installation, are offered to glue it with liquid nails. But the "heater is not worth the dressing". To do this, it is necessary to trim the last fragment of the ceiling. But due to the design of the panel - it is very difficult to do it.

When cutting with the use of a ruler or rack, even with a weak pressing, plastic bending occurs, and the knife wins on the parties. High-quality cut is very difficult. Therefore, it is necessary to cut from the P-profile. But in this case, a noticeable seam is obtained between the panels. After all, there are uncomplicated lock and retaliatory parts nearby.
Therefore, it is better to install in the usual way. We will talk about him especially. This process causes many perplexity. After all, you must at the same time insert a strip of four grooves:
- the castle of the penultimate panel;
- gap in a p-shaped profile;
- two grooves on the side walls.
Oddly enough, there are no difficulties. To begin with, you should prepare the PVC item to the installation. It is necessary to set the width of the future ceiling fragment. This can be made a ruler that is inserted into the P-shaped profile on the wall perpendicular to it and calculate the divisions to the penultimate strip. This will be the width of the last fragment.
Some people will ask a reasonable question that we did not take into account the width of the groove (5 mm) of the penultimate PVC element, and the last fragment of our ceiling will hang out. But just in this, there is a "chip", especially since this process you have done one or several times at home when the glasses inserted into the bookshelf or in the servant.
The depth of the P-shaped profile on the wall is 1 cm, and the depth of the Castle -5 mm. Consequently, if you insert the last fragment into the profile, and then pull it out, snapping in the lock, then the whole design will be collected properly.
The second question arises. What about the side grooves? The answer is simple. For this we cut the stripes. It is necessary to slightly bend the last band on the arc and insert it into one of the side grooves until it stops. Then gradually push it along the entire length in the P-profile.
- Attach construction tape into the lane in two places. By pulling it for it, you can pull the panel and closure in the castle. Just try to pull the surface of the ceiling in parallel, otherwise the tape is simply angry.

- Before installing the last fragment, get two thin ribbons from a dense material for the edge. Saving the panel into the P-element, pull the ribbons. The friction force and the dense connection will not let them jump out at once, and the strip will go ahead. When it snaps, a screwdriver or knife is slightly removing the edge of the P-profile and the tape will come out. In the extreme case, just doincate it.

At the end of the work, install plinths or other decorative hiding elements. Clean the ceiling from sticking chips, dirt, traces of fingers. Connect and insert the lamps into the holes if you did not do it during installation. On this, the installation of the Ceiling of PVC panels is over.
Gradually go into non-existences such outdated methods of trimming ceilings like leather lime or water-emulsion paint. Modern manufacturers have flooded the building market with various finishing materials, one of which are plastic panels. Since this material is practical and unpretentious in care, many give him preference when finishing the ceilings in the corridor, kitchen, bathroom, bathroom, glazed balconies and loggias. Before starting to start repair workYou need to understand how to make a plastic ceiling correctly so that he harmoniously fit into the interior.
Where to begin
First you need to make the calculation of the required materials. Make sure that your chosen color of plastic panels coincided with color gamut premises.
Specialists do not advise use white plastic Due to the fact that dust, cobweb and dirty spots are clearly visible on it.
So, from building materials you should buy:
- seamless plastic panels 25 cm wide;
- metal profiles UD and CD;
- starting plastic P-profile;
- self-tapping screws and press washers;
- the suspensions needed to attach the profile to the ceiling;
- dowels;
- wires and the necessary accessories for laying wiring;
- lamps.

Required tools:
- perforator;
- a hammer;
- screwdriver;
- bulgarian.
We make carcass
The tree is an excellent natural material, which, unfortunately, can turn strain, especially indoors with high humidity. Making a choice between a wooden and metal frame, preference give the latter.
- For the ceiling to be strictly horizontal, perform markup walls using a reliable assistant - construction level. For economical use of the room height, lower the level at the minimum distance.
- Next, dowels using a perforator to adjust the guides of the UD profiles onto the walls according to the markup. Remember that UD profiles can only be used on the walls.
- After that, insert CD profiles that make up the framework of the framework into the guide profiles. CD profiles should be attached to UD profiles with screws with a drill or press-washers (80-100 cm pitch). For example, in the bathroom it is quite possible to do with one CD-profile of one and a half meters wide, consolidating it in the center of the room. For a room width of more than two meters you will need two profiles.
- CD profile attach to the ceiling with special suspensions. The suspensions are attached to the profile, as a rule, by conventional snaps, and to the ceiling - with the help of dowels or anchors (60-80 cm pitch).
- In the case of fastening to the ceiling chandelier, you should take care of the presence of a metal hook in the ceiling.
- If you decide to decorate the ceiling point lightingThen you need to post the wiring to all places of the future location of the light bulbs.
We are slaughtered

- On metal profiles, secure plastic profiles in which you will insert plastic panels later. Cut the P-shaped profiles according to the size of the walls and screw them from the bottom to the UD profiles using the press washers. Note that plastic profiles should be brought to the walls as close as possible. You can do without them - in this case, the installation of the ceiling will occur faster, and the financial costs will be less. But, know that at the same time there will be gaps between the panels and walls, which will have to close with foam corners using the titanium type glue, and later you will be quite difficult to complete the complete disassembly of such a ceiling.
- At the next stage you need to install the panels on the collected framework. Cut the plastic panels of the desired length and insert them into fixed plastic profiles. The first panel you need to insert in a spike direction to the wall. Each panel is defined to the CD profile using self-tapping screws or press-washers. The panels are connected to each other in the spike of the next panel in the groove of the previously installed panel. Acting in this way, you should collect the whole ceiling.
- In the assembled ceiling, do the holes for accommodation point lamps With a drill with a special round nozzle. Then output the wires into the velocked holes for connecting the lamps. For the chandelier there will be enough one standard hole in which you will withdraw the wire to connect it.
- The most difficult point in the installation of the plastic ceiling is the insertion of the last panel. Usually it has to be cut both in length and in width. For this procedure, use a sharp knife, which is usually used for drywall cutting. The width must be calculated in such a way that there are no slots and lumen in the ceiling when snapping the last panel in the groove of the previous panel.
- At the final stage, install and plug the lighting electrical appliances.

Plastic ceilings are valued for the ease of installation, quite modest cost, ease of care and an excellent appearance.
Video
Video instructions on the installation of PVC panels on the ceiling:
If a few more years ago, the ceiling decoration in most cases was limited to whitewash or pasting with wallpaper, then today the base can be covered with rather unusual materials, such as plastic. How to install plastic panels on the ceiling, we will understand below.
Advantages and disadvantages of ceilings from plastic panels

The surface finish of the ceiling by polyvinyl chloride has many advantages:
- Masking irregularities. For installation, the ideal alignment of the base coating is not required. The panels will hide all defects.
- Convenient installation of communications. Pipes, wires and ventilation channels are freely placed in the interporal space.
- Different lighting options. In the ceiling of plastic panels, you can install original lamps or backlights.
- Easy installation. Equip the design of PVC is much easier than suspended or stretch ceilings.
- Small weight. The ease of material allows it to be attached to a longitudinal framework, which significantly reduces the costs of profiles.
- The possibility of additional isolation. In the interpostral space, a hydraulic, noise and thermal insulation material can be placed in the installation process.
- Reuse. If necessary, the panel can be dismantled and re-installed.
- Moisture resistance. The material is absolutely not afraid of water, and therefore it does not breed, not covered with mold, not deformed when moisture gets. Because of this, it is precisely it is chosen for the ceiling equipment from plastic panels in the bathroom, in the kitchen, on the balcony and loggia.
- Easy care. Plastic is resistant to the effects of most detergents without abrasives, therefore it can be easily cleansed from any contamination.
- Relative cheap. The PVC panels are distinguished by a relatively low cost and will be significantly cheaper than drywall or stretch analogs.
- Durability. With the correct operation of the plastic will serve for about 15 years.
- Simple view. The ceiling of plastic panels looks quite fiscal.
- Limit of types of structures. Using PVC, you can only make a single-level construction without bending.
- Reducing the height of the room. The suspended ceiling of plastic will make the room below at least to the width of the profile.
- Interpanel seams. Even with the right installation of seamless plastic lining the place of the joints of the panels will be seen anyway.
Varieties of plastic panels for ceiling

To date, this material is so common in the construction industry, which is used for the trim. different surfaces.
By type assignment panels are:
- Wall. They are more dense and heavy.
- Ceiling. They differ relatively slight weight and lower strength characteristics.
- Seamless. The joints of such panels are visible only at close range.
- Relief. The surface looks as if she was covered with lining.
- With fist (rust). Similar to seamless patterns, but have a decorative well on the ends.
- Lining - 300 * 10/300 * 12.5 cm;
- Seamless with a length of 260-300 cm and a width of 15-50 cm;
- Squares (rectangles) - 30 * 30 - 100 * 100 cm;
- Sheets with a width of 80-203 cm, 150-405 cm long.
- Glossy. The lacquer processing makes the surface of the mirror.
- Matte. Without additional processing. A budget option.
- Colored. In cheaper models, the drawing is applied by transfer by the thermal film, in expensive - direct printing.
To mount the ceiling of plastic panels, ceiling, seamless, leaf models are most commonly used.

Among the diversity provided on the market, PVC panels are very easy to confuse, therefore it is necessary to know the rules for choosing high-quality material:
- The panel must be geometrically correct shape, with a clearly applied pattern and a smooth surface.
- From the outside, the rigidity ribs should not be visible. In this case, consider that the strength of the structure is directly proportional to their amount.
- Choosing the panels, take two parts and dock them. High-quality products must fit tightly to each other, it is easy to sharpe and not form gaps in the connection places.
- Try pressing or bend material. Even despite the ease and a small thickness, the ceiling panels should not be too fragile.
- Smoke the material. The quality product does not make up a sharp smell.
To do right choice Among the widest range of textures and colors, consider the following nuances:
- You can view the height of the room to visually, equipping the light ceiling. Dark coating, on the contrary, will reduce height.
- The glossy surface visually deepens the ceiling, making it more remote, and the room is volumetric.
- Do not overload the interior using more than three colors in the ceiling finish.
- Imitation of a tree or stone on plastic looks primitive (especially if the seams are visible), because it is better to refuse the textural drawings.
At the same stage, think about the type of lamps used and the method of masking the extreme ends of the panels.
Installation of the ceiling of plastic panels do it yourself
The design consists of a frame, fixed on the base surface and the trimmed PVC. To perform work yourself, you need to prepare the ceiling, make markup, make a drawing, calculate the number required material, build a frame and fix the panels on it. At each stage, many technological nuances should be taken into account and it is important for each process to approach responsibly in order to remain satisfied.
Preparatory work before installing the ceiling of plastic panels

There is no significant preparation or leveling of the base ceiling with such a finish, but some works are still worth carrying out:
- We liberate a room from large-sized furniture, removing curtains, eaves, paintings and chandeliers, insulating the ends of the wires.
- Stool on the floor polyethylene film and close the doorway it.
- We remove the ceiling finish and dismantle the old wiring if necessary.
- Cleight large cracks and holes.
- Ground surface with anti-grapple composition.
Calculation of the material for the ceiling of plastic panels

In the course of the work we will need directly panels and components. Materials should be purchased with a margin so that in case of unforeseen circumstances, the installation process is not delayed. To competently determine the exact number of fasteners, components and panels, first measuring the length of all four walls. Please note that the opposite walls also need to be measured separately as they may be uneven.
Calculations are carried out with the following rules:
- The ceiling area is divided into one panel area, add 15-20% to the result obtained and rounded into the biggest. This figure will be an indicator of the desired number of PVC panels.
- Calculating the amount of ceiling profile and suspensions, consider that it is mounted in increments of 0.5-0.6 meters.
- The length of the desired starting profile is equal to the perimeter of the room plus 10 cm.
- The number of dowels will need to be with a calculation of 1 pc. / 0.5 meters of profile, and self-tapping - 1 pc. / 0.5 meters of length of the panel.
- To calculate the number of plastic profile, the perimeter of the room is divided by three ( standard Length Products) and rounded in the big face.
In the residential premises, the crate can be done from wood, but for mounting the ceiling from plastic panels in the kitchen, balcony or in the bathroom it is better to use metal, galvanized.
Ceiling markup before mounting plastic panels

For the convenience of work, prepare a pre-roulette, a greasy cord and a hydrorer.
Marking in this order:
- We measure the height of all corners and center of the room.
- In the lowest corner from the base ceiling, they measure the height of the interporal space.
- With the help of the level, we do in the same plane of the mark on all corners, screw in them temporary screws.
- Between two temporary fasteners, we stretch the greasy cord and beat off the plastic coating line. We repeat the procedure for all walls.
- On the opposite walls at the ceiling, we make marks with a step of 0.5 meters.
- We stretch between the marked points of the greasy cord and beat the line of fastening the carrier profiles.
- We celebrate the places of fastening of the suspensions.
If the panel fastening equipment is assumed, the marking on the wall is not done, and the base ceiling is pre-aligned.
How to make a frame for a ceiling of plastic panels

When mounting the frame for the suspension mounting of the ceiling, we use metal suspensions. Before starting work, you must make sure that there are no hidden wiring in the locations of the holes. To do this, you need to invite an electrician or take advantage of special detectors. Otherwise, you can damage the power supply and even get injured.
Works carry out the following instructions:
- Attach on the level of markup on the wall of the guide profile. It must be fixed on all the walls, except for the one where the last detail will be installed. This is necessary for the convenience of dusting and tilt.
- At the noted places, we attach the suspensions on the dowel and bend their ends.
- Insert the ceiling profile in the guide and fix on the suspensions by self-draws.
- Align each element on the stretched caprochy thread.
- On the placed lines on the ceiling attach the carrier profile. In the process it is necessary to monitor the maximum dense adjacent of parts to the wall. However, if the coating was previously aligned, the cracks should not be formed.
- Attach the L-shaped profile on the walls along the perimeter of the room at the level of the ceiling profiles recorded on the ceiling.
- Attach the angles in the joints of the joints.
Note, when the interporal space is tailored, it is not enough to install point lighting.
How to shepherd ceiling with plastic panels

Plastic panels need to be fixed across profiles, installing the installation as follows:
- Cut off if necessary, the detail of the desired length by 0.5 cm is less than the width of the room. To do this, you can use the jigsaw, with a shallow teeth, a sharp knife.
- Grind the edges of sandpaper and remove the film from the panel.
- Insert one side to the starting profile, slightly bend and insert the second edge.
- We shift the element close to the wall. As a result, the first panel will be fixed in three profiles.
- The remaining side is attached by self-drawing with a wide hat to the sinus.
- Insert the second part in the same way to opposite guides and tightly shifted to the previous panel.
- We are wearing the entire ceiling on this technique. The extreme element before installing will need to trim along the appropriate width.
- Install decorative plinths on the starting profile around the perimeter of the room. In the place of fixing the last panel, it can be glued to liquid nails.
- Cut the drill with a crown hole for mounting lamps.
This ceiling decoration can be performed at any stage of repair, both before and after decoration of walls and sex, since this work is not "dirty".
In order for the design to be aesthetically attractive, durable and durable, we recommend considering the following recommendations in the process:
- Plastic panels are fixed to the longitudinal frame, but if you plan to hang a chandelier, then at the place of its installation you will need to strengthen the crate of jumpers and secure in advance to the base ceiling anchor hook. Jumpers need to be chopped from the ceiling profile and attach the "crab" by connectors.
- For a beautiful dusting of plinths in the corners, they must be cut off at an angle of 45 degrees. For convenience, you can use the stub.
- If, after installation of the last panel, small gaps remained, they can be blown by a sealant on an acrylic basis.
- On uneven walls, it is better to mount the foam plinth of the foam, since plastic products will form gaps.
- The most high-quality products from polyvinyl chloride produce Italian manufacturers. The warranty period for such panels is almost doubled, and the cost is higher by 20-25%.
- Plastic is not a fuel, but under the influence of high temperatures (80-90 degrees) can melt, therefore it is better not to install high-power lighting in these ceilings. Optimal option - LED lightening.
- It is categorically impossible to glued the panels with liquid nails on the ceiling. First, it is not enough reliable fixation, and secondly, the ventilation gap should be between the base surface and plastic coating.
How to make a ceiling of plastic panels - Look at the video:
Plastic ceilings - optimal solution For bathrooms, kitchens and other premises, in which the practicality and functionality of the finish in the first place. Our recommendations will help to figure out how to make a ceiling of plastic panels. Following the instructions, you will independently perform all the work, ranging from the preparation of the base surface and ending with the installation of decorative plinths.
Polyvinyl chloride is the material widely used in the most different areas Activities, it finds its application and in construction. From PVCs are made to decorate walls and ceilings. Thanks to its cheapness, resistance to adverse external influences and durability, such panels are well suited for finishing the ceilings in the bathroom. The installation here does not require high qualifications and expensive equipment, just to get acquainted with the algorithm of its implementation, which will be set forth in this material.
Advantages and disadvantages

But there are a number of shortcomings that should also be remembered.
- If the bathroom is too big, such a ceiling can look inorganized, since the panels are limited long (3 meters).
- Installation on metal carcass Lowering the ceiling height of several centimeters.
- Sophisticated design solutions, such as the multi-level ceiling and its bends, are impracticable here.
As can be seen, the disadvantages of this variety of ceilings are insignificant and outweigh by its merits.

Necessary inventory
To independently equip the Ceiling of PVC, you will need the next set of materials.

Decorative profiles are used to make the ceiling of preferred edging, their varieties are presented in the table.
Table. Types of decorative profiles for suspended ceiling of plastic panels.
| Types of profiles | Purpose |
|---|---|
| Hides the ends of the panels |
| Hides the joints of the corners |
| Connects two standard profiles if they lack their length |
| Completely hides all the ends |


Performance
Step 1. Straighten the work plan. It is not necessary to strictly comply with all the rules for technical design of the drawings, but it is important to fix all the sizes and intervals.

Reference!There is an option to design a ceiling of PVC, which does not require the creation of an iron frame. In this case, the attachment of plastic blocks will go directly to the rough ceiling. An unequivocal advantage of this method is to preserve the former height of the room.

Fastening of plastic panels on the ceiling "Liquid nails"
But such works are possible only under the condition of a very good condition of the draft ceiling, if it is perfectly even, does not have roughness and damage to the fungus. Here the mount will be carried out with the help of construction glue for plastic or liquid nails.
Step 2. Next, preparatory activities are carried out. If lime is sat down from the draft ceiling, then you need to remove such sections. All loose wires need to wrap in corrugated plastic pipes, leaving them a free exit only in those places where they will switch to lighting devices. Old ceiling It is processed by anti-grapple solution.

Step 3. Then the horizontal line is carried out around the perimeter of all walls. It will designate the height of the mounting panels. The line must be at a certain distance from the ceiling, which depends on the planned use of the resulting empty space. If there is nothing to be placed, then a five-meantimeter retirement retirement. If you plan to place ventilation or massive lighting devices, then the distance can increase to two or three tens of centimeters.
Step 4. The line is carried out using a level. If a tile has already been laid out in the bathroom, then it is possible to use its extreme seams as a ruler.
Installation of carcass
Step 1. Before starting work, the tile is closed with polyethylene or cardboard.

Step 2. The first starting profile is installed, that is, the UD forms. It is necessary to apply it to the wall so that the lower limit coincides with the lines. Cuts off pieces with a length of the wall.

When the profile is applied to the wall, the holes are drilled every fifty centimeters to insert the dowels there, the opening depth is equal to the length of the dowel with a reserve of 10-20 mm. There are smaller dowels and screwdriver twisted, the first type is more convenient to use. Before drilling the wall, it is necessary to check it for the presence of wiring using the detector instrument.


Step 3.. Then the CD profile is then laid out. It is inserted perpendicular to UD into its grooves. There are two ways to lay these elements: along a long wall or across it. They provide different aesthetic effects: if when laying along the room it seems more spacious, then when laying across it looks more compact. The longitudinal design has one minus: since the profile saves between two grooves at a sufficiently large distance, it takes an additional mounting to the ceiling in the form of suspended structures.

The suspensions are fixed before installing the CD forms. To correctly calculate their future location, when installing UD, make tags on them that will help you determine both the location of the suspension and the location of the CD fastener.
Step 4. If the chandelier is used for lighting, then you need to spend one rail across all the others in the place where it will hang.

Installing panels
Along the perimeter of the wall right under the base profile, a plinth is installed, liquid nails or glue are used for fastening. The plinth is performed from the same material as the panels themselves, differing from them only with their shape. Some types of plinths are fixed without the help of special means, mechanically attached to the UD panel. F-shaped plinths can be attributed here.

On a note!During the arrangement of the plastic ceiling, you will probably pose the problem of creating the right corners. For wall panel It is not necessary to do it, since this element is still not striking. But for the plinths that are in sight and are edging the ceiling, the design of the angles is necessary.

The most time-consuming method is to cut them with a stouch from standard products. But the stub is not always available at hand, and there is not everyone working with it. In this case, you can purchase special nozzles, which are easily attached to the joint of two plinths.

The panels are cut in accordance with the wall dimensions. For convenience, you can make them a little shorter than you need, but with a difference of no more than 5 mm. A profile band is taken, one end of her end is in the groove between UD shape and plinth and attached there. The other end of the strip is attached in the opposite commander; In order for it to turn it there, you need to slightly bend the strip, but be careful, since at this moment it is easy to break it. Each strip has fasteners. The first inserted panel is fixed to the plinth with a screw. Subsequent panels are connected to each other using a press washer. The latter has a half-width, for which the standard panel is cut into two parts. This panel is attached to the profile and plinth community without connecting bolts and washers.

Note that the laying of plastic panels occurs perpendicular to the direction of CD forms. In other words, if the CD was laid along the long side of the room, the plastic panel should go across it.
Reference!In addition to parallel and perpendicular, there is also a diagonal direction of fastener of the frame. It requires more accurate calculations for its implementation, but the approximate reference pointing is rather parallel direction than perpendicular.

Lighting
In advance, place under the lamps. The performance and safety of all wiring is checked. During the laying of plastic blocks, it is not necessary to forget to remove the ends of the wires from the filled areas so that they do not be "closed" between the ceilings. Do not regret the wires, let them be carried out with a spare length, the risk does not reach the wire to the planned place can jeopardize the entire plan of arrangement.
In the right panels, the holes forms of your lighting device are drilled. The easiest way to do round holes, for which it is enough to put on a perforator a special nozzle. The lamp is mounted after installing panels.

This can be considered the process of arranging plastic ceiling completed. And this is another advantage of this material - it does not need any additional facing. After the completion of the main works of such a ceiling is a full-fledged element. home interiorAnd the bathroom with it may change beyond recognition.
Video - Ceiling trim in plastic panels