How to align the walls in the apartment with your own hands. Methods of alignment of walls in the apartment: Review of methods and the choice of optimal
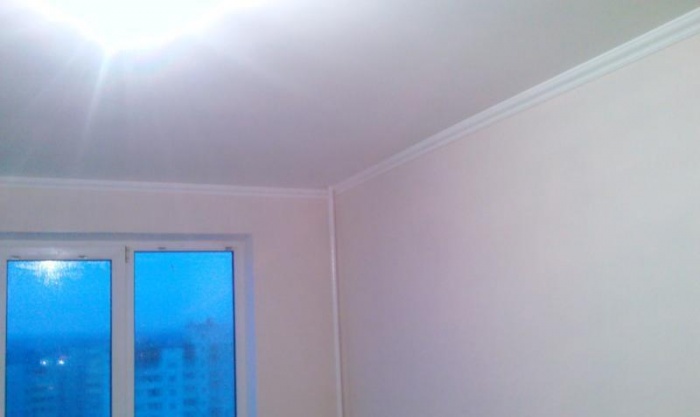
Ideal corners and an absolutely smooth surface of the walls can be obtained using plasterboard. But not everyone agrees to give up their modest residential areas to this finishing material. With the help of dry plaster and their own effort, you can achieve good results. Walls are recommended to align not only in painting, but also under the wallpaper. Finish finish The walls repeatedly wins if it is produced on a prepared level surface. It is not rare to observe how the well-processed walls are blocked through beautiful expensive wallpaper, it is especially noticeable on bright thin wallpaper. And on top of the wallpaper, crooked glued ceiling plinths, wave into the wall and create a shadow with artificial lighting. At least it looks ridiculous, so before painting the walls and glue wallpaper on them, it is necessary to align vertical surfaces. As part of this article, consider the alignment of the walls in the panel house.
What do we need to align the walls?
Buckets, basins and rags will be found in every home. In addition, it will be necessary to fulfill the wall equalization of the walls:
- quick-hardening dry plaster to fill out explicit recesses and straightening the large curvature of external corners;
- dry good quality plaster, for wall decoration under painting - base gray and finish white;
- primer;
- roller, sprayer or brush for applying primer;
- metal spatulas are no less than 2 pieces; a spatula angular; Spaker scraper;
- kelma or trowel;
- right or halfuric;
- grater or holder for sandpaper;
- sandpaper 0;
- emery bar;
- nozzle-mixer on a drill;
- libra;
- measuring water tank;
- a shovel or scoop for dry plaster;
- perforated corners.
Basic and finishing putty, buy the one that hardens, not too fast, not an experienced person difficult to quickly use the prepared mixtures. All finishing material (mixtures, primer) is best to choose from one manufacturer. The number of perforated corners should coincide with the number of corners that you plan to edit. This means that the corners will continue to remain in the solution cavity.
Preparation of walls
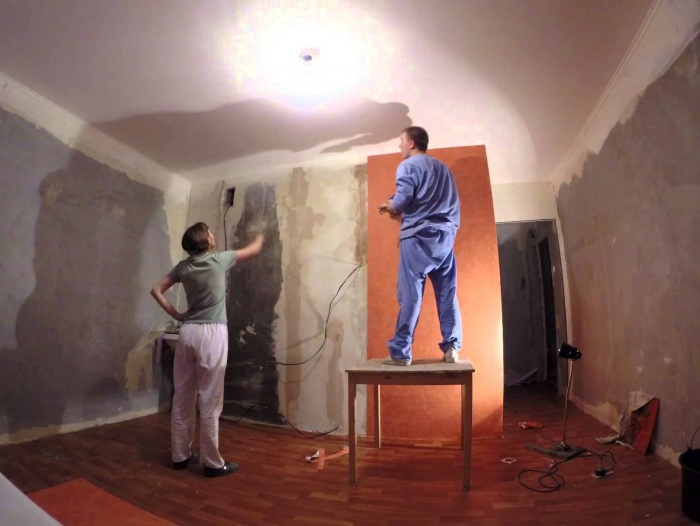
Before starting to smooth the walls, it is necessary to remove the finishing material from them (wallpaper, painting, ceiling and outdoor plinth), i.e. Heat the plate with spatulas. Old wallpapers are better removed if they are pre-wedged with water. For compactness, scraps of wallpapers are folded on each other and wrapped in rolls that fasten the scotch.
After the surface of the walls is released, it is necessary to handle them with the help of emery, i.e. It is necessary to remove all the strongly protruding bumps, old nonsense. In the corners, use an angular spatula. Furious fittings also need to be removed. The most uneven places on the walls of panel houses, as a rule, in the corners, under the ceiling and near the floor. Think if you can remove an excess thickness all over the perimeter? Align the main area of \u200b\u200bthe wall to it is problematic, too much work, therefore it is more expedient to make smooth transitions between the main part of the wall and the riding (bottom). After the wallpaper or it will be painted on the wall, this difference will not be noticeable.
After complete cleaning of the walls, it is necessary to remove all the dust from them with a broom or vacuum cleaner. It will not be superfluous to wash them with any detergent.
Next, on the entire surface you need to apply primer. Main works can be started after drying the primer.

Main works
If there are explicit recesses on the walls and large cracks need to be chopped up with a rapid-hardening mixture. Try to immediately align the surface of "patches". After the partially sealed places are completely dried (the drying time is indicated on the package with the mixture), apply primer on them. Next, you can proceed to basic work.
Start ravous walls, i.e. Apply a solution from the floor. For this mix dry plaster with water in the recommended proportions. The recipe must be observed, otherwise too liquid solution will be dragged, poorly held on the walls, and when drying, this surface will be all in small holes from bursting air bubbles. Too thick mixture will be glanced earlier than you have time to align it.
The container in which you will be kneaded by the solution should be wide enough to make it more convenient to make a mixture on trowel or spatula.
Performing the plaster of the walls, it is necessary to master the main movement: throwing the solution on the wall. Do it with force, as if you want to drive the mixture into the surface of the wall, then she will adole good and you will only lease it. Experienced masters are able to throw a solution with a trowel, which is buried by a mixture. For a beginner, this process is not so simple, so it is more appropriate to use the same trowel and a spatula or one can still use such a method: put a solution on a celma, then take a mixture with the same spatula and throw a mixture on the wall. Everyone throws the solution in its own way, so decide how it is more convenient to do it. Application, thus, a solution on the surface of about 1 m2, align this area with a graking or half-sash. Align the solution with circular motions. Continue to make the knees, apply the plaster and align the surface to the ceiling.
If in some places the wall has a wave-like form, then fill out only low areas until they equalize them.
Apply plaster on the thickness of the layer to which it is intended. Do not try to launch the entire area for one layer, you do not even do professionals.
When applying the base layer, it is not necessary to level it perfectly, because you will apply at least 1 layer on it.
You can not add a new portion of dry plaster or water to the already cooked solution. All prepared solution must be used immediately. If you have extra, then remove it immediately from the tank before hardening, later it will do problematic.
Some complexity represents alignment of internal and external corners. But this moment is very important, because negligently completed angles are negated by all efforts to equalize the walls and at the same time can hide all the existing flaws.

Rules corners
Internal I. exterior angles You can align with perforated corners.
The inner corner must be smoked: at the same time, apply a quick-hardening mixture with a period of 15-25 cm and secure the perforated angle on it. Before it is necessary to determine where the biggest depressions and hillocks and, based on this, try to fix the corner smoothly. The solution to solidification must be distributed throughout the corner and leave until complete drying. After a time, it is necessary to continue equal to the angle, leaving it in the cavity of the angle (that is, it is not necessary to remove the angle) finish or starting putty depending on how many layers you will do.
The outer angle is performed in a similar way, only the perforated angle is applied on the contrary. In the case of a large curvature of the angle, it is necessary to apply several layers of the solution to complete alignment.
After you have applied enough layers of plaster and think that the wall is quite smooth, grinding the entire surface. This is done with a grater or holder for sandpaper. Before painting or pasting walls, apply a primer on them.
It is possible to clean the tools from the nanileous plaster with the help of a small spatula, while not necessarily brushing the tool to the gloss every time, you can lower it into a water container until the next day.
Soundproofing
After plastering walls, you will thus significantly increase their sound insulation. Installing new in the apartment entrance doors soundproofed plastic windowsOf course, you can achieve a significant reduction in the penetration of noise from the street and from the site. But these are not all measures that are necessary to ensure the smallest penetration of noise from the neighbors. In order to isolate your apartment from the neighbors, it is necessary to fill the floors, in several layers to fly the ceiling. But the most important thing is necessary to think well the location electric sockets. They are mostly most of the noise conductors between the apartments.
Modern types of repairs have become high quality than before and now the need for a flat surface of the walls is a prerequisite for the house or apartment.
True, even brick house, new building from aerated concrete, have curved walls, and old houses are more so.
In this regard, align the walls under the wallpaper or other finishing materials must be necessary.
How to align the walls in apartments and private houses with your own hands, as well as alignment methods will be presented in the article.
What can be aligned with the wall?
Building technologies are developing rapidly, but the alignment of the walls is carried out with their own hands, as many years ago, using two methods:
- Aligning walls with putty.
- Alignment of walls by plasterboard.
If we talk about plaster, then a lot of her species are sold. The composition is different and it can be made of plaster or from cement, but when installing drywall on the walls, glue for installation, a frame of wooden rails or a metal profile is used.
Some people instead of drywall are used for the walls of dry-fiber sheets (GVL). They contain gypsum material and vegetable fibers, but such material does not hold shocks and other loads, damage can appear even with easy blows. All this led to the fact that GWL is rarely used. In some cases, drywall is replaced by OSB-plates, and used to use Phaneur. True, such materials are not best alternative Glk, which over time begins to give cracks along the plane, can swear. A chipboard is also used for an uneven wall or floor, but the material is several times more expensive than plasterboard. Therefore, today to use plasterboard for alignment is best.
Tip! Stucco, putty can also be used. This option is to choose only with the relative evenness of the walls, which have small differences, up to 5 mm. In this regard, there are already smooth walls, in order to get the perfect surface.
Many masters says to use for independent work better plasterboard. It's easier and more convenient to work with him, the design of the walls is cheap. But if you use the leveling of the wall in the lighthouses, then the work is also not distinguished by difficulties, it will be able to make it a beginner builder, the main thing is to deal with technology and do not rush during the repair process.
Preparation of the surface and primer

Concrete walls Or the walls of brick and other material before alignment must be prepared. There is no difference, what kind of selected. Preparation lies in the following sequence:
- The old coating on the walls is removed, especially that weakly holds.
- Cracks in the wall need to be sewed, after which it sees and evaluate how much the wall curve. If the protrusion is large and very highlighted, it is removed by the hammer and other equipment.
- In the presence of old plaster, which holds hard on the wall, you can estimate its condition and the need to remove. It is enough to knock on the wall, if there is a deaf sound, between the plaster and the wall of the emptiness, so the likelihood of the wall collapse is high when aligning the wall. It is recommended to beat everything to the very foundation so that the old material does not spoil future works.

- If there are large depressions, it will be necessary to close them separately. A very thick layer of solution or putty can fall off, due to this, defects are close, and the protrusions are simply knocked down.
- If there are staining of the walls, the paint can be seized or just fall off pieces due to perfect evenness. It will help to solve the problem of primer, namely her species - concrete contact, which makes the surface rough. In this case, the putty is well held and nothing disappears.
- To improve the hitch of materials, use notches on the wall. Previously, they were made by an ax, today they use a grinder. Per 1 sq.m. There will be about 100 notches.
Based on the selection of putty, the primer is selected. The main goal of the soil is to improve the hitch of plaster with the wall. Instructions on the package will allow you to do right choiceAnd also familiarize a person with the right application on the walls. Often the compositions are ready, but there are also such that needed in breeding. You can apply primer on the walls with a roller or other device. Preparation is simple, but technological process Alignment will be more difficult.

To make a smooth surface curve to make a smooth surface to align the walls. This is a profile that is exhibited in the same plane on the wall, the beacon will guide the plaster in the right places, filling the emptiness and achieving even the walls. The beacon method implies the use of galvanized steel profile, these are T-shaped profiles, although the timber is used as guides.
The metal lighthouse is more convenient in operation than the brusade method, it is easier and more convenient to mount. The layer of plaster will be approximately 8 mm. The minus of the method is in the cost, the absenteeism is not big, but these are extra expenses. In addition, the plaster and steel are badly connected with each other, so when the mixture will dry, lighthouses are extracted, and the holes are closed.
When using wood deeks, the process becomes cheaper, but the smooth bar is more difficult to find. From moisture wood leads, and the layer of plaster is uneven. Some people use a solution as lighthouses. Initially, strips of plaster on the wall are applied, they are leveling under the level, and after drying are used as lighthouses. The method is cheap, but also more complicated other light air species.
Important! From the correctness of montage of lighthouses, the evenness of the walls depends. If you put the beacons smoothly, then the result will be excellent if there is an error, then the required result will not be the best and it may be necessary to redo work.
To install on the wall, several cakes are made from plaster, the profile or bar is inserted into them, it is set to the level to the desired degree, it is possible to use a plumb. When the tortillas dried can continue to work. The width between the beacons is taken from the calculation of the rule that is in stock.
Sketching

The plaster is preparing according to the instructions on the package, after which it takes on the wall. The paper needs a spatula or bucket for painting works. After sketch, the order of work is:
- The solution to start throwing between beacons from the bottom point, closing part of the wall.
- The rule is placed on the lighthouses at the bottom point, leaning on them, the plaster stretches up. Stop the mixture you need easy keyword rules on the parties.
- It is necessary to put the masonry of the solution will not be solid and smooth.
- The plug-in mixture is removed by the spatula and again rushes onto the concrete, the wall.
- The work is carried out to the top. After one strip of lighthouses, you need to lay the following, and so each square meteruntil the room is with smooth walls.
On this, the first part of the work is completed. The starting layer is laid, but it is still necessary to smooth the walls, even visually irregularity is noticeable. Fully align the wall will be more liquid.
Alignment under the spike

If the first layer began to push, but did not have time to frozen, then it's time to smooth the wall under putty. All defects are maintained by a solution, the consistency must be used for a mixture of Жiy. Application is made in a large spatula and is leveling the rules for lighthouses. Thus, the entire perimeter passes, the layer is better to do thin and the base is obtained close to ideal. This phase is needed that the consumption of putty is minimal.
If the solution is like a thick plasticine, the beacons are getting, driving a screwdriver at the bottom. Next, the seam is filled with a putty and the spatula is aligned with the wall, if necessary, seams can be cut, because it is not completely frozen the mixture, it is perfectly cut.
Important! During the alignment, you need to follow, so that the plane remained smooth. On this wall alignment is completed. Next, you can conduct internal finishing work, Painting walls are carried out in different colors, sticking wallpapers on them, laying of tiles and other finishing materials.
Align the walls with your own hands (video)
What are the types of mixtures
Different dry mixes are used for decoration. All of them possess different compositions and have different characteristics. For surface alignment, dry material is most often used, which is presented in the table:
| Mixture: | Description: |
|---|---|
| Cement: | There are with different sand and cement fractions. Some have lime to improve the plasticity of the solution. Due to this, the cement-sandy solution and cement-limestone are isolated. In the first form, large sand fractions are used, for starting finishes, small sand particles are used on the finishing layer. Lime views are more versatile. |
| Gypsum: | Stucco applied to painting works And is popular. Allows you to apply wide layers, excellent plasticity and fast drying. Additionally, it has heat and sound insulation properties. The plaster has a high absorption of water, so it is better to apply mixtures with small parts. |
| Clay: | Previously, clay was often used, which was applied to the walls, after which she was blown. Today, the material is rarely used and only to create a specific effect. Clay - eco-friendly and regulates the microclimate in the house. |
Pros and cons of cement compositions
Cement solutions are good because they can be selected for internal work And for external, it is possible to smooth the facade of a private house. A cement-sand dry solution is used or with the addition of lime. On the walls, these materials are perfectly flawed. In addition, the material is cheaper than gypsum-based putter and is great for wet rooms, for example, for bathrooms, basement, garage.
The lack of material before plaster is that the texture is not very smooth. After applying, it is often necessary to grind or applying the finish solution. The disadvantage is also what such plaster matures long, so the wall decoration is delayed in time, as a rule, it will be completely frozen the mixture in 20-30 days.

Leveling the walls under the tile of the beacon method is not obtained from everyone, the process is long, the material will dry for a long time. Faster to align the walls using sheet drywall material. This method relates to a dry type of plaster, and the result is not worse. Walls are smooth, it will look for the interior and can be separated by the walls in any decorative material. Such technology has some minuses:
- To hang heavy items on the wall, a frame of wood or metal is manufactured.
- Plasterboard material takes a bit of space, which is not good for some types of housing, especially if it is a Khrushchev.
Of course, if you lock drywall on the walls without a frame, then the place can be saved. The size of the room will remain the same.
Frame Mount Method
Align the walls on framework technologists with plasterboard can be any, including ceiling, open windows or doors. Initially, a framework is created to be set up by level, it is better to use a laser level, so accuracy will be higher. The assembly is carried out in stages:

- In terms of gender and ceiling, a guide profile is installed.
- Fastening is carried out by a dowel to the wall.
- On the installed profile, place the installation sites of vertical parts, with a period of 60 cm.
- When it all managed to calculate, the vertical line is carried out, on which the mounting curtain is fixed.
- Carriers are put on the guide parts.
- Everything is leveling in one plane and fastened with veins.

- A plasterboard material is screwed to the mounted frame. Preliminary measurements are made and plasterboard is cut.
- The space between the wall and plasterboard can be inspired using minvatu or foam.
- The mesh is glued to the joints, then it is embarrassed with putty and everything is aligned.
- All holes from the screws are also placed.
As you can see the alignment of the walls by plasterboard is simply done, and the step-by-step lesson will help to understand the essence of the process. At the end, such a wall needs grinding plaster and you can start the finish. Make tiled walls, use any tiled material, wallpaper paste or just paint. It is recommended to use the PVC panel to the windows, and on the MDF doors.
Installation of sheets
Installation of plasterboard sheets is simple, a standard tool is needed for work:
- Screwdriver.
- Line.
- Screwdriver.
- Saws.

Screw the screws at a distance of 20-30 cm from each other. Fasteners caps are inserted into the drywall so that at the end of the wall was smooth, and they did not divert. If there is no screwdriver, you can use a bits drill. If desired, work is independently held per day. After that, the cottage, a house or apartment will be with smooth walls. It is worth considering that aligning the ceiling by plasterboard material, the height of the room will slightly decrease. Aligning the wall at the window, it is better to use a perforated corner on the corners, to impart the right shapes.
Sheet material is easier to use for alignment of walls without a frame. For fixing, plaster, glue or other material applies. A mixture is applied to the wall, how many thickness should be dependent on the walls. Next, the plasterboard is applied to the wall and is set correctly in terms of the plate, in order to the plane. If necessary, the material is attached to the wall, with the help of hands.
Important! When the material stands exactly, all edges are close to plaster. Next, you need to install the following part of the plasterboard. So the alignment of the walls in the house is done. For reliability, you can fasten the material in a day directly to the wall. Visual effect is excellent, kitchen, loggia, bedroom and other rooms will be with smooth walls.
The list of materials for alignment of the walls is large, the choice of materials depends on the skills and preferences. In the course of the work it is recommended to check each section of the wall after alignment, the defects have not begun. Methods of registration can be seen in the photo on the network, and how to make house walls smooth, presented on video:
Alignment of walls with their own hands is not a simple process with which the beginner can also cope with the diligence. First you need to decide on the desired result and method of work. There are several ways to align the walls with their own hands, in each case there is an optimal option.
Types of alignment
According to the technology and material, the material is distinguished by dry and wet alignment. Dry alignment is advisable to apply indoors with large surface errors, in wooden houses. Wet alignment is used both with minor deviations and with noticeable. Consider in more detail how to solve the walls for each technology.
Dry alignment
Aligning with a dry way, it is a frame, significantly saves costs compared to falling the incident wall - this is an important advantage.

To start work, the necessary material is calculated:
- the profile guide is purchased in a double perimeter;
- profile rack - the amount is equal to the attitude of the perimeter of the room to the width of the drywall (standard 1 m 20 cm), multiplied by two, plus 4 angles;
- anchor-wedge or dowel-nails - perimeter divide by 50 cm and multiply on 2;
- self-tapping screws - the number of rack profiles multiply by 4;
- GLC is a perimeter divide by 1 m 20 cm;
- self-tapping screws in GLC - a perimeter of one sheet divide by 60 cm and multiply on the total number of sheets;
- serpian - the number of rack profiles is multiplied by their height;
- the primer of deep penetration is 150 ml per 1 square meter. m.;
- spacure for seams - depending on the manufacturer, consumption is different;
- pluckle in GLK.

The frame alignment allows you to create an ideal geometry of the room, it is suitable for any kind of finishing finish.
With the help of a laser level, the framework frame is placed, the guide profiles are attached by anchors or dowels on the ceiling and floor.
The rack profiles are cut at the ends, the petals are created through which the screws are screwed. Insert into guides and are attached at a distance of 60 cm from each other.
Sheetsockarton sheets are screwed to the finished frame, with a pitch of 0.6 m, the hats of the screws are in charge.
The seams are maintained by a special putty, it is of greater elasticity. In order to avoid the appearance of cracks in the putty, the serpent is heated.

For the finish alignment of the surface, a putty is used: a mixture is preparing, which is folded over the entire surface. In order to save time on the processing and at the cost of the finishing layer, GLCs should choose with beveled edges, then the difference in height will be insignificant. You can cut the edges yourself.
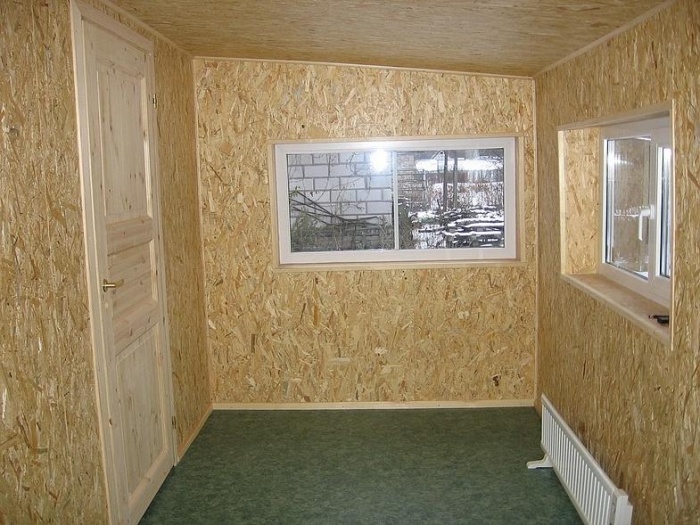
In addition to drywall for frame alignment, other materials can be used: Fiberboard, chipboard, pVC panels, plywood, lining and more modern OSB-stove.
Tip! The choice of method of alignment depends on personal preferences and financial capabilities. Therefore, before the start of repair, it is worth painting all possible types of finishes, their cost, and then make a decision.
Wet alignment
Alignment of walls with a more time-consuming and dirty process. But it allows you to save space, and in some cases finances - with minor deviations, flow consumption will be less. The method of leveling depends on the requirements for the end result.

There are two ways to perform work: on beacons and by rule. The perfect alignment of the corners of the walls is impossible without light and corner elements. Such a time-consuming process is relevant to the bathroom, for the kitchen. Here, the geometry of the room is very important, during the installation of furniture of the right form, minor errors become noticeable. Recommendations for alignment from professionals:
In practice, two methods are often combined: walls are aligned with windows and doors, while other walls according to rule. Also, careful leveling of beacons requires premises with outer corners.
The choice of the mixture for alignment of the walls depends on the finishing coating. It may be wallpapers, paint, decorative plaster.
Alignment of walls under wallpaper depends on their type:
- under the bright thin coating, a light base without the slightest errors;
- glass equipment I. vinyl wallpapers dense texture can hide minor flaws of the base;
- liquid wallpapers, depending on grainability, require a perfectly flat plane or allow small flaws.

Alignment of walls under painting always requires a perfectly smooth surface. Spends several steps of shtlocking and the use of high-quality mixture. The choice of polymer putty allows you to prepare the surface to paint into one stage of the shtlock without skin and re-putty.

The decorative plaster of large graininess does not require the shtlocking of the walls, fairly plastering for a flat base, the smoothness does not have the value.
Important! Regardless of the number of layers and finishing coating, each stage ends with a primer. It is necessary for better clutch of layers and material savings.
Difficult cases in alignment
How to align the walls in wooden house? For this case, it is permissible to use both methods of work, but frame option Preferred. The technology of work is the same as described above.

An important point is the height of the casing material in the unknown house, it must be 5-10 cm less wall. The alignment of the mixture is a more laborious process: requires careful processing of walls by adhesive composition, attaching dranco or mesh to hold plaster. Pre-trimming under shocking looks as follows.

Even in modern new buildings you can meet with clay walls. This material is low cost, good hygroscopicity is ideal for use in residential areas. How can you align rare clay walls?

In fact, nothing complicated: alignment occurs with plastering and spitting easier or equilibrium mixtures. This is suitable gypsum or clay mixtures.
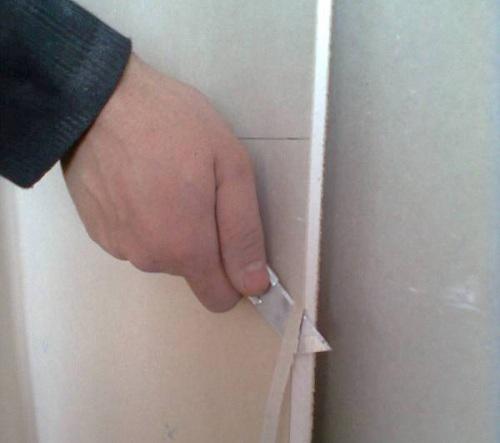
The alignment of the outer angle of the wall is becoming much easier to use a special perforated corner. It can be fit and sewing, depending on the need. Corner creates perfectly smooth sides, remains in the plaster. For shtpocking, it is convenient to use a special corner spatula that will require a minimum skill and effort.

Aligning the corners in the room of an irregular geometric shape with your own hands a very time-consuming process. The use of drywall will steal more space than shuttering, but will pass faster. In any case, the angular elements are perpendicular to each other. Then on the same line with them, the beams are attached along the wall on the alabaster. Laser level Simplifies the process of alignment of beacons and angular elements. The most responsible moment is completed, it remains only to fill the space between the beacons by plaster.
Selection of material
For high-quality finishesHer speeds, the convenience of work is important material and tools. They should not save.
Mixes for alignment of walls are produced different grain and whiteness. The more expensive the mixture, the less troubles with it. The ready-made compositions of plasters and putty, which are ready to apply without dilution with water are especially comfortable. Such mixtures are distinguished by long preservation of properties even in open videoIt is very important for beginners - because ordinary solutions will quickly dry and affect them uncomfortable. Finished compounds Sold in buckets, after using residues can be stored in the bucket until the expiration date.
White putty saves the cost of painting, necessary for light wallpapers. Therefore, when choosing it is worth clarifying the color of the mixture if you need to level the walls in the apartment under the wallpaper.

High-quality plasterboard does not crumble, does not have chips - its processing will be much faster. The presence of factory champers (the image above) on the sheet saves the total consumption of the finish mixture and the time for the finish. The same applies to profiles - rigid profiles create a robust frame and are not subject to strain during installation.
Tip! Choosing cheap Material, do not count on fast repairsSuch savings will require greater patience and skills in work.
It's nice to improve your home personally, but the wrong approach can spoil the mood. Before starting repair, it is necessary to soberly assess your strength, study the necessary information. Trust work professionals can always have time.
Smooth walls are the key to the perfect repair and most often the most expensive of all procedures. To reduce the price of work, many set themselves the question: how to equalize the walls with their own hands.
The first thing to do is to understand why you need perfectly smooth walls. Alignment of walls in the apartment is usually due to the wallpaper pasting and the correct geometric shape in the arrangement of furniture.

Walls can not be aligned if you use live wallpaper. They smooth small irregularities and for them is not a fundamentally perfect smooth surface (for example, bamboo wallpaper).

The process itself is presented on the Internet a multitude of video and photo alignment of walls. Also before starting work, I would like to advise you to ask for help from people who already have experience with plaster and subsequently read the instructions indicated on packages with mixtures.


Types of alignment
If the alignment of the walls cannot be avoided, then this process can be made in several ways. Leveling plasterboard is the least costly. To do this, you just need to attach plasterboard sheets to the wall, armed with the level.


List of plaster for internal work is great. It happens with various impurities. If you have already bought an apartment with aligned walls, then, most likely, they were aligned with ordinary sandbetone, but the evenness of such walls should be rechecked.

If the differences in the level of the walls you have small, then you can also make this work by Peskobton. However, it is worth considering that the degree of breathing is longer and therefore work can delay.

How to level the walls with plaster, you need to pose to others, which plaster to choose. Based on experience, it is better to choose gypsum.

Plaster
If you have chosen the alignment of plaster, then additionally you have to purchase lighthouses (this is if the other materials and tools are available).

Alignment of walls by lighthouses is their proper installation. First, put the beaches all over the room. In the height of the wall, every 30-40 centimeters, to the surface we install a dowel with a self-tapping screw. Usually such "columns" are made at a distance of 80-90 cm from each other throughout the room.

The main thing is that they are all the same. Applying to the heads of the screws, set the level over the entire height. Such a procedure is done with all rooms.


We mix a small number of plaster and brapping beacons on these planes. In places of joint with self-drawing strengthen the plaster. After the procedure is completed, we are waiting for a while and give the plaster to dry.

We are preparing a mixture of plaster based on information written on the bag. I throw a ready-made mixture between two lighthouses starting below. Then we take the rule, set it between two beacons and start lifting the mixture from the bottom up with the shaking. We do such movements while the mass is not leveled.


The residues of the mixture with the rules remove the spatula and throw on a non-plastered site. We finish all the walls with such pace. Should get smooth and smooth walls. Depending on the type of plaster, the walls become white due to the presence in the mixture of gypsum.

Shpaklevka
After the plaster dried, we can proceed to the putty of the walls. Spaklyka is needed to remove small porous holes and bringing the state of perfect smoothness.

After putty, we can proceed to the removal of beacons. In order to remove them, you need to push the screwdriver from the bottom and pull out all over. Do not be scared, the resulting failure is close in plaster and rule.


You can align the walls and just putty, but this case helps when the wall distortion is not so great. Permissible deviation no more than 5 mm.

Plasterboard
Alignment of walls with plasterboard there are two types. One is already described above, but on the other you want to stop a little more detail. If you have very strong differences in the walls, it is cost-effective to align them with plasterboard.


For this, the framework is made on all walls. In terms of gender and ceiling, fasten the guide profile. On them, every 60 cm is installed vertical profile. And the entire plasterboard sheets are attached to all this installation.

The joints need to be sampled with a special grid and all irregularities and holes from the self-tapping screws to smell with putty.

If you want to make the walls with some curly, only drywall will help, because under other conditions, the consumption of materials will be gigantic and departed in a penny.


Smooth walls in our lives are not a tribute to fashion, but a vital necessity. Incorrectly aligned walls will be able to make life in your house terrible. The most harmless is constantly dugout wallpaper, but the worse all these are various fungi and bacteria.

Decide before the level of alignment, it is not easier for you to bring down some parts of the walls to reduce the consumption of materials.

In Soviet times, the walls were leveled by sheets of plywood, but she had bad moisture resistance. Also, the joints of the sides of the sheets of plywood had to either decorate or leave as it were.

As a result, for better work, it's better to sand up to remove the microcracks invisible to the eye.

Photo alignment of walls


Perfectly smooth walls in the apartment - a mandatory norm for all who started repairs.
Priority of the level of leveling
When aligning surfaces, it is important to observe the sequence of work.
- First of all, the floor align and, accordingly, the beacons for walls and etc. are installed to it.
- Then, after laying hidden communications, carry out raw work on alignment (for example, on the walls) and ...
- switch to dry - ceiling trim.

Why need to lift the walls
Orthodoxes on surfaces in the apartment can not be ignored at least for two reasons.Any finish is well lighted and creates comfort and comfort in the room only on an equal basis.
If the main surface is with flaws, then during operation decorative finish It can very quickly lose its appearance, and will have to take repairs again. The walls occupy the most part of the room and always in sight, so they must be perfectly smooth.

2 ways to level the walls - plaster or trim
Depending on the materials used, two methods of alignment of surfaces are distinguished - raw (with building mixtures) and dry (installation of different designs).
Each of these methods is equally effective when complying with all stages of work, but has its own characteristics. As a rule, the alignment of plaster is used with drops of 30-50 mm.
If desired, it is possible to use construction mixtures for walls and with greater curvature, but it will require large investments in the material and work. Therefore, it is better to give preference to mount the frame with its subsequent drywall.
Small cracks and irregularities can hide cozy wallpapers with a corrugated pattern, but the alignment of the walls is necessary.

Pay attention to align the corners. The curvature, imperceptible to the naked eye, will be visible when mounting the plinths and the sticker of borders.
We use mixtures for alignment of walls
Advantages and disadvantages
- Does not take the useful area of \u200b\u200bthe apartment
- Requires preliminary surface cleaning
- A rather laborious process, there is a lot of dust and garbage

 Before baffle to align, you need to measure surface irregularities.For horizontal, the cord or construction level is stretched along the wall or a construction level with a length of at least 1.5 m. The vertical is checked by a plumb. If the differences are detected after measurement within 3-5 cm, the most effective method - Apply the building mixtures. Their use is preceded by phased work performed.


Dry alignment of walls
Advantages and disadvantages
- Covering drywall does not require pre-cleaning walls
- Inside the frame you can hide communications, as well as lay heat and sound insulation materials
- "Eats" useful area of \u200b\u200bthe apartment
Walls covered with plasterboard, withstand less load compared to plastered brick wall. Moisture-resistant sheets are separated by a green cardboard, while ordinary - cardboard gray. To finish wet premises, choose the sheets of G Clac.
Traditionally, drywall sheets 12.5 mm thick are used for dry alignment of the walls. But for their installation, the framework should be installed.
