How to glue the ceiling plinth: the features of mounting cartery of different types. Ceiling baguette: how to glue reliably and right? How to shove the ceiling plinth
How to glue ceiling plinth And why is it needed? - This question often occurs during the repair process. Plinth plays a big role in the interior of any room. With it, you can clearly change the area of \u200b\u200bthe room, or raise the ceilings. Designers have been used for decoration for many years. It is mounted upon completion of all finishing work. The process is simple, however, requires compliance with some rules and skills. It is impossible to attach a baguette correctly, if you do not take into account its features, or choose inappropriate adhesive composition.
Properly selected ceiling plinth will give individuality to the room, make the interior more beautiful and more strware. In addition, all possible disadvantages will hide
Why install ceiling plinth
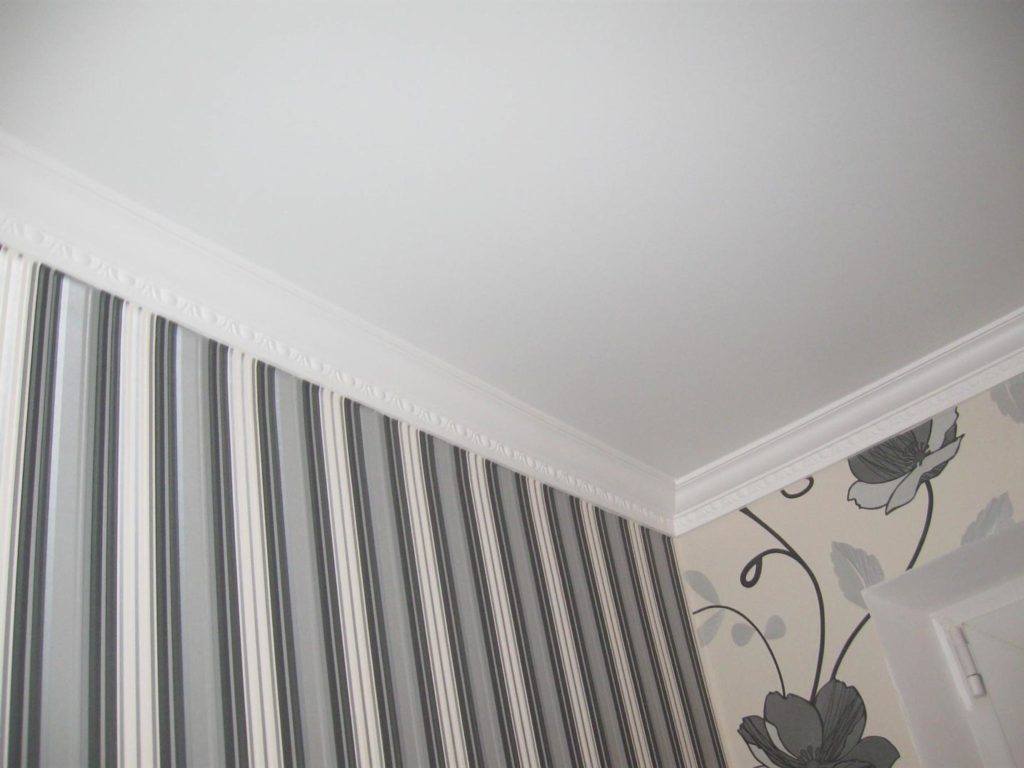
Plinth is not only decorative elementBut also wears practical functions. It hides the joints between the ceiling (stretched, suspended) and walls, and also closes the top edge of the wallpaper, making the transition smooth and inconspicuous. Under the baguette you can hide the irregularities of the angles without resorting to the perfect alignment, or hide the wiring.
For specialists in the field of design, it is also the possibility of implementing their ideas. Properly selected cornice is able to visually change the size of the ceiling and its height. The backlight is originally and beautifully, which is installed under the conservation. With it, you can smooth out the color differences in horizontal and vertical surfaces. In addition, it gives a finished type of interior

If, placed under the ceiling around the perimeter of the room luminous lED ribbon., and cover it with a plinth, you can create original lighting. Plinth, you should choose a special, with a notch
How to choose a plinth
Currently, the assortment of plinths for the ceiling is huge. When choosing, you should repel from your preferences, but most importantly, from the area of \u200b\u200bthe room and design.
Rooms are:
- Gypsum - look aesthetically, they are durable and massive. Glue on the plaster shta.
- Foam - lungs and cheap, but not very durable. Fixed on panel or polymer glue.
- Polyurethane - durable, have many forms and colors. Glued on sealant or "liquid nails".
- Wooden - environmentally friendly, looks expensive. Installing them more complicated, fixed on fasteners.
- Polyvinyl chloride - presented with a large selection, inexpensive, moisture resistant, easy to install.
Buying cornice needs to take into account the width of the room. If the ceilings in the room are low, then the plinth is needed narrow, since the wide eaves will make the room even lower. Conversely, for large rooms, it is necessary to pick up massive structures. An universal option is considered to be size 5 cm, such a model is used most often.
Also, the models are: smooth, lace, striped, with a pattern. When choosing, you need to repel from the style of the room.
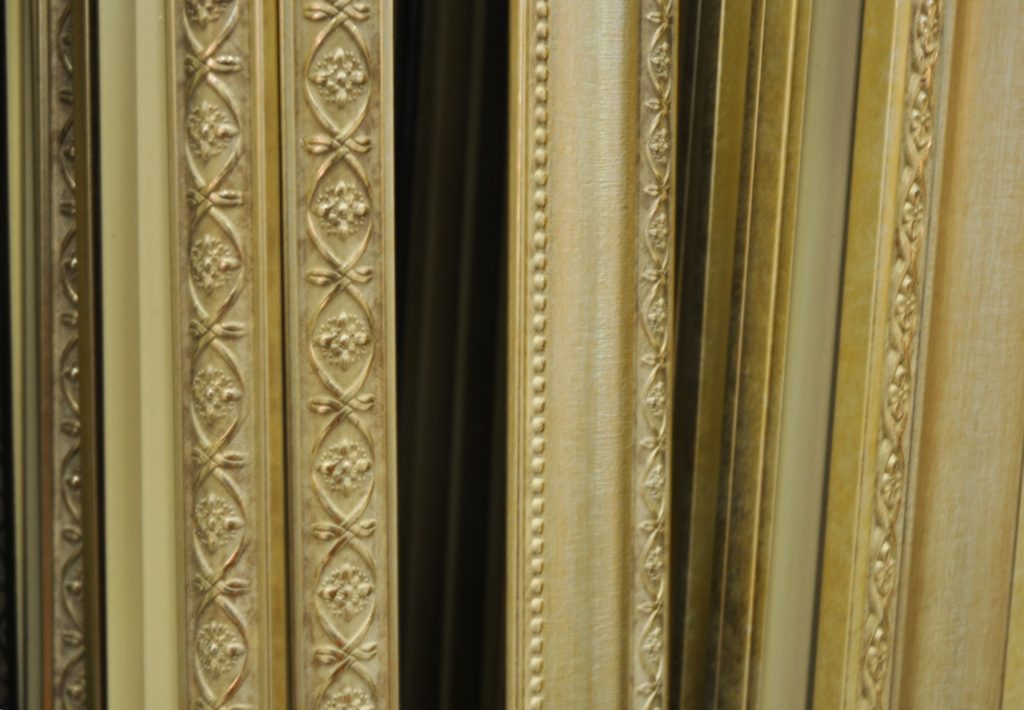
For right choice Carnishes, you should pay attention to its form. It should be borne in mind that behind baguettes with many bends is difficult to care for. Dust accumulates on them, and wipe it from curls not just
An important stroke is the selection of color. You can purchase a baguette of the desired shade, or paint yourself. The main thing is to comply with a number of rules:
- with the same color of the walls and the ceiling - the color of the plinth is selected different from them in several tones, also say white;
- with a small height of the ceiling - baguette due to the color of the walls will extend the room;
- if the room is small - it is desirable that the baguette matches the color of the ceiling.
Win-win option for any interior - white color. The choice of contrasting color look original and effectively, the only difficulty, can make a selection of a shade.
If you are confused in a variety of baguettes, and do not know which suitable for your room - take the white. It will fit into any design, regardless of color and wallpaper pattern.
Preparatory work before installing
Before installing the plinth, you need to do some preparatory work. The essence of them in the following:
- There are marks on the wall for which the cornice will be attached. To do this, you will need a roulette, level and greasy cord.
- The plot where the eaves will be mounted, is processed by acrylic primer, for better surface interaction with glue.
- Measurements are made, and fastening places are calculated.
- If the surface is concrete, and the plinth is wooden, then you need to immediately drill holes for fasteners.

The surface of the walls and the ceiling must be well aligned before fixing the baguette. If the surface is uneven, then there will be a space between it and the plinth that is not beautiful, but the main thing, the profile will hold weakly
Selection of materials and tools
First of all, it is necessary to decide on the cartoons themselves, choose the desired size and design. Stripping from the material from which they are made to purchase a glue composition for their fastening. The composition should have good quality in order to reliably fix the cornice.
Main types of glue:
- polymer - durable and grab quickly, they include "moment", "Titan";
- "Liquid nails" - have excellent adhesive qualities, are suitable for different types of plinths;
- acrylic putty - simple in work and safely, in addition to fixing the eaves, also close up cracks.

Liquid nails are the most convenient way to fix the ceiling plinth. It can be used at any stage of the walls. There are different species - for wood, plastic, etc.
Also, you can make the adhesive composition itself. It will take: PVA glue, shplanie and water. Plate and glue mix (1: 4), water is added to the consistency of thick sour cream. The mixture should be made in front of it, how to glue the plinth, as it takes it to be used for two hours.
For embedding inner and external corners, you will need the details of the form. direct corner, and elements having different cutting directions. In the smooth corners, the extension corners are needed. It is worth buying special stubs for joints.
To work you need to stock:
- hacksaw;
- stupid;
- knife;
- assembly pistol;
- spatula;
- painting scotch tape.
Methods of docking
To, baguette watched beautiful and neat, you need to know how to glue the ceiling plinth. When docking, it is important to observe the pattern, otherwise all the efforts to disguise the joints are useless.

When placing a ceiling by plinths, it will necessarily be necessary in the docking of parts. It is imperceptible, it turns out if the surface of the walls and the ceiling is smooth. Also, it is important to comply with the technology of work
Mounting work
The basic principles of mounting ceiling plinths are similar, regardless of the material from which they are made. You need to start with the walls opposite entrance door. Before their fastening it is necessary to check the external and internal angles on rectangles, with the help of the square. Then, the baguette is applied, and marked with a pencil of installation places it is done around the perimeter of the room. The surface to which the eaves will be fixed. Next, cutting is made using stubs or hacksaws, at an angle of 45 degrees. However, there are features of installation depending on the type of plinths.
It is necessary to check the eaves to the joint, if the docks are not visible, then you can install the cornice to the intended place. In the presence of errors, it should be carefully fired
On shplanyovka
Before mounting the plinth on the putty, it is necessary to prepare it according to the instructions. Further, the principle of work is as follows:
- the surface on which the baguette will be installed is stuffed or wetted with water so that the shplanke must be better;
- on the opposite side of the plinth is applied with a putty, a smooth layer;
- applied to the wall and sticks 2 minutes;
- the extruded surplus of the mixture is cleaned with a wet sponge.
When drying, the putty can give a shrinkage in the joints, in this case, they should be shuffled again.
Fixation on glue
The glue is used to fix the plinth on a smooth surface. When irregularities and deepening, he will not keep tight.
Sequence of work:
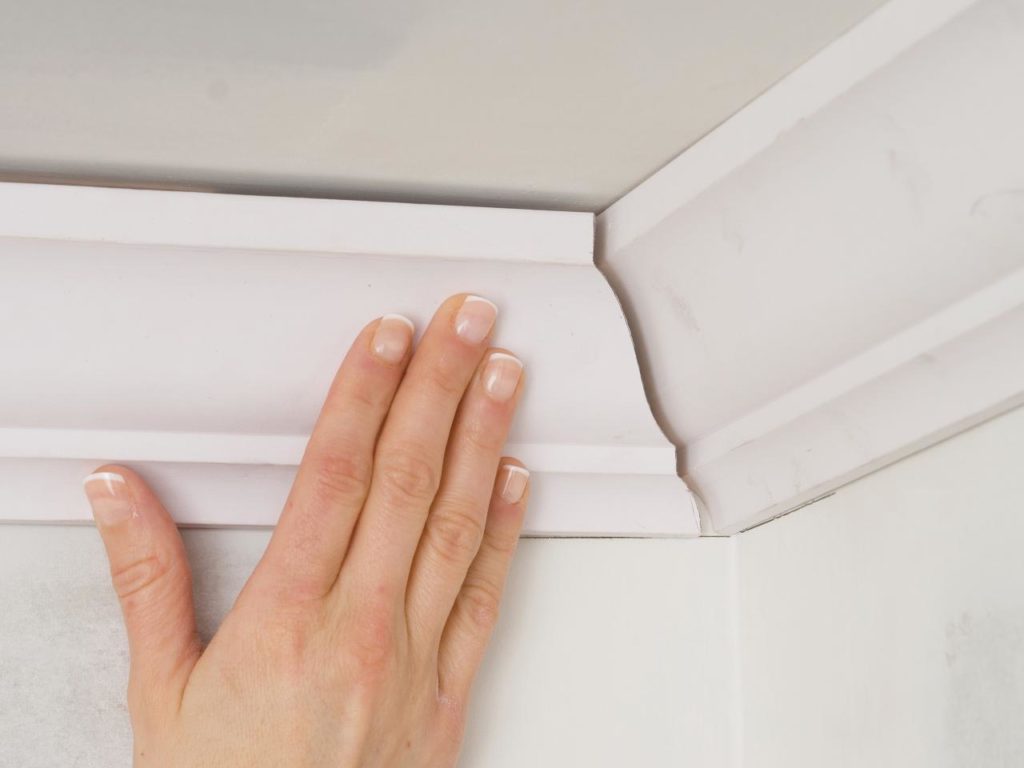
- Falls from the inside are evenly lubricated with glue. The layer is imposed not thick, since in the pressing process, it can flow on the wallpaper.
- The plinth is namazed by glue presses to the ceiling and wall.
- It holds seconds 30 for durable grasp.
- If the glue spoke somewhere, he wipes his sponge

Eaves of foam or polyurethane can not be pressed with bare hands, traces and dents can remain. It is recommended to use a cloth or dress cotton gloves
Installation of wooden ceiling karny
The plinth of the tree today is less popular, although it looks very aesthetic. In addition, they can be painted, thereby get the required shade for the interior. Such plinths are quite expensive and the installation of them is more complicated.
Before installation, it is necessary to conduct preparatory work. A wooden plinth is installed only on a smooth surface, so you need to perfectly align the ceiling and walls. After that, you can start fastening the baguette. Wooden design It should be treated with abrasive material.
Only light and narrow cornices are attached to the shplanies. For heavy, it is necessary to use fasteners from metal (selflessness). Also, they can be mounted on wooden rails that are nailed to the wall after 50 cm.
Wooden eaves are suitable for the interior in ancient or classic style. Also, they are suitable for Art Deco style. This profile, looks aesthetic and gives the room an elite species
How to glue ceiling plinth
Polyurethane plinth is best glued straight on the wall, and not on the wallpaper. Such fixation is more reliable. This baguette is stronger than foam, but it cuts harder. It is better to close on glue having a polyurethane base or "liquid nails". When gluing the surface should be even so that there are no gaps.

After fastening the plank, you need to check the joints on the gaps. If they are, they should neatly close the acrylic putty. After drying it, with the help of sandpaper, smooth out irregularities
Foamflast option
Installation of foam products simple. Because of its small weight, the plinth is fixed on universal glue. Additional fasteners are not required. They are soft enough, so it is easy to cut a knife. But due to fragility, they are easy to damage, so work requires accuracy.

Polyfoam today are popular, suitable for any interior. Externally resemble gypsum products, but much cheaper. The material is easily painted, and for this, any water-emulsion paints are suitable.
Profile from PVC.
Plastic panels are currently popular. There are the following PVC cartel:
- triangular shape - on the one hand have a groove where the plastic plinth is inserted;
- digitable with a latch - in fact, it does not differ from the plastic structure, only the straight line with hooks is first mounted, and then triangular plinth is mounted.

The PVC profile is a profile by which the vinyl panels are attached. They are moisture resistant, so ideal for the kitchen, bathroom and even saunas
Sticking taking into account the width of the product
How to stick the ceiling plinth high-quality? Such work is possible only with the width of the product. As it depends on the width technological process, and subsequently, the view of the room.
Useful recommendation:
- Wide plinths - designed for room having high ceilings, visually wide designs will make ceilings less. For better fixation of the design, the adhesive composition should be applied to the entire irrigation side of the plinth.
- Narrow models - help visually lift the ceilings. The fastener is applied point.
- Models of medium width - the most popular option. You can glue them different ways: Spot or solid.

Bagtiet width happens from 2 cm to 15 and even more encountered. Wide is better suitable for the hall or large premises in a private house. Therefore, for standard apartments, narrow or medium baguettes are recommended.
Plinth taking into account the design of the room
It is important to take into account the appearance of the cornices. After all, its color and design affect the overall perception of the room.
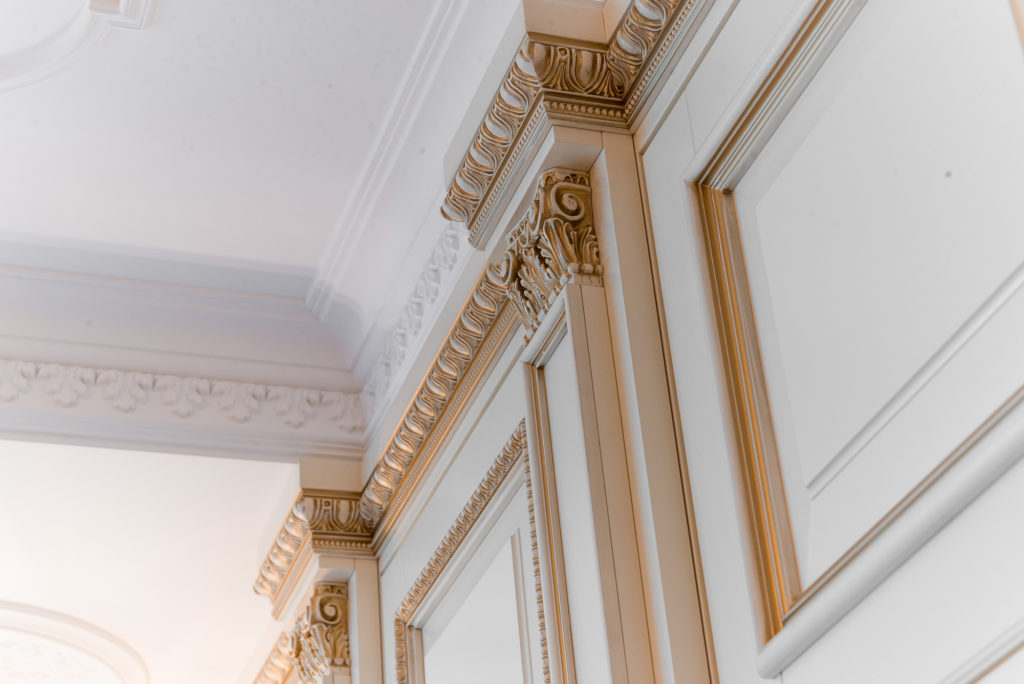
- When choosing a drawing, it is necessary to repel from the style of the room. If the room is made in a classic style, then you can choose a baguette of a complex texture, with a pattern or stucco.

Minimalism assumes the presence of a plinth on the ceiling, which will not rush into the eye. Better imperceptible, without pattern and pattern, thin or medium, width, color - white
Plinth having volumetric figures is applied to monophonic surfaces. He weights the interior, so it does not fit for a small room.
So that the transition was smooth, the pattern is selected for the wallpaper or ceiling.
Finish finish
Having finished fastening the plinths, you should do the finish finish. The final activities are necessary for the decor and to disguise the shtcloth in the joints. In addition, the finish prevents the yellowing of the seams.
Sequence of work:
- baguette is ground;
- paint is applied and dries;
- if necessary, it is painted again.
Foam products are covered with paint not containing solvent, and for wood it is provided for wood or varnishing.

Paint should be applied to a pre-cleaned surface. Work should be done carefully, so as not to smell the surface that is near. To do this, on the wall and ceiling, you should stick tape
To avoid errors, in the process of installing eaves, specialist advice should be taken into account:
- The baguette is not glued to the stretch ceiling, the adhesive composition is applied only to the surface that comes with the wall.
- The plinth of the walls will make the room above, and the color of the ceiling is wider.
- In the absence of stub, you can make it like. Conduct two parallel lines on cardboard, which intersect with lines, under the desired angle.
- When using production angles, they are installed primarily and then baguette.
- Fixing bulky gypsum cartoons, one should be supplemented with self-draws. When the putty dries, they can be deleted.
- Baguette from gypsum or polyurethane is cut in a metal with a metal.
- How to form corner and intermediate joints
How to glue the plinth on the ceiling in the corners? The answer to this question is not simple, this is exactly the most difficult in the process of fastening the eaves, it takes care and attentiveness.
- How exactly cut the corner of the ceiling plinth
Using the usual markup on the ceiling, you can perfectly cut the corner of the cornice. Works are carried out in the following order:
- Two parts should be cut exactly vertically.
- One plank is applied by resting the end to the wall on the contrary.
- Also, the second part is applied, make marks on the ceiling.
- The intersection of these lines is the label on which the baguette is cut, an angle is formed.
- The plinth is applied re-and the cut line marks.
- Details are cut and fixed to the ceiling.

To properly cut the plinth, they should be attached to the wall and make marks. On them, you need to carry out the trimming using the stub and hacksaw. In the process of work should not be too pressing on the part.
First method - using stub
Stuslo - a box having vertical holes under the hacksaw. With it, you can cut the products at an angle of 90, 60 and 45 degrees. Its most rational use, if the contacting walls are located strictly perpendicularly.
Internal corner
Get the inner angle can be if:
- the bar is installed in the tray, and is attached to a distant wall, its position must correspond to the position of the plinth on the ceiling;
- keeps with her left hand;
- hoven - at an angle of 45 degrees, and her handle approaches the left hand;
- the opposite bar is cut into the same way, only keeps his right hand.
Outdoor
The size of the plinth is measured, from the wall to the outer angle, it is necessary that the edge lightly went out. The cornice is placed in the stouch and trimmed. If the right outer angle is made, then the knife should be located right left if the left is the opposite.

Stuslo - the perfect tool for trimming the ceiling plinth. Using it, you can easily cut the part below the desired angle. In addition, to use this tool does not require special skills.
Property features for different ceiling surfaces
Different surfaces require a different approach and you need to know how to properly glue the ceiling plinth on them.
Stretch ceiling
The plinth is not attached to the stretch ceiling, the fixation is carried out only to the wall, so:
- the cornice should be light - from the foam, polystyrene foam, plastic;
- glue - reliable;
- the ceiling side should be less than the other.

For stretch ceilings having a non-standard form the ideal option There will be a flexible baguette. It turns well and can smoothly repeat all the bends of the ceiling. Such a plinth, emphasizes the beauty of the ceiling and the unusualness of its forms
Ceilings from GLC
It is simple to glue the ceiling to glue the plinth, due to a smooth surface. The main thing is to pay attention to the plots of joints of the plates of GLC, because there can be a shplanke, which is easy to remove sandpaper.
For this surface, any cartoons will fit. In this regard, that the use of drywall leads to a decrease in the area of \u200b\u200bthe room, the designers found the perfect way out. Baguette, wide face, fixed to the ceiling, which visually increases the room.
Playing ceilings
The plastered ceilings have drawbacks, and less convenient to install the eaves. The ceiling and walls, in the place of attachment of the plinth must be even. In small defects, you can neglected using flexible plastic and cartoons with soft edges.
Fixing the plinths, it's not a complex, requiring accuracy and accuracy. Therefore, before you begin, you need to familiarize yourself with the nuances in technology and with the peculiarities of this material.
Photo Gallery


Video
At the last stage repair work The question of how to glue the ceiling plinth is quite relevant. The process requires care and accuracy, otherwise the fragments will fall off, cracks will appear. Of all known methods, two fastening technologies are isolated - using putty and glue.
How to glue the ceiling plinth put splot
The method is suitable for repair work when they have not yet proceeded to the finish finish. Thanks to the raw surface, it is possible to achieve a better clutch. Powing the ceiling plinth on the putty is considered the easiest way.
Getting Started, you need to prepare the following materials:
Fillet. With the help of putty, you can attach ceiling baguettes of almost any variety;
Shplanke. The mixture is sold in ordinary building stores, you can also use the remnants after repair. When choosing the material, two factors are taken into account: the date of manufacture and integrity. If the shtatlevka lost the crushing, then it is not suitable;
Priming. The purpose of the composition is to improve the quality of the clutch of surfaces. It is better to use ground with deep penetration.
Learning how to glue the ceiling plinth, you can meet the Council - use the gypsum composition. The material is suitable, but it quickly grasps, which is a great disadvantage, because it is impossible to fix defects, but to apply the solution and mount baguette will be very fast.
To attach the cartel on the ceiling with a putty, you need the following tools:
- Handling for metal for trimming. If the width of the baguette is about 2 cm, but not more, the stationery knife is used. Otherwise, the quality of the plinth will deteriorate.
- Stuslo for the formation of corners.
- Middle-length spatula (8-10 cm).
- Sandpaper. It is needed to give the smoothness of the surface of the cartel if it is rough. Otherwise, gluing the plinth will be more difficult.
So that work is not delayed, all these tools and materials are pre-acquire. When sticking decorative slats, accuracy and accuracy than extensive knowledge in the decoration are more important than extensive knowledge.

- Inspection of the place selected for baguette. After applying finish finish Defects often appear on the surface. Their elimination is the task of sandpaper, attached to the convenience of the bar. It is best to prepare the surface in advance.
- Treatment of primer. Pre-composition is prepared according to the manufacturer's instructions. If concentrate is used, it is diluted. The primer is applied to the fully dried previous layer.
- Marking. The plinth is applied to the place of the future attachment and the line is carried out at its edge. It is she who serves as a guideline.
- Trimming details. Using the foam cartel, you should be careful - the material will crumble from the wrong exposure. Corners are formed in stupid. It is recommended to pre-train.
- Preparation of the shlatovka. The material is mixed immediately before the start of work. Then he will not lose properties. A dry mixture is poured into the tank, which is diluted with water. Instructions and proportions of components are indicated by the manufacturer on the package. As a result, it should be a mixture without lumps, sufficiently thick.
- Fixation. The selected composition is uniformly applied to the inner side of the baguette. The procedure is performed using a spatula. It is important to monitor that the mixture does not hit the outside side of the plinth. You should not take too much solution at a time.
- Installation. Baguette is attached to the place marked by the pre-line. Do not put too much to put on the plinth. If the solution is fresh, the baguette will fix quickly. The excess mixture, which appeared from under the edge, is immediately cleaned until she dried.
To attach the second fragment, it is important to properly connect the planks . To do this, you need to apply the minimum number of plates on the store of the plinth. The fragment is pressed to the marked place and combined with an already attached element. The ends must be perfectly coincided, because even a slight snot is noticeable. If you know how to glue the ceiling plinth , That finish will be very accurate and will not require correction.
It is necessary to wait about 24 hours for the complete clutch of the slats and the surface.
Second method - with glue
The technology is used when wall design with wallpaper has already been completed. By resorting to this method, it should be remembered that the coating should be firmly glued. Otherwise, because of his defects, the baguette will begin to lag behind the wall.
Getting Started, it is important to choose the right glue. Of all the existing options in demand are the following:

- Standard formulations. Suitable for polystyrene and similar materials. Funds are viscous, long frozen mass. Disadvantage - uncomfortable application. It is necessary to put them on the surface for a long time, and after holding baguette for a few minutes until the grip is strong enough. They glue products from foamed materials.
- Liquid Nails. The composition is most popular because it is easy to use. It is produced in tubes for the construction pistol. Buying liquid nails, it is important to make sure that they are suitable for your chosen baguette. You can clarify this moment at the consultant in the store.
- Acrylic sealant. The material you can use when there are no other options. Buying a means, you should consider the components of the composition and choose verified, from reliable manufacturers.
Fixation of baguettes for glue
Selecting the right composition and tools, it remains to accurately repeat the prescribed actions. The mounting of the plane glue can be divided into the following steps:
- Preparation of walls and ceiling. The surface is inspected if there is flaws, they are eliminated. Then the plank will not be twisted and attached tightly.
- Marking and preparation of parts. Neglect of this stage will lead to a substantial result.
- Application of glue. The composition is distributed in the center of the inside of the planks.
- Fastening the plinth to the selected place. Each type of glue requires an individual approach. Therefore, you should explore the instructions before starting work.
- Laying the rest of the details. How much time will need for complete fixation, depends on the type of glue. The joints and cracks are filled with sealant if necessary.
If defects are too much, they are better hidden under the paint. With the help of glue, ceiling planks are fastened quickly in time. But the quality of the result depends on how well the features of the selected composition are taken into account.
How to make angles on ceiling plinths
When fastening a baguette on a prepared wall does not arise big difficulties. But how to docile the ceiling plinth in the corners, not everyone knows. Details are connected by the ends very carefully and accurately. Over glue or other composition is immediately removed.
Knowledge, how to properly cut the corner on the ceiling plinth, will help perform better work. The tool is selected based on the baguette material. For a wooden product, a special saw is suitable. Foam and polymer baguettes are cut by the metal blade.

So that there are no problems when working, you should get used to the tool. It is recommended to practice, cutting or subscribing a small piece of material. It is possible to achieve the right corner on the baguette by the following tools:
- stupid. Plinth must be put correctly in the instrument to get an accurate external or inner corner;
- stationery knife. It is useful for working with baguettes from polyurethane;
- decorative corners. An easy way to connect the details is to place the finished, factory products between them. They can be slightly cut off the stationery knife.

If several pieces of the plinth are attached, and to the angle it remains quite a bit, you need to cut off the next bar with the reserve. The residue is cut after several fittings and a celement. In this case, the stub is replaced with a knife. It is necessary to cut a strictly perpendicular to the baguette so that the slice turns out to be smooth and perfectly docked with the ends of the already attached items.
How to glue ceiling plinth of foam
Both options described above are equally suitable for fastening the foam decor. The variety of material is the most sought-after. The ceiling planks made of foam plates have such advantages as:
- simple installation;
- aesthetics;
- environmental friendliness;
- excellent clutch;
- low flammability;
- affordable price.
The disadvantages of the foam applies not the ability to resist impacts and pressure, fragility. The material is compatible with almost any adhesive composition. Plinth from the foam is attached using wrappers, liquid nails and compositions based on rubber and formaldehyde resins in the same way as other types of cartoons.
How to remove the ceiling plinth without damaging wallpaper
Dismantling of old baguettes is performed due to their damage or loss of presentability external view. For removing the slats, the following tools are needed:
- chisel, spatula;
- knife, scrap.
In order not to spoil the finish, the plywood sheet should be substituted. Between the plinth and the wall, the sharp tip of the chisel is driven, and the scrap is inserted into the resulting gap and separated the bar.
If you do work carefully and not in a hurry, it will be possible to save the wallpaper. Polyfoam baguettes should be removed carefully, because due to fragility they can fall off with the finish. Disassembly tools are selected based on the fastening method and baguette material. In sufficient work, it is sometimes possible to even leave the plinth and re-use it.
Communicating with builders, do not embarrass if they focus on the kallers - under this unfamiliar word, experts mean nothing more than ordinary plinths on the ceiling. Speaking about how to glue the plinth on the ceiling, builders can slightly stignify the price - in fact there is nothing easier than sticking the cartel, so you can completely calmly do it yourself.
Ceiling plinth - options
Ceiling plinths - a very convenient way to make a complete type of interior. Kartlets, as they are called in a professional environment, can serve as an additional element, closing the gap between the wallpaper and the ceiling and independent, giving the situation a special atmosphere. Manufacturers produce ceiling plinths from materials such as polyurethane, polystyrene foam and PVC, length standards for them - from 1.3 m to 2 m. Often manufacturers for convenience are released and ready-made corners. However, it is also not difficult to make corners.
The most qualitative type of ceiling plinths is made of polyurethane.It has great ease, durability and it is not terrible moisture. Builders love polyurethane kallers for their high elasticity, which allows them to use them in the design of almost any interiors. The second in popularity of the kind of cartoons is made of polystyrene foam. They are also nongens, moisture resistant and have soundproof properties. However, when interacting with sources of artificial light, they can darken over time. In addition, they possess rather weak strength characteristics.
Masters of the site site prepared for you a special master class on the topic. Step-by-step instruction S. exclusive photos and video materials.
The most cheapest ceiling plinths are PVC products. They are presented in different colors, but have the lowest strength, so it is quite difficult to work with them - it's worth a little pressing, as a dent appears. They do not differ and flexibility, and high humidity Simply is dangerous for them.
So if you first wonder: "How to glue ceiling plinths?", And decided to do it yourself, it is recommended that the most reliable and affordable option.
A large assortment of ceiling plinths and not only you can see and purchase on the site www.ext-decor.ru.
How to glue the plinth on the ceiling - step by step
So, you painted the ceiling and are ready to glue the wallpaper in the room. However, think in advance the edging option. If you have chosen for this cartoon, then the blending of the wallpaper is better to postpone finally - the edging of this type is glued to the wallpaper worse.
How to glue the plinth on the ceiling - step-by-step scheme
Step 1: Make calculations
First, calculate the desired amount of material. If you glue wallpaper yourself, it means that you will cope with this task easily, since you already have the necessary values. The perimeter of the room is the total length of the ceiling plinths. It is best to take products of 2 meters long - with them you will have fewer joints. So, we divide the perimeter of the room for the length of the plinth and get the right amount. Round the resulting number towards more, and even if it is smooth, we buy one spare two-meter, the benefit of them is quite accessible. Spare plinth can be useful to us in cases where it turns out an uneven slice or dent.
Step 2: Go shopping
In the store, be sure to inspect your purchase - you can slip cartlers with visible dents and scratches, such rejected. Specify, from one party you sell plinths - similar externally, products from different parties may differ in size. Do not forget to buy glue (usually use liquid nails or special mounting glue, the main thing is to quickly cool) and the tools that are needed to work. These tools will not be useful to this tools in the farm, so do not shake on the purchase of a roulette, a mounting knife, stusla, plastering tape and white sealant. You will need a stub in order to properly fit the corners of the plinths, and with the help of the sealant you can shove the gap, giving them the perfect look.
Step 3: Getting Started
Before starting work well, wash your hands and wipe the tools - white plinths are very easy to blur. Determine the angle from which you will start work. It is recommended to start a sticking from the corner, in which case you will have less trimming. For starters, practice with a sharp plinth at an angle of 45 °. This will help you stublog. If you have never been practiced in this case before, the result is hardly satisfactory with the first attempt. However, do not forget that you have one spare option, so it is possible and practicing. It is best to harvest templates with internal and external joints, and with their help will go much faster, and the number of unsuccessful attempts will decrease sharply.
Step 4: glue plinth
So, you have two smooth cuts under the desired angle, it's time to start the sticking of our cartel. The glue should be applied both on the surface adjacent to the ceiling and on the surface, joined the wall - the savings here is not to the place. Apply adhesive follows one continuous band. After the smooth strip of the adhesive was on the plinth, you can postpone it aside and proceed to the following - before sticking it will be better that the glue is a little weathered. Prepare a dry clean rag that you will remove excess glue.
Apply neatly plinth to the ceiling and press it into the angle, then spend your hand along its entire length. In order for glue as it should be grabbed, you need about a minute. Excess glue, speaking from under the plinth, wipe the rag. By gluing the first strip, proceed to the second, the one that follows the embarrass. When the first angle is completed, proceed to the next corners - after sticking the angular cartoons, it will make markup and close the empty spaces between them.
In old houses, and not only, walls and ceilings can be uneven, because of which the plinth is often dug. To secure them, you can use a plaster ribbon that does not leave traces on the surface. Blooming the cartel, close the gap with a white sealant. To do this, it is better to use a special skeletal pistol that allows you to squeeze a thin and clear line. Apply the sealant on the gap, and then spend the wet finger on it, as if indoor inside. Thanks to this simple reception, the edging will look just perfect! After performing all the steps, you will become a real connoisseur how to glue the plinth on the ceiling!
How to glue cartlers on the stretch ceiling - features of sticking
If you decide to combine in the interior and cartel, you will have to take into account some of the features of such a "duet". In this case, the question is not entirely correct - glued cartoons on stretch ceiling we will not be in principle! Since the stretch ceiling is a synthetic film, it is unknown, as the composition of the adhesive can affect it. At best, the glue can deform it, even to dissolve it. In addition, the stretch ceiling is not fixed rigid to the surface, and its minor oscillations can damage the glue seam between the ceiling and the plinth.
And yet, how then to glue the carter on the stretch ceiling? The output from this position is quite simple - glue it is not to the ceiling, but to the wall. In specialized stores you will even find special plinths with a larger bottom. Between them and the ceiling should be left a small gap. Although it is possible and large - you can invest in the plinth lED lamp (It is the LED - it is not heated!), Having highlighted the ceiling.
Ceiling plinth is used during repairs in apartment, office and other premises. It shares two planes - walls and ceiling itself and sometimes hides the error of gluing wallpaper or finishing. Can hide wiring, which is often under the ceiling. Difficulties appear when the material has to be allowed in the corners. This task is not easy for beginners. Consider whether it is possible to fulfill such work independently, not attracting professionals.
Materials for the manufacture of ceiling plinth
Ceiling plinths are also called baguettes, moldings, cartoons and produce from the following materials:
- Tree;
- Polyurethane;
- Plaster;
- Polystyrene foam.
Wooden models
Wooden baguettes are rare, due to their impracticality . They look good only with the same wall design. The price of such a product is running in a wide range. Cons: A complex installation and processing process, difficulty in disguise the gaps that occur as a result of docking. The tree begins to rot, mold appears and insects. In order to avoid these troubles, it is necessary to treat the tree with varnishes and an antiseptic.
Types of wooden baguette
Gypsum models
Gypsum, like wooden, is rarely chosen due to heavy weight. In addition, they are difficult to dock and glue.
 Baguette from plaster
 Models made of polystyrene foam
Foam products are comfortable in use, inexpensive and light by weight.
Cons: have low strength, they are easily broken and dents remain on them. Not all types of glue and paints are suitable for installation. Fire-hazard material.
 Polystyrene baguette
 Polyurethane models
Basically, buyers stop on this form of a baguette, although compared to fontoam, their cost is higher.
They are flexible, durable and durable. There is a variety in choosing a color, although mostly preferred white color.
Pros: The product is not lit and its strength is higher in comparison with the previous view.
 Polyurethane baguette
 For rooms performed in the style of minimalism, it is preferable to choose products with smooth lines. To highlight the pompousness of the room, choose products with patterns and complex relief. The same baguettes are chosen for rooms decorated in a classic style, especially if there is a room old furniture or design. Note that the carter with patterns is harder to poison in the corners.
Tools and materials for cutting and gluing cartoons
Before you begin to glue the ceiling plinth in the corners of the room, you should prepare the following materials in advance:
- Plasterboard knife, or hacksaw;
- Line;
- Cutting stub
- Correiler;
- Putty knife;
- Gun for applying glue;
- Roulette;
- Pencil for marks;
- Mounting glue.
Trimming in Corners
You can do this in two ways:
- using a template or stouch for sawing;
- use factory cast details.
How to make a cut stub
 Baguette cutting stub
 Most of the premises, as a rule, have an angle of a room equal to 90 degrees. Therefore, it is necessary to cut a strip of a 90 or 45 degrees. To make it right, you will need a tool - stuslo. It has several slots, each with his angle of inclination.
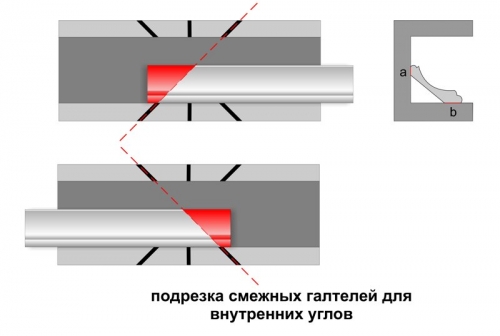
Clear ringing in the inner corner:
- To do this, take the baguette and put it in the stub. The hacksaw is inserted into the grooves and incisions are made on the workpiece. The left groove should be closer;
- The second baguette is covered by the same scheme. Only the right groove closer, left further.
The peller is tightly pressed to the far wall of the stouch and sticks in an inactive hand. The handle of the hacksaw or saws should be as close as possible to the hand, which holds the workpiece. On the saw should not be pressed too intense.
Scroll Rooms on external angles
- First, it is preferable to make marking. To do this, attach the bar to the ceiling and indicate the dimensions;
- We press the workpiece to the wall, keep it with one hand, note with a drywall knife;
- We choose the position at an angle of 45 degrees for the hacksaw saw;
- Cut the cartel;
- We put the second baguette in the other side of the stub and cut it in the same way.
If the walls are not perfectly smooth, it is better to use other methods without using a special device.
How to make an open cornix manually using a pattern
On the sheet of paper, draw a straight line. Pencil apply a point on the workpiece. Mark the angles 90 and 45 degrees using the transport. Draw straight lines through the labels so that when working with a saw, they were clearly visible.
 Baguette presses to one of the parallels under the desired angle and cut off with hacksaw
 There is another simple option to cut the cornice "on the eye". You should take part of the product and attach it to the right corner. During the applying, carefully observe and celebrate the place of the pencil.
 Pruning Plinth Pencil Pendas
 Using factory elements
So as not to poison two blanks, which is quite difficult, you can use corner elementswhich greatly facilitate work. They are sold with cartoons and there are internal and external. At the same time, it is necessary to take into account that the angles should be slightly changed and adjusted for conformity if they are greater than or less than 90 degrees.
- In the presence of the relief, it is necessary to ensure that the joints turn out to be a harmonious transition from one model to another;
- Begin to glue the product from the corner;
- The clearance on the connections should not exceed 1.5 mm. In the event that the gap between moldings turned out to be more - this problem will help to eliminate the sealant. If the clearance is large, you can close the strip from the material, and then fasten with glue.
Part of the successful work is due to the knowledge of the features of the angles - internal and external. The angular joint combines two parts: left and right.

We'll figure it out how to properly docile the ceiling plinth in different corners of the room.
Docking inner corner
Feature of these angles: the lower edge is longer than the top. That is, when the eaves are attached to the ceiling, the lower edge presses to the walls, and the upper goes inside. Therefore, the upper perimeter will be less lower and the ceiling part of the cartel is shortened when cutting.
The side of the cornice, which stood the side of the stub was glued to the wall. The face is glued to the ceiling, which was at the bottom of the instrument.
Before sticking the corners of the room are measured by a tilter.
Cropped blank under 45 degrees when the corner is straight.
The cornice is glued on the left side of the angle, if it was cut on the right. If cut from the left side - you need to glue on the right.
Both angles are trimmed with stupid, segments are applied into an angle for fitting. If everything is fine - you can glue.
Docking on the outer corners
The docking procedure is simple. However, they are not often found.
- To trim the model, first indicated by a pencil area of \u200b\u200bthe cut;
- Put the bar in the stub. On the left side of the long part, an angle of 45 degrees is cut;
- Part of the product that is located near the side wall of the tool glued onto the wall.

Potting ceiling karnis
It is pre-needed to wash and get rid of dirt, dust ceiling and walls. To align the surface, a putty is used. If the walls have small errors, use models with soft edges so that the differences are invisible.

Work begins with measuring measurements and numbers. The usual model length is 2 meters.
Carnizes are glued by such methods:
- On acrylic;
- Special putty;
- On wallpaper and sealant.
Sealants for carnizis sticky
The most suitable is silicone sealant. His advantages are that the baguette will be perfectly held, it is even suitable for those who have the wall curves. They can also smear the gaps that arise due to the curvature of the walls.
It is recommended to align the walls in front of the adhesive wallpaper and spiket. As for the sealant, the masters choose acrylic. They can be disguised as gaps and corners. In plus acrylic sealant of its cost. Its price is 100-150 rubles.

Docking on a straight square

After gluing the corners, direct planks are joined to the angular and attach. Moldings are attached to each other and need to ensure that their connecting places are smooth. So that the joints were perfect, the plots of the plinth are pre-grinding.
- Apply a model to the installation site;
- Remove excess glue with a spatula;
- Carefully wipe with a damp cloth until the composition is completely drying;
- The next day, the spatula of the plastering putty on the junction. This procedure should be repeated twice after drying the composition.
Color and disguise joints
Perhaps after adhesive ceiling eaves there are small spaces between the plots. This is all corrected using white sealant.
Use an easy putty as a sealant, it is necessary to walk it on the area of \u200b\u200bthe product. After drying it, it is recommended to remove the residues with a grinding sponge.

Output
Before sticking the planks, follow the saying "Seven times will die, once a revenue" and then there will be no mistakes.
You can watch video for practical familiarization:
Construction works involving the design of the corners are always evaluated by masters above, and people overpay for what they can do themselves. For example, few people know how to glue the ceiling plinth so that it happens beautifully and did not take much time. Armed step by step instructions and qualitative material, You can cope not worse than any professional.
Ceiling plinths are often called cartoons, so when choosing them in the store, such names on the price tag should not scare. Use this element to give the completed work done to hide the often formed defect between the ceiling and wallpaper.
Before finding out how to glue the ceiling plinth in the corners and make imperceptible joints, it is worth learn what to pay attention to when choosing:
- It is considered the highest quality material for the manufacture of ceiling plinths, but the market can be found PVC and polystyrene foam, as well as wooden and gypsum cartoons;
- the length should be standard - from 1.3 to 2 m, the rest can be considered trimming or non-format;
- when pressed on the surface of the angle of the ceiling plinth should not be a dent - otherwise we can talk about low quality;
- the edging style is thought out at the stage of selection and sticking wallpaper so that it harmonized with the interior.
Sizes of baguettes and corners
Do not buy material on natural markets or dubious suppliers, even if they offer such tempting prices. The ceiling plinth accrued from poor-quality material can seriously spoil the impression even from expensive repair.
Step-by-step instruction
To properly and beautifully perform repairs, you need to stick to some sequence in actions.
We compile a preliminary estimate
In repair, it does not happen, so it is necessary to calculate the required amount of ceiling plinth at the planning stage. If the wallpaper is mixed independently, the desired values \u200b\u200band measurements will already be on hand, as the perimeter of the room and there is a necessary total length of the required material.
When planning, the material should be taken into account standard length 2 m, and choose it in the store - in this case, you can avoid large number joints, and glue corners will be easier.
For the suspension you can buy one additional two-meter detail. It can also become useful if it turns out an uneven slice or will have to be practiced.

Plinth numbering
Preparatory work
Before glue ceiling plinths, they must be selected, without forgetting to check the quality and availability of all consumables. In addition to the corners themselves, which should be without dents, scratches and other visible defects, will also be required:
- glue (suitable mounted or "liquid nails", only for the dying period to be minimal);
- roulette (for measuring);
- mounting knife (they are easier to do cuts);
- plastering tape;
- stuslo (in order to correctly adjust the plinth);
- white sealant (for the resulting slots).
Hands and tools before work should be clean, as the material is easy to drink. When choosing an angle from which to start work, follow simple rule: where there will be less trimming, from there and start. It is possible to practice slightly and cut the material so that the corners of the ceiling plinth are equal to 45 degrees. This will greatly help the stub. Newbies from the first time it rarely comes out. If you pre-prepare templates, then unsuccessful attempts can be avoided, and the work will move faster.
Punning sticking
Having read how to properly glue the corners, prepared the whole required Material And the right amount of ceiling plinths can be proceeding directly to the work itself. Surfaces should be dry and without flaws, irregularities, tubercles or protrusions, as it affects the quality of gluing.
The adhesive substance is applied on the wall with a thin uniform layer. Big thickness should be avoided, as the glue will flow from the corner. How to glue baguettes on the ceiling so that glue or liquid nails are uniform evenly, even in the corner? Ideal if it is one continuous strip of glue. If the excess glue is still formed, they should be removed using a dry clean cloth.
Little trick. It is advisable to stick the baguette already on the filled glue, so after applying it is necessary to give it to hesitate for a while.
Now you need to slightly press the plinth so that it is smoothly "sat down" and the joints with the wall were as straight as possible. Hand or dry cloth spend all over the corner, slightly appling it, ranging from the corner to the room center. After the first strip takes its place, you can start a second that will be joined, and so on, while the room is completely glued.
The joints should be highlighted as much as possible. Best if they are only in the corner, but sometimes the size of the room does not allow this. In this case, there are some nuances. Let's look at how to stick the ceiling plinth in the large room:
- if the foam plinth is, then the joints are better to do straight, and not inclined. The places of the joints are easy to close with a putty;
- polyurethane or wooden plinth masters advise to cut at an angle (not forgetting that the drawing must match), and the junction should be smeared with silicone sealant, which after hardening should be pasted.

That's all the steps that need to be performed so that the ceiling plinth is a real interior decoration. After completion of the work, it remains to clean the corners, remove the remnants of glue and align the joints. Additionally, you can handle the plinth with ground mortar and paint. For this fit simple water-emulsion paint. The shade is selected depending on the interior and wallpaper: if the color is chosen a contrast, then when applied, paint should use a painting tape to protect wallpaper from contamination.
Technology is simple and simple. Once trying, you can become a real specialist in this matter and easily carry out similar work in the future when the need to cross the wallpaper will appear.
More video on the topic