Bank for coffee decoupage. Master class on decoupage Glass cans with napkins - original decor with your own hands
As a present, you can make a decoupage of a glass jar. It can be used both for pencils and as a vase for small colors.
Step-by-step master class with photo. Decoupage Glass Banks
To make a decoupage of glass jars and gilding need:

Three-layer napkin with the desired image
Glue for decoupage
Painting ribbon.
The basis (acrylic soil) for decoupage of the color of ivory
Acrylic lacquer
Paste for gilding cans in a tube (wax with metal pigments)
Brush for applying acrylic soil
Brush for applying glue
Lacquer
Decoupage of glass cans occurs in several stages:
Decoupage glass jars. Photo No. 1.

decoupage Banks and Gilding
1. First, we need to cover the jar of paint - acrylic soil. Make it we will be, keeping the jar for the neck, so it is pre-prepared to prepare it. The throat of the glass can not be painfully painted, because it has a thread to twist the lid. In order for us to keep the jar for the neck, we put it with a painting ribbon - the one that the windows usually rush. Press the tape throughout the ribbed of the neck.
Decoupage glass jars. Photo number 2.

prayer glass jar
2. Now we apply an acrylic soil in a brush and paint a jar. By covering the paint all the bank, we assign it to the side and wait until he dried (for this it will be needed half an hour). The bank covered with the soil can still enlighten the "skipping" - places, not very carefully covered with paint. Therefore, we appreciate the second layer of the soil and again we are waiting for half an hour, while the bank is driving.
Decoupage glass jars. Photo number 3.

cut the drawing from napkins for decoupage glass jars
3. In the meantime, we take a napkin with the desired image and take it carefully. Our jar will serve as a container for candied lemones, so the image we decorate the jar will be on a lemon theme. So, cut the flowering branch of the lemon with fruits. The napkin consists of three layers, two of which (lower) we need to remove. Only the top layer of napkins with an image applied to it is useful for decoupage.
Decoupage glass jars. Photo number 4.

we glue a drawing on a glass jar
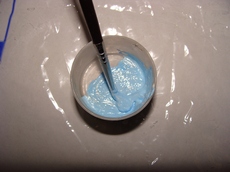
4. If the bank has already dried, we apply an image to it with lemon. Macaus Tassel in glue for decoupage (actually, instead, the glue can be used by the usual PVA, on a third diluted with water) and apply glue to the image, pressing it to the bank. The movements of the brush should be from the center of the picture to the sides - so we can smooth off the bubbles that form a napkin. Thoroughly smoothed the brush all the image, watches so that no edge of the drawing remains without glue. Then we wait until the bank dries - for this we need at least half an hour.
Decoupage and gilding. Photo number 5.

we make gilding on the bank
5. After that, we take a paste for gilding, squeeze out a small golden point from the tube right on the jar. I smear my finger at the same way as a larger surface of the can. Gilding should not be uniform: in one place we will apply more pasta, in another - barely noticeable "gilt". The image with lemons is not applied.
Decoupage and gilding. Photo number 6.

we make gilding on the back of the bank
6. But with the "back" banks can be dispersed and allowed a large area. Again, we do it fragmentary: somewhere there will be more paste, somewhere - less.
Decoupage glass jars. Photo number 7.

cover decoupage lacquer banks
7. The last step is to take another brush, make it in acrylic varnish and apply to the jar. After the lacquer gets dry, we will put another layer of varnish on the bank, since one will be not enough (the surface remains Schelava). After applying two layers of varnish and the final drying of the banks can gently remove the painting tape with her bumps. If the paint coating at the top of the cans (at the junction with the neck) turned out not very smooth, we can hide this disadvantage, smearing the neck for gilding.
Decoupage glass jars. Photo number 8.

Step-by-step master class with photo. Decoupage Glass jars and gilding
Decoupage glass jars and gilding is ready!
Master class with photo: "Decoupage of glass banks and gilding" made Nika Shooteva
Solyanka jar in rural style, decoupage. Master ClassI, like many of you, probably, is stored in an ordinary glass jar with a twist, which remained from tomato paste Mak-May. And I have long wanted to arrange it under the ceramics in a rural style to make a jar for bulk products with your own hands. Finally, I made a decoupage of a glass bank and offer you my master class.
In general, the easiest, in my opinion, is a decoupage on glass. I have already done such things many times - decorated glass jars with their own hands. There is nothing difficult in this, everything you need for the decoupage of Sollyanki in a rural style is a small set of art accessories, inspiration and 3-4 hours of free time. For women, the decoupage can turn into a real hobby, and those who do not likelandite, and conducts leisure reading, we advise you to visit the women's website of the Bratsk Belarusian people dedicated to Courtre, poetry, creativity, needlework and many other women's topics. Website www.femina.by has become a sponsor of this master class.
For decoupage on the glass we need:
- Polytero jar with twisting lid
- Scissors
- Napkin for decoupage
- Porphoon sponge or sponge
- Tassels
- PVA glue + water breeding jar
- Acrylic brown paints, blue
- Titanium whites acrylic (white acrylic paints)
- Acrylic glossy lacquer
- Liquid remover or alcohol with wool for glass degreasing
- Hair dryer for drying
- Multicolored glitter glitter for applications
Decoupage technique for glass, or decoupage glass jar for bulk products in rural style with their own hands
![]()


Well, let's start decoupage. Liquid for removing varnish or alcohol and cotton remove the remnants of glue from the label on the jar, well degrease the surface of the metal cover. With a wide brushes on a glass surface, we apply a layer of white acrylic paint - this is titanium bleached.


In painting the jar of leaks, proceed to the lid. After the colors we give well to dry, so that there is no turning. You can speed up drying with hair dryer. Then in a small dispair mix titanium bleached with a drip of blue acrylic paint. We need to apply a blue background that will perform from under the wipes glued on the jar. In theory of the composition, the blue sky is suitable for us. We are stirred to bleel with paint and very quickly with the help of a sponge or sponge, we turn on the top of the jar.


We get tonned in the top of the jar. Now cut out the fragment of the napkin, which in theory we will have pasted on the bottom of the jar. In a separate small dish, we break the glue PVA with water in proportion 1: 3 (in the photo the water is added, but the glue is not stored in it yet).


Applied fragment apply - trying to our jar, trying to arrange exactly. Lock the napkin will not work, so you just need to keep it in your hands along with the jar and in the process of gluing to ensure that the napkin is not shifted and did not break. It is necessary to glue the napkin from the center, gradually moving to the perpole. Do not hurry to capture the tassel large squares. It is just necessary to make a brush in the glue often (the brush is better to choose a small very, with a very soft pile). And typing a drop of glue, gently apply a brush to a napkin, like a wig paper, conquering literally in a millimeter area. So pass slowly and carefully, so that the napkin is not wrinkled from excessive moisture and sharp movements with a brush. If in this case there will be a hurry, then the wet napkin will bake, sticking with wrinkles, it will be very ugly. Having salave in a circle from the center first in one direction, glue in the other (from the center). The glove napkin carefully dried with a hairdryer.


The place where the dusting was not enough napkins, we draw up with a gold circuit for drawing on the glass, drawing a woven wicket. Under the gate brown acrylic paints, draw a path with a brush. We leave the jar to dry and proceed to the lid. Again, we stir the bleached and the speck of blue paint - you can directly on the lid. Sponach or sponge tinging the lid in a blue color. Such with a hair dryer very carefully.


The dried napkin and the jar we open the glossy acrylic varnish, carefully under the dryer. After carrying the marafet: with the help of glue with sparkles, we apply surround points in the places where the flowers on the napkin. We leave dry hairdryer and leave still dry. We start to the cover - we open the blue tint with acrylic glossy varnish and thoroughly by the hairdryer. Upon well-dried surface of the lid, we applied the points with glue glue to the decor. Everything is carefully dried, without touching once again, it is better to leave for the night for absolute drying. Decoupage jar - Sollyanki in rural style is completed.
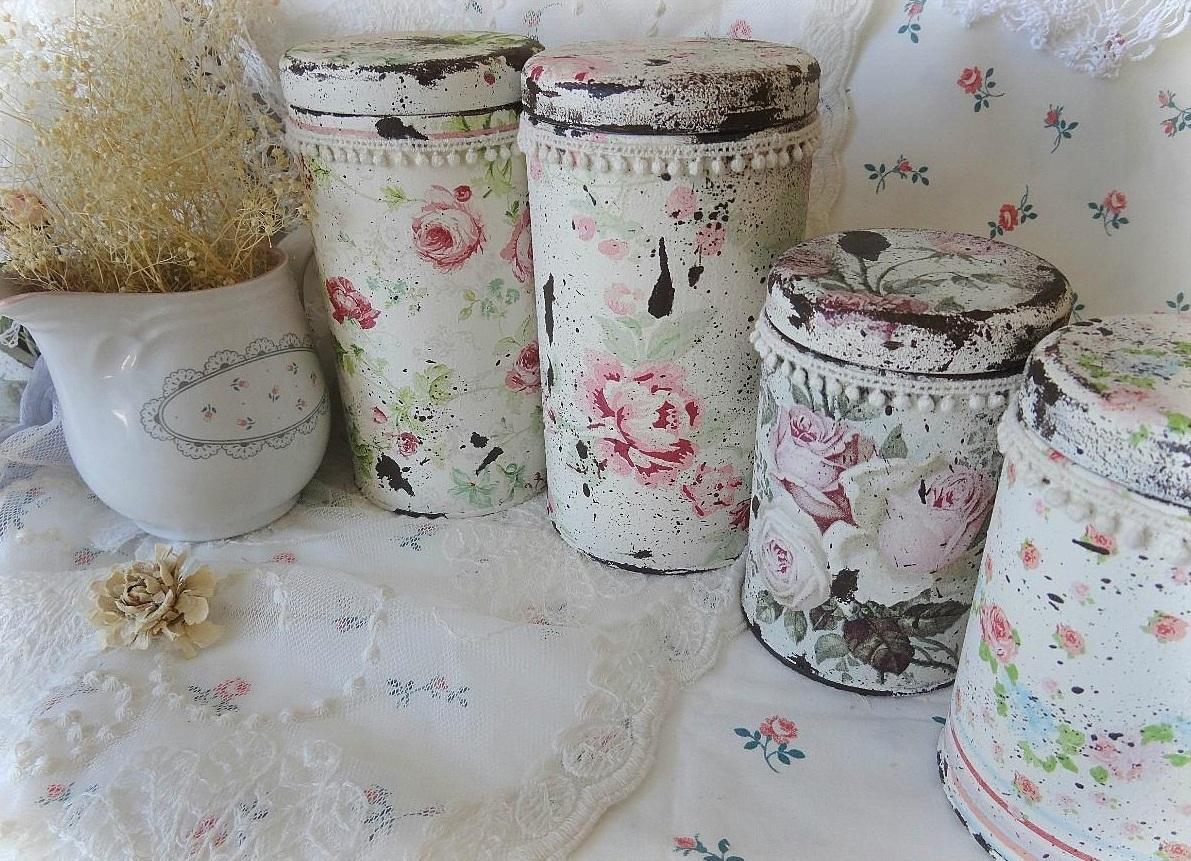
What's a lot in every kitchen, so these are different jars, boxes and another container for spices and bulk products. Find the perfect set in the store Even with such a big choice is difficult. But thanks to the technique of decoupage, you can create beautiful containers in a single style from glass cans. Decoration of objects with the help of carved patterns is known since the Middle Ages. With materials for decoupage there are no problems - you can find them in all stores of stationery or at home.
Decoupage of glass jars with napkins: 5 accessories
This is a creative occupation that brings pleasure from the process and an incredible result. The full set of dishes can be made with your own hands, if you decorate a few jars of different sizes and in the same style to make a clock with a napkin.
A set of small containers is originally, a special stand is created for completeness. cardboard box. It first wakes up with tight paper, then covered acrylic paint and decorated with drawings from napkins. At the final stage, acrylic varnish in 2-3 layers is applied.

To work well will fit the napkins from rice paper, especially since the benefits of its use is much:
- Saturation and dense texture of decorated areas;
- Volume of image;
- "Congenital" decorative elements;
- When sticking, paper is perfectly merged with the surface;
- For beginners, use such material is convenient because it does not need to be preprocessing.
Condifies the decoupage technique with its limitless choice of compositions and a variety of stylistics. You can transfer any image on the glass. Galina vacule an experienced decoupage master, in his training materials tells how to work with glass, creating unique patterns.
Decoupage Glass Banks: Master Class
Described master class - perfect option For beginners, and a good help to needlewomen with experience who love to create masterpieces with their own hands. The napkin technique is considered one of the easiest and most inexpensive.
For creativity, you will need:
- Original three-layer napkin;
- Special glue;
- Acrylic paint, preferably in the spray;
- Acrylic varnish, brush, scissors;
- Alcohol or dishwashing agent.

For decoupage of kitchen cans or bottles, you need to pick up several glass tanks with closing tight lids. The round will be a form or another, it is still important that the product is suitable for further use.
The surface before applying acrylic to it needs to be deguted and dried. You can use alcohol or dishwashing liquid. It is required to paint in 2-3 layers to make the composition saturated all the product. While preserves, decorative elements with napkins are prepared.
Carved fragments for decorating the faces of the tank "try on" around the perimeter of the can, then, with the help of the brush and glue are applied to the desired places. If the form of the product is asymmetric, it is important to pay special attention to the front part. The structure of the napkin is fragile, so it should be approached to the process of pasting gently. Applying elements small sitesIt is worth avoiding the formation of folds and wrinkles.
Important! If you use PVA glue Paint will come to the front part through the pores of the napkin. Here you need a special glue for decoupage. It is very strange that many authors of articles advise beginners to use PVA, entering people misleading.
The glued elements must dry completely, then you can start working with varnish. In order for the tank for a long time retaining attractiveness and justified its purpose, the means is applied in 2-3 layers. While the lacquer did not have time to dry, smeared and released in the edges of the drawing of surplus, are removed with a cotton disk in alcohol. The finished product is recommended to bake in the oven so that the drawing is not flushed. Time for baking 1 hour 30 minutes, temperature - 130 ° C.
Decoupage Glass jar: effect effect
Jars from under baby food You can use for storing soda, salt, coffee and other bulk products. For this, labels are removed, the covers are repainted if desired, the original labels for signatures are manufactured.
Covers are decorated in several ways:
- Wrapping paper;
- Cloth;
- Color acrylic composition;
- Brown or magnetic paint.
The technique of artificial formation is popular. Proclastic varnish helps to achieve such an effect. Craquelur is applied to the treated surface, and from above the paint that cracks under varnish. The grid of cracks located in chaotic order is formed. The paint is selected contrasting color, looking through the cracks, it will give a decorative additional effect.
For the bottom layer used brown colorIf the base is yellow, the top layer is blue, it means that the bottom is blue. It is important to take into account - the layer of varnish thicker, the cracks will be larger and pronounced. The main paint is applied to the cracker, when it has not yet frozen inside, but it will not stick to the fingers.
When finished decoupage cards or napkins are not used, you must print the selected drawings on the printer with a waterproof cartridge.
For applying, a brush or foam rubber is used, in the first case patterns are obtained smooth with clear edges. The foam rubber allows you to achieve soft and chaotic cracks, in the process of drying them will appear more.
Decoupage on glass jars: direct and reverse appliances
Before doing creativity, it is important to determine the technique of execution. It happens direct or reverse. The use of one or another method largely depends on the functional use of the subject. For example, a jar for storing liquid non-schish products is made by direct drawing. The tank for spices is decorated with reverse decoupage: the lacquered surface should not be in contact with food.

Ways to decorate:
- The direct decoupage is distinguished by the use of special soil for glass and other, non-absorbent smooth surfaces.
- Reverse decoration is performed exclusively on the glass. There is a turnover and inner side of the product, so only banks with a wide neck are suitable, so that you can easily put the appliqué.
The corrugated glass will not fit - the image will be very distorted, but if the original, bizarre effect is required, then it is possible to work with such a surface.
Technique Decoupage Glass Bank (video)
Original banks, which are difficult to find decent application, but also do not want to throw away, with the help of decorative decoupage techniques it is easy to turn into exclusive innovations of the interior. Decoupage on glass for many opens unusually beautiful world creativity and decor. In his bins there is a huge stock of ideas, to create masterpieces that are originally complementing the interior of the house or apartment. New options are always emerging for inspiration, master classes, video instructions, thanks to which it is extremely economical to realize ideas and surprise everyone with their grace and simplicity.
ATTENTION, only today!
Decoupage for beginners
What boring kitchenware, simple wooden horses, ordinary flower pots, an old shabby stool - I'll think about it, I would have painted everything, would have turned into works of art. Familiar? Personally, I still like.
But the problem is not Nova. In front of our brethren, she stood back in the seventeenth century - at that time, the last pussy of the fashion was painted oriental furniture covered with varnish. However, not everyone could afford such furniture. And the Europeans found a way out
European artisans themselves began to make lacquered furniture. They glued various pictures (painters copied oriental ornaments) and covered in many layers of varnish. This made a complete impression of a picture applied to the subject. Subsequently, this was the name - decoupage.
Nowadays it is much easier. I think each of us, I met in stores beautiful paper napkins - here and flowers, patterns, and animals, etc. This napkin is the finest paper that falls on any surface is glued and it seems to be merged with the subject, becoming one single.
The newcomer is easiest to start with napkins, because For their preparation before gluing, it is only necessary to remove the top layer with the picture and can already be glued.
This beauty can be made with your own hands!
Decoupage for beginners. Master class: jars for bulk products
For those who decided to try themselves in decoupage - I propose to start with the simplest, direct decoupage. It can be safely attributed to the section "Decoupage for beginners".
Using the technique, decoupage can be realing the most ordinary plastic jars from. I propose a master class and step-by-step instructionsWith which you can easily make a decoupage at home.
With the help of a decoupage, we will make beautiful jars for bulk products that will not be ashamed to give to any holiday, for example, mom or grandmother on March 8.
So, we take a jar for decoupage from. 
1. First you need to carefully wash the label. If the plastic remained sticky factory adhesive - it can be removed, rubbing fluid to remove varnish. 
2. Since the plastic surface is quite difficult to decorate - it is bad "sticking" to the paint, before starting work it is necessary to sand it. Losing sandpaper on jars, we make them a little rough. 
3. Before staining, the surface must be rebounded. Apply one layer of acrylic artistic soil. 
4. On the dried soil we apply the background paint, almost always this white acrylic. It is necessary to glue a napkin only on a white base - this is the main rule of the beginner decoupage. 
5. While the paint will dry up - you can pick up a napkin. If you plan to store bulk products in these jars (spices, tea, salt), you can choose some kind of vegetable pattern, for example, images of small berries. Such bright berries can also be embroidered with ribbons on napkins and make an additional accessory for the kitchen. 
6. Berries need to carefully snatch from napkins with hands and separate only the top layer with a pattern. 
7. We begin to glue fragments. Soft brushes with synthetic bristles, we wist the decoupage glue from the center to the edges of the drawing pattern. It is very good to master the decoupage for beginners precisely on small fragments - they are easier to glue without folds. So gradually we glue the entire surface of the cans and wait until the glue is dry. 

8. The drawing on this napkin is pretty bright, so it's not worth doing too many urges. You can describe small strawberry flowers. In the center of each flower we put the point with the gold circuit, and instead of the petals, we put the same dots with a silver glitter. 
9. Berries can be made volumetric using a transparent vitreous circuit. From afar it will not be noticeable, but close to the touch - it is clear that the berries rise slightly above the surface of jars. 
10. Between the berries, on the background I put several points with a golden glitter. 
11. When the samples were well dried - you can cover lacquer jars. For the kitchen, it is best to use acrylic varnish and apply it at least ten layers. 
12. When all layers of varnish are dried, you can "revive" a drawing with a ribbon. I tied short satin ribbons around the neck of jars. 
13. Now these jars will decorate any kitchen. I plan to store in them the weight fruit tea 
I hope you can master the decoupage technique and this master class has become a useful advice for you.
Master class for beginners Decoupage
In this article, I will tell you in detail how you can make such a decline in the technique of decoupage with napkins. 
We will need:
Bottle of unusual shape;
White acrylic paint;
PVA glue;
Three-layer napkins with robes;
Pink acrylic paint;
Lacker multiple two-component (Creall);
Acrylic varnish.
So, glass bottle Ground white acrylic paint in two layers. 
We give every layer to dry. And begin to make a decoupage. Separate from the napkins the top layer, cut out the fragments you like and gently glue them to PVA. Envy. 
Then they paint the pink paint with napkins places. It seemed to me relevant use in this work of the crockel lacquer (this varnish gives the effect of cracks). 
Cracks I smear oil paint. Cover our decouphant bottle acrylic varnish. Envy. Ready! We made a decoupage of the bottle with napkins. That's what happened. I wish you success! 
Decoration flower Gorshkov. Decoupage technique
Indoor Flowers - Decoration of everyday life and joy on holidays. We will not talk about their benefits as air purifiers or remember healing properties Some of them. Turn to their aesthetic function. Flowers not only adorn the interior, but also give him a completeness. Not less important in the interior and flower pots. There are also ordinary, unremarkable pots, and interesting enough. You can make a floral with your own hands, which will harmoniously fit into our interior. Materials and devices that will be needed for this can not always be found in free sale, but enough online stores offering a variety of quality products for decoupage. It is a decoupage technique that I propose for decorating a flower pot.
Tools and materials:
Plastic floral
Multilayer Napkin with Pihalok Pattern
White acrylic paint
Painting ribbon.
Blue Paint Spray
Yellow rhinestones
Hearts with hearts
Transparent acrylic varnish
Universal glue
Wide brush
Scissors
Getting to work on decorating flower pot
The surface of the entire flower pot except for the rim is covered with white paint.
After drying, the paint under the bezel is glued by a painting tape to protect the white surface from a blue spray. Blue paint-spray paint the rim, after drying, we remove the painting ribbon. If you replace the spray on the usual paint, the painting tape will also be needed.
From paper napkins cut the violet. To be more convenient, you can first cover with markers. Gently separate the colorful layer from the paper base
Carefully press each violet to the white part of the pot and carefully over her surface with a tassel with acrylic varnish. After all violets are dry, the entire surface of the pot will need to be covered with acrylic varnish. Now our flower pot Water is not terrible, you can wash it without fearing to damage the picture.
Between violets, we glue yellow rhinestones with the help of universal glue.
On the blue bezel glue the blue braid with hearts.
If you wish and a small fraction of fantasy, you can create other pictures. It is important to select the combined colors. So, in our example, blue violets on a white background required blue colour Rim and blue braid. White daisies on a salad background ascend to green bezel.
For decoupage, you can use two-layer napkins with a beautiful pattern, and pictures on ordinary or rice paper. In the latter case, the technique will be slightly different:
Paper drawing for a few minutes put into the water, we shift onto a paper towel and scare thoroughly;
A small amount of glue is applied to the surface and on the opposite direction of the pattern;
The drawing is neatly transferred to the surface, press the sponge (so that air bubbles go);
Covered with varnish or glue for decoupage all surface.
Each hostess regularly buys various foods in the banks of various intricate forms in the supermarket. Often, it is a beautiful bank that attracts our eyes, and we make a purchase, without even thinking about the quality of the product being in it. After a certain time, there are quite a lot of such cans from different materials. However, do not hurry to throw them out or try to sell someone. Today we will look at the decoupage of coffee banks, the best thing that can have it is a capacity for regular use.
Make a decoupage on glass jars
If you have cans for bulk products, you can make tanks for storing coffee, tea, sugar, salt and other food products. At the same time, you will spend very little effort and cash. Very many people technique decoupage so fascinated that they were further designed in this style not only a kitchen inventory, but also furniture items.
For decoupage glass cans you will need:
- empty glass container;
- three-layer napkins;
- glue for decoupage (can be used ordinary PVA);
- acrylic paint;
- if you wish to create a relief, you can use the eggshell.
Decoupage on a glass jar:
- If you decide to make jars for bulk products with your own hands, then you should take an empty glass container, carefully wash it out with a dishwashing agent.
- Cracking glass acrylic paint vessel. For this purpose, white, blue, beige or other light shade will fit. You can create a saturated color if you paint several times.
- If you want to create a beautiful relief on the bank, then at this stage it is necessary to glue the chopped egg shell to the tank.
- We take triple napkins with the image you are interested in. Separate the top layer with a pattern from two others. If a fragment is needed, and not a whole napkin - we take off.
- On the container we apply glue PVA.
- We glue the napkin and dry tassel smoothing it on the surface.
- If you have glued to the surface with an eggshell, then you may have no painted spaces. In this case, it is best to use one-year paint with a napkin and paint the gaps. Give dry.
- Cover the container with varnish. It is best to use a colorless acrylic. It does not smell and dries quickly. It is necessary to cover in three or four layers.
Bank for bulk products with their own hands is ready! It can be decorated with ribbons, pebbles, beads or other decor - it all depends on general design Kitchens and your personal preferences. 
Important! In solving the issue, how to decorate jars for bulk products with your own hands, decoupage is the most the best option. This is due to the fact that you paint all the surfaces from the outside. They are not in contact with food. And besides, all the necessary items for decoupage are absolutely harmless and safe for human health is cheap, and the result is incredibly interesting.
Decoupage of the Old Tin Can
To decorate cans for bulk products with your own hands, you can take tanks from tin. Such iron banks It will become an excellent interior decoration in the kitchen, in the country, in the garden, but anywhere. They can become a real interior highlight!
To decoupage tin can you need:
- tin Bank itself;
- acrylic paints of different shades;
- acrylic varnish or crochelinary;
- three-layer napkins;
- pVA glue;
- decor elements in the form of beads, rhises, pebbles, ribbons and so on.
Decorate a tin jar for bulk products:
- The jar was a means of washing dishes.
- We wipe the rut dipped in alcohol.
- Strace the jar into the desired shade. We do it carefully - there must be at least three layers.
- At this stage, you can paint paint the desired patterns, a monogram or other ornament.
- If you want to create an antique effect, use the crockel lacquer. It must be done before gluing the napkin.
- The necessary piece of napkin is separated from the other two layers.
- The bank is facing the pva glue, we glue the napkin. Gently wipe with a sponge or dry tassel.
- Let's dry with a paper product.
- Apply varnish. After applying the first layer, the surface can be sprinkled with melted glitter, attach rhinestones, beads and another decor. After that, again cover lacquer.
- Varnish must be at least three layers.
- Let dry and enjoy a beautiful tin can!
Decoupage plastic banks
If you have a desire to make jars for bulk products with your own hands, then you do not need to use tin or glass containers. You can use modern plastic vessels, improving their standard design.
Important! These items in each house are quite a lot. They can serve not only with ray products, but also beautiful vases, crafts for home, for giving or storing small things.
For decoupage of plastic containers, you will need:

We make a beautiful container of plastic blanks:
- At the first stage, you need to prepare a plastic container. You can take two bottles, with a capacity of two liters, trim them in the middle and combine with the help of a glue gun. Or just take the most simple bottle, Bank, Vazon, which will be as the basis. This is not fundamentally.
- The plastic vessel must be thoroughly washed, dried and degreased with a rut dipped in a medical alcohol.
- Apply paint into three layers. Thus, you must achieve the desired shade of the future coffee banks.
- Majm the surface where the drawing will be, PVA glue.
- Fragments of napkins that should be glued to the jar, pre-disconnect from the rest of the layers and, if necessary, tear away from each other.
- We glipulate the napkin on the jar.
- I wipe the surplus glue with a sponge or tassel, thereby making a napkin. Do it stands carefully, so as not to break the paper product.
- Let's dry the glue.
- Covered varnishes in three layers.
- Jars for bulk products do it yourself from plastic blanks are ready!
Important! The main difference between the plastic decoupage from everything else is that at the workpiece you can cut unnecessary elements or to give the necessary form. So, you can make excellent penguins or any other figures from such blanks.
There are many options how to decorate jars for bulk products with your own hands. Decoupage is fashionable, beautiful and easy. You can create a whole series of dishes in such a style. Try, and you will succeed! In addition, you can attach your children to this exciting action, and such an occupation will become the most real family hobby, tradition. Namely, it combines close people - common interests.