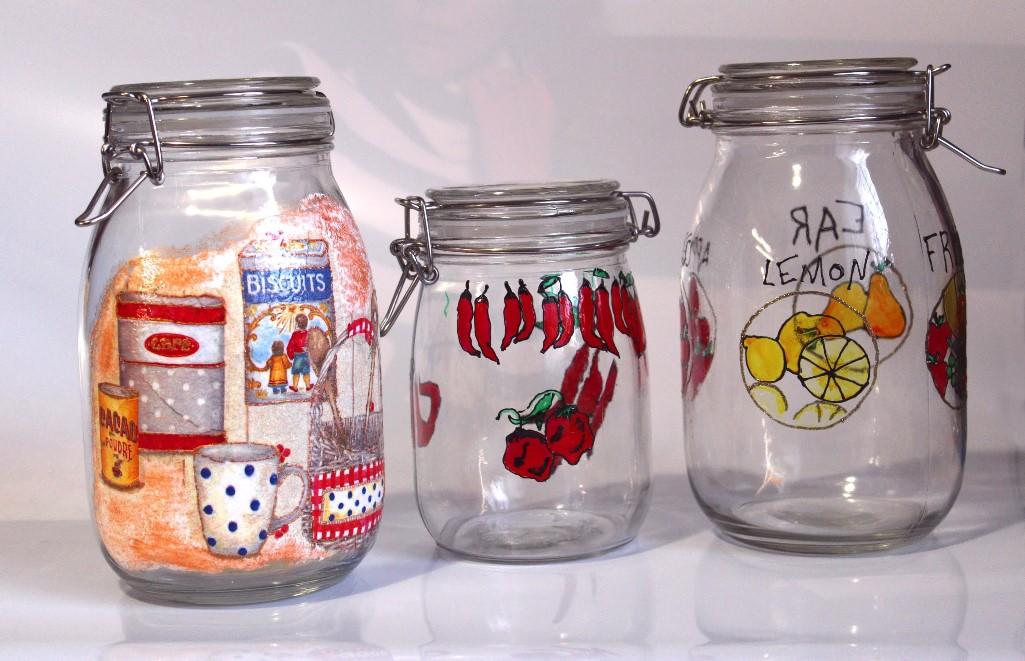
Decoupage on a metal jar. Decoupage Tin jar for sweets
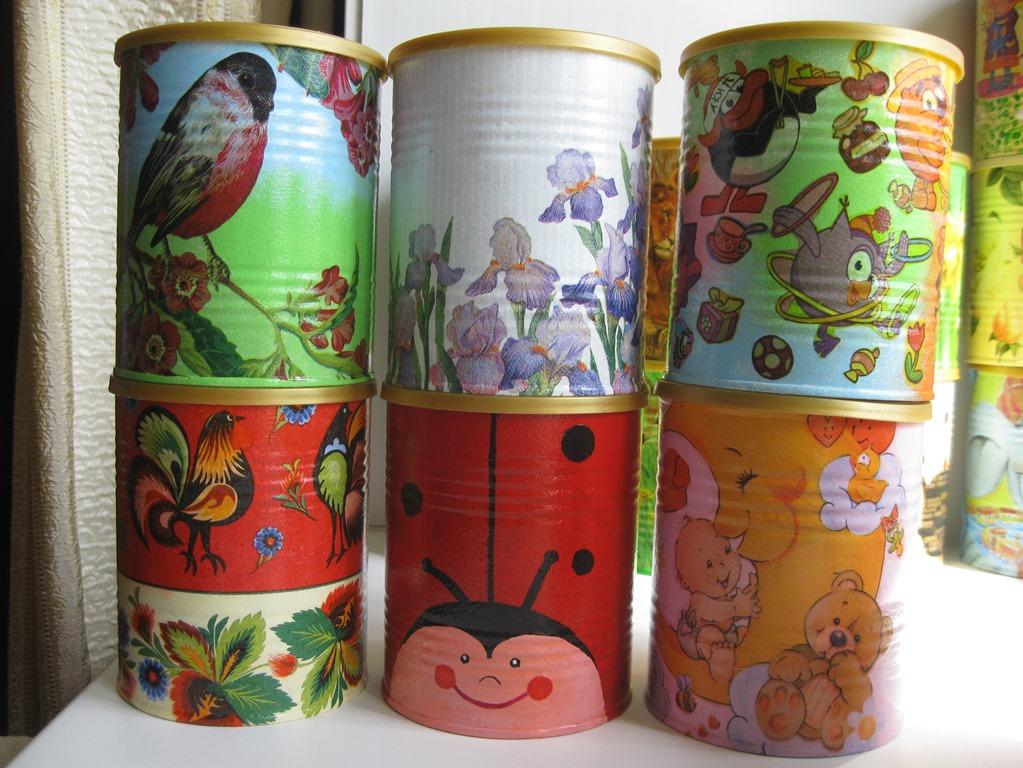
With the help of decoupage technique, you can win the most simple items, even those that in the idea should be sent to the trash can. Here, for example, we all buy tomato paste, baby dry food or something like this in iron banks. What do we do with them with these banks? Well, the best - we use for seedlings, and mostly - in the trash. But you can decorate this jar. Maybe you will inspire this idea with red cracks, using napkins? It turned out beautifully)

So, we look at the photo master class and inspire the decoration and decoration of the cast material - the iron can. The decorated jar can be applied to create a decorative Topiaria, as a pot, or as an organizer for brushes with pencils and dissolve it on the most honorable place of your desktop in the office) by the way, about the desktop) you have not found the work of your dreams? Well, the one on which is like a holiday?) I invite you to look at the site of the sitehttp://rabota.ua/, here the work will find you myself, you just need to competently create a resume (there is an article on this topic, how to create a resume) and leave it on the site. Search for vacancies on the site will help you find a job faster than you think) Good luck!
Decoupage Iron Bank. Photo master class
For work, we will need the following materials:
- iron can,
- acrylic paint of red (or other color, depending on the color of the fragment of the napkin),
- acrylic paint white color,
- crocheral lacquer for decoupage,
- glue for decoupage or ordinary construction PVA,
- napkin,
- a piece of foam rubber or sponge,
- tassel.
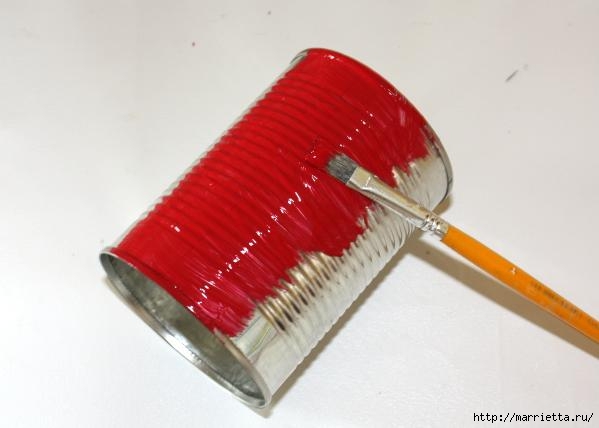
Getting to work. My, we clean from dirt and dried our iron jar. After drying, we paint red acrylic varnish.
A thin layer of crusture varnish for decoupage is applied to the dried layer of red acrylic paint for decoupage.
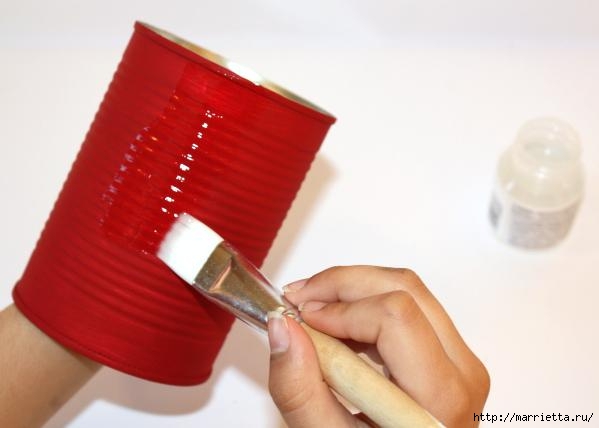
We leave the jar before drying varnish. 
Now we take white acrylic paint And "Chpokay on a bank", we apply it with a piece of sponge or foam rubber.
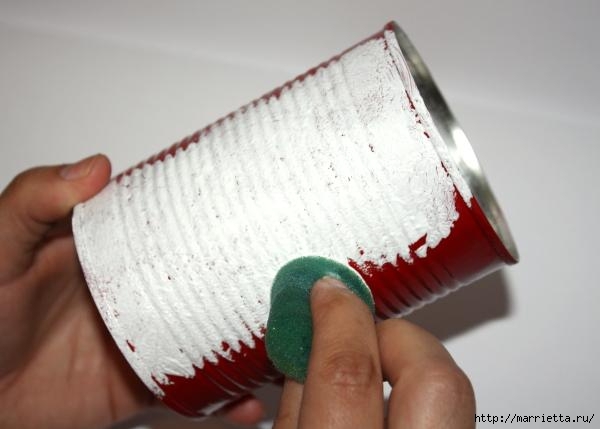
After a few minutes, we begin to observe the appearance of cracks on the bank.

We take the napkin, separate the top layer and tear the motive desired to decoupage.

We glue the motive to the jar.
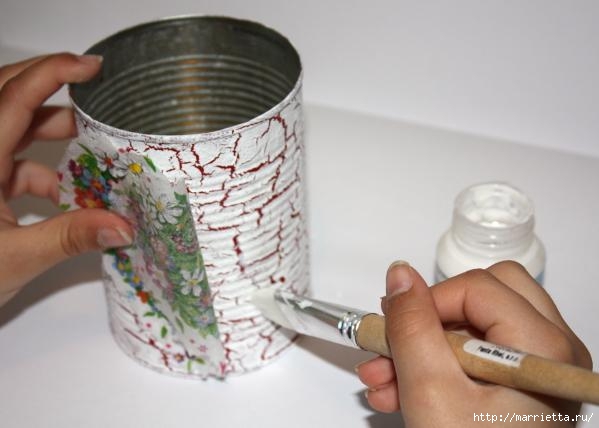
From above, the motive is coated with a layer of glue for decoupage. In order to get a barrel, you can glue another napkin on top.
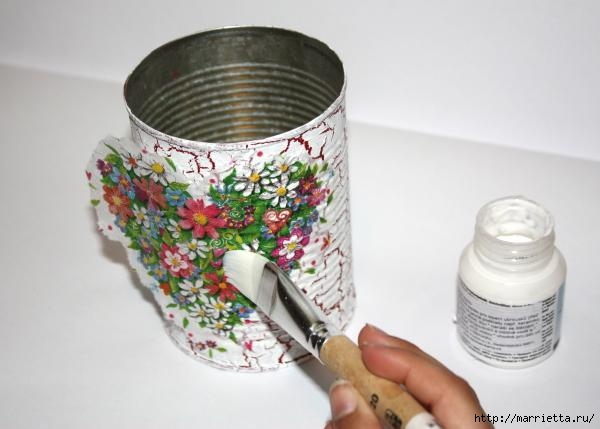

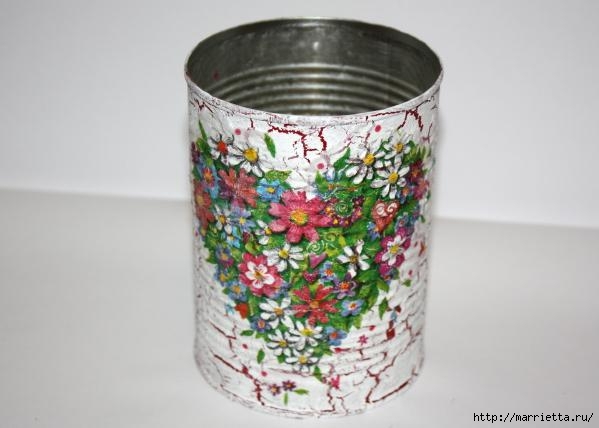
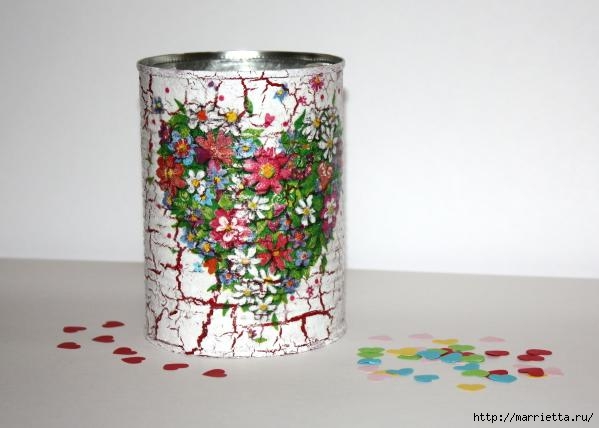
Dried work and admire your creation)
Decoupage is a decoration technique for various items and surfaces by overlapping paper drawing and securing it on the subject with special varnishes. This technique is loved by craftswomen from all over the world, it allows you to decorate bottles and baked banks (even metallic) eggshell and lace, as well as other materials.
How to make a decoupage of a tin jar
In each house, many canned cans of ordinary and tanks from under a children's mixture or cream, which often emit. But if you apply a little fantasy and a droplet of labor, own hands Of these, you can make wonderful things that will complement the interior of the house or apartment. And if there is little imagination, then you can see a master class.
Do not forget that it is necessary to start work with degreasing a tin surface, for these purposes any alcohol-containing liquid is suitable.
First of all, decide what you would like to see in your product. Depending on the purpose of the thing, the materials are selected.
But most often you will use:
- Acrylic paints;
- Skin;
- Beautiful napkins;
For example, in order to create a beautiful floral porridge, you will need only a couple of hours. At the beginning of work, clean the surface of the can and degrease it, you can now start the design selection. It all depends only on your imagination, you can combine different elements and textures, painting the product or decorate only some elements according to the scheme.
Various decoupage techniques cans and bottles
Those who have already tried to reorganize in the technique of decoupage several jars and bottles, hardly stopped on it. The craftsmen want to recognize various techniques and create new masterpieces. Despite the seeming complexity, all the decoupage techniques are quite simple. Here the main thing is not to hurry and then the result will exceed the most bold expectations.
For example, the reverse decoupage technique is very popular, there is a vase, and a bank, and a bottle. Such banks are well suited for storing honey, it always advantageously distinguishes such a technique. Well-fit banks made in the style of reverse decoupage, as a container for bulk products. Tell how to make the decor in this technique step by step.
So, proceed to work:
- In order for the image "lay down" to the surface, it needs to be deguted. Avoid small jars, with them very inconvenient to work. Then, the previously selected image is glued on one side of the can, but by picture inward.
- Keep in mind that in front of the image there will be a window, the rest is completely reapken. For the product to be more interesting, the picture needs to be glued and on the side viewed sides.
- The image can be glued with any glue, after drying it is neatly applied varnish. The main thing is not to touch the glass, otherwise all the product will not look carefully.
- Next, the entire jar, except the window, is covered with paint. You can use a brush or foam rubber.
- After drying, you can proceed to decorate the bank itself. It depends only on the wishes of the wizard. Some add different colors, others continue the decor in the technique of an ordinary decoupage.
- Do not forget to reap the lid.
In such a style, the piggyback looks well, but the bank is better to choose the largest size.
Work in the technique of reverse decoupage is ideal for a gift.
The craftsmen love to decorate in the technique of decoupage bottles. Most often used glass, but if desired, you can find application and plastic. The technique does not change from this, the alcohol-containing liquid is also used to degrease the plastic surface.
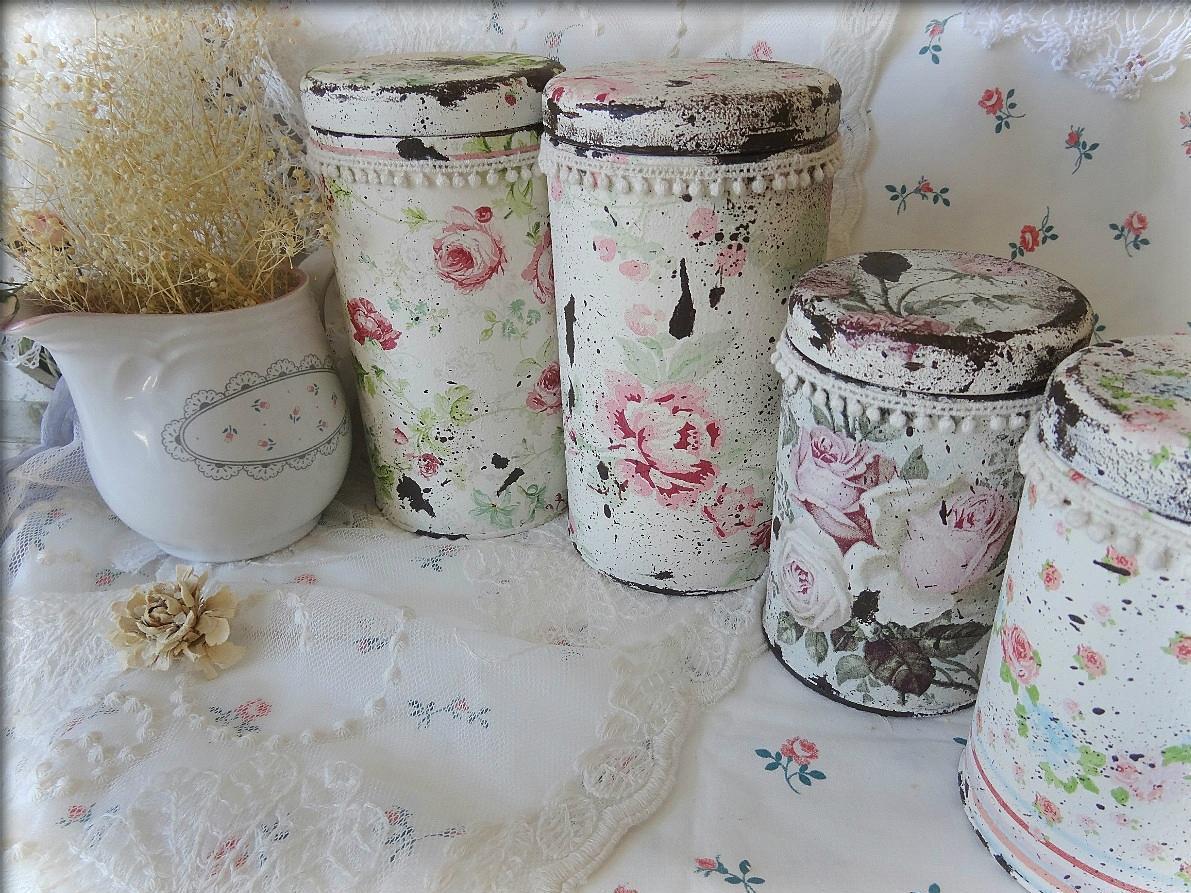
Decoupage of jars for spices: simple decorating methods
Each house will always be copied a large number of Glass cans of different sizes. Usually they dust in the basement or storage room, but for the craftswoman it is simply invaluable material for creativity. Especially good if there is small child. Then you can use accumulated jars from under baby food. They are ideal as a container for the storage of spices. With the help of decoupage, you can perform them in the style of your kitchen.
It is very important before starting work thoroughly clean the surface of jars, otherwise it will not be possible to decorate objects in the decoupage technique.
The glass surface is required to clean from labels and any other contaminants. To this end, it is possible to use water using soda, after the bank must be washed and dried. Soda is well repulsed and other surfaces. Now you can proceed to work itself.

To decorate you will need:
- Glue;
- Beautiful fabric or napkins;
- Brush;
- Pure tissue napkin;
- Acrylic paint.
The work itself does not take much time, but will require accuracy and patience. It is necessary to remove the lids and re-establish them. The lids are applied to the material and cut the circle of slightly larger diameter. Then the napkin is abundantly wrapped with glue, after wetting it is divided into several layers. The upper layer on which the image remains, and will be applied to the lid, pre-lubricated with glue.
The image must be applied extremely carefully, bubbles are driven by a brush dipped in a glue. After the drawing is secured, it is covered with several layers of glue. If desired, the jar can paint acrylic paint or to apply at least three layers of varnish. After drying the lid is completely prepared. In order for the jars for spices look more stylish, it is worth creating vintage labels for them. They can be made of paper, fabric or wallpaper residues.
How to raise yourself mood: Decoupage Kitchen jars
The kitchen is a special kingdom in which there should always be a good mood. But, if you suddenly urgently wanted to update something, then take a look at decorating cans in decoupage style. This is a very simple and cheap way to change your kitchen and make it original.
You can use different items as the basis. For example, a standby stand for kitchenwaremade from the packaging of the "Prinls" chips. Such a thing always attaches a special mood.
And most importantly, you do not have to spend big money on this important thing in every kitchen.
Decoration is performed in the technique of an ordinary decoupage, and the finished product can be decorated with ribbons or leather cords.
Very interesting watery cans for bulk products in decoupage style. They are done quickly and easily.
To work, you will have to stock only a few materials:
- Glue;
- Colorful napkins;
- Acrylic varnish.
Such work will take at your no more than two hours, and the jars will turn on the envy of all hostesses.
Decoupage techniques cans (video)
In the technique of decoupage you can create absolutely different things, the flight of creativity is not limited to almost nothing. Modern world Invites masters a lot of new materials, with which the work turns into pleasure at each stage. Some stores even sell plywood blanks for decoupage, so-called coloring. They allow us to create another masterpiece as quickly as possible. In conclusion, I would like to note that for many masters of the hobby turned into a matter of lifetime, bringing serious income. Try it maybe this is your way too.
If you have been lying metal jar from under lollipops, do not hurry to throw it out, try to update it with your own hands using the technique. I am sure that for such a cute thing there is a worthy application. For example, it can store bobbs for sewing machine or beads and beads for needlework. And it is possible to use for the purpose - for sweets if you want to take them to work, such a jar will take quite a bit of the place in your purse. Master class from.
Decoupage of tin cans
Materials and tools:
- metal jar,
- window washing
- emery paper No. 100, No. 400,
- latex wrap,
- putty knife,
- napkin,
- soil - white rust enamel,
- brushes and foam sponges,
- stationery file
- glue for decoupage,
- acrylic varnish glossy,
- titanium Belil,
- red acrylic paint,
- cosmetic sponges (triangular shape),
- gold acrylic paint,
- yellow acrylic paint.

Operating procedure:
I had a completely old metal jar, in some places, in some places, it was bent and pretty heavy. I will try to do something decent from it.
First, the bank needs to rinse well and dry, then degrease, rub with an alcohol-containing agent (I used a tool for washing windows).

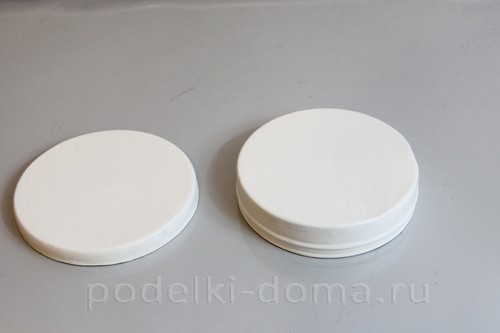
Now you need to remove all old paint Using coarse emery paper (No. 100). The lower part of the jar, on which there was no paint, also need to be an eye.

All dents need to be embedded with a cabinet, align the surface with a spatula and dry.

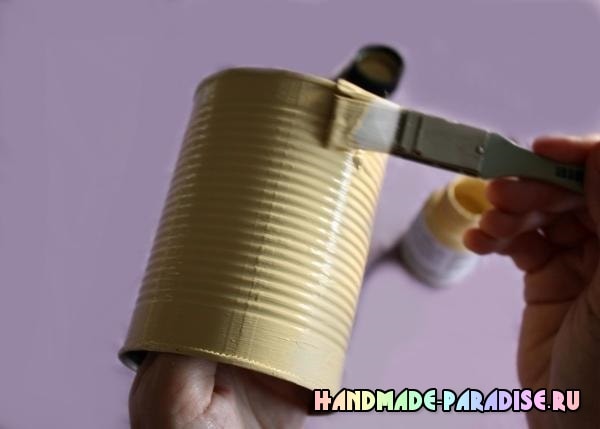
When the shtatlevka is completely dry, cross the jar of the ground - enamel on rust. The first layer of enamel I inflicted with a brush. Dry the first layer. Soil enamel dries significantly longer than acrylic soil on water basedSo that the bank is completely dry, it will take hours 6 - 7.
![]()
After that, process the surface with thinner emery paper (No. 400), it lines small irregularities.

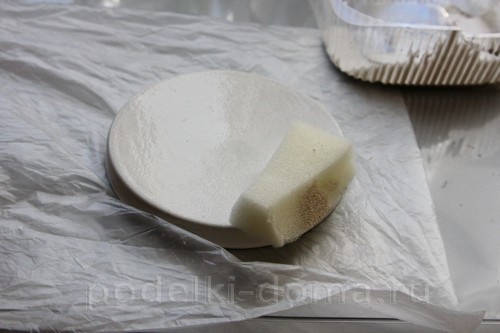
The second layer of the soil - enamel is no longer a brush, but a piece of foam sponge. In order not to blur the hands, hold the sponge not with your hands, but a clothespin or a stationery clamp.
Leave the bank again to dry by 7 - 8 hours. Then again process the surface with polishing skurt. Do not forget to also cry and the inner surface of the jar.
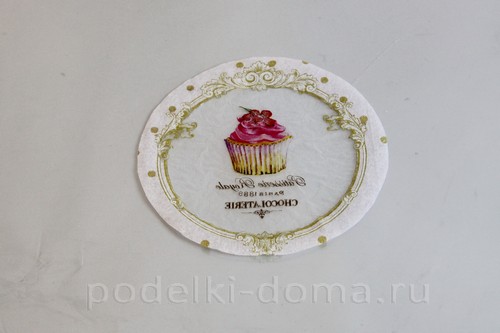
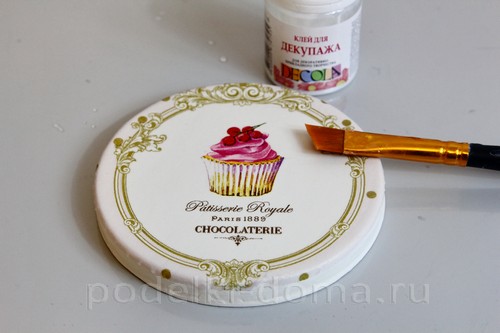
The next stage of our work will stick napkins. I chose a motive with the image of a cupcake on gentle cream, slightly pinkish background.

Cut the napkin on the shape of the lid. Separate the top colorful layer of napkins. Lower two layers do not throw out, they will be more useful.
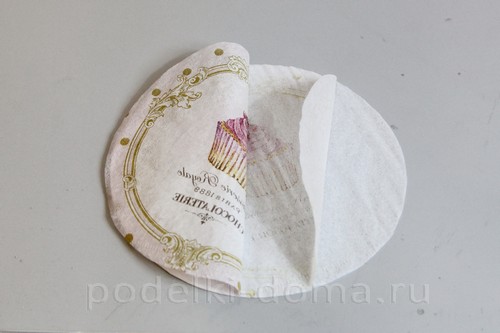
Put the napkin down the "face" to the file and water with water. In the water, the napkin will be wrinkled and starts to bubble, carefully touching the edges of the napkins, stretch it, trying to smooth out the folds.
Brush with a beveled edge Scroll from the center to the edges, kicking out of the napkins air bubbles. When the napkin is good and smoothly spends, bend the napkin and drain overwear from the file.
Walk through a dry napkin (those two layers that you separated) on a wet napkin with missing movements, while all the remaining fine air bubbles will disappear.
Turn over the file and place the napkin on the boot cover. Without removing the file, pass the spatula from the center to the edges, kicking out the remnants of bubbles, smoothing the remaining folds and achieving a good fit of the napkin to the jar.

Cover the napkin with glue for and dry.
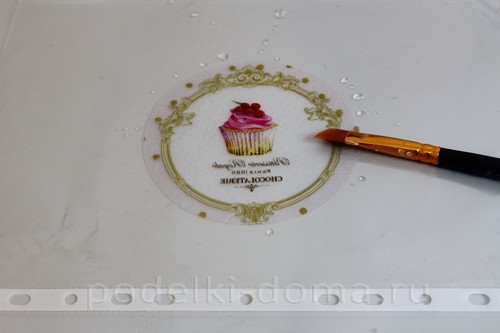
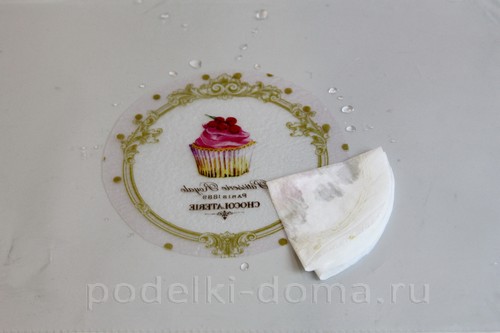
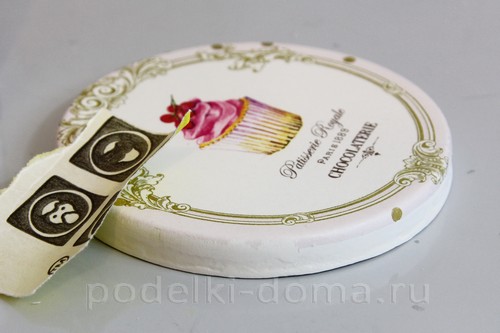
When the glue is dry, polish the surface with a thin skin and cover the glossy acrylic varnish.
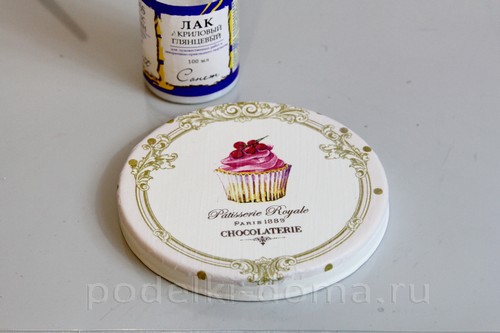
When the lacquer is fiercely dry, press the surface with thin "sandpaper" again, and around the edge, you walk with a more rigid skin, breaking the sticking edges of the napkin.
Since the background of the napkins is not white, and the cream, the entire bank will have to paint in the same color. To pick up the desired shade, I mixed titanium bleached with a red acrylic paint.
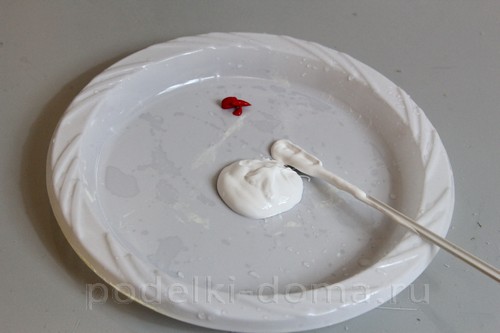
Paint is a soft cosmetic sponge, carefully acting around the drawing. Paint the jar on so many layers as needed to ensure that the background of the banks are completely merged with the background of the drawing on the napkin. After each staining (I had three layers), be sure to polish the surface with thin sandpaper.

To draw the peas, mix the gold paint with yellow, having achieved a complete coincidence with the paint, which are painted peas on the napkin.
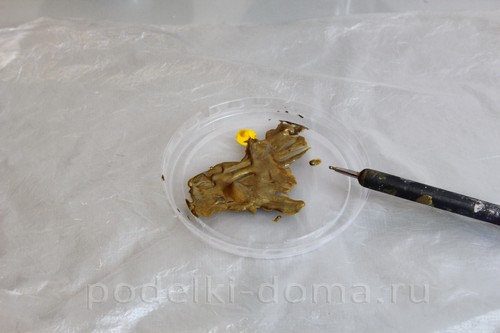
Draw the peas with any girlfriend tool. I used a tool for a manicure that makes the point on the nails.

Dry the paint and cover the can from all sides by several layers of glossy acrylic varnish, every time dried it and polishing the surface. I have at least five layers of varnish it turned out. Here you go, updated by decoupage jar Ready. It is impossible to know!
Such a jar is not ashamed to even give!

If you have found a mistake, please select a text fragment and press keys. Ctrl + Enter.. Thank you for helping to do our portal better!
How to update old vase
The new idea of \u200b\u200bthe decor of Vase from Maria Lugovskaya (author of the crafts to help the photographer). "Each of the ...
Box of newspaper tubes
Oksana master class, how to make a box of newspaper tubes. "Almost everyone from us on ...
Sunbed for a dog do it yourself
We already have a sun bed for a cat, now you can sew a sun bed for a dog, because your faithful pets too ...
Decoupage at the Iron Bank can like all fans handmade from the cast material. In this publication, consider the decoupage technique, which will allow you to use and transform iron Bank, Usually immediately departed in the trash can. In such tin jars, we usually buy tomato paste, green pea or baby dry food and do not even guess that unnecessary containers can turn into a beautiful vase for canteens, in porridge for indoor flowers or just for decoration kitchen interior. I invite you to watch the master class, which will help you easily cope with the work using the cast material.
For work, we should prepare the following materials:
- iron jar;
- napkin with beautiful pattern;
- glue for decoupage;
- lacquer for decoupage;
- acrylic paint;
- oil paints;
- alcohol or any other alcohol-containing liquid for degreasing jar;
- tassel.
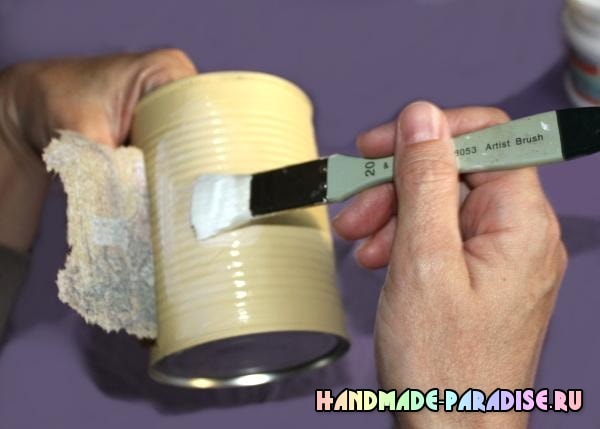
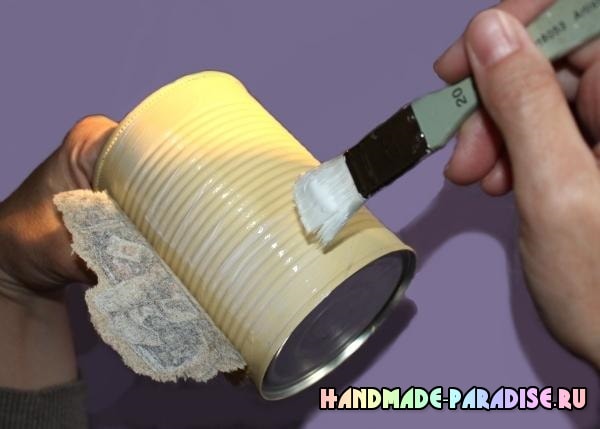
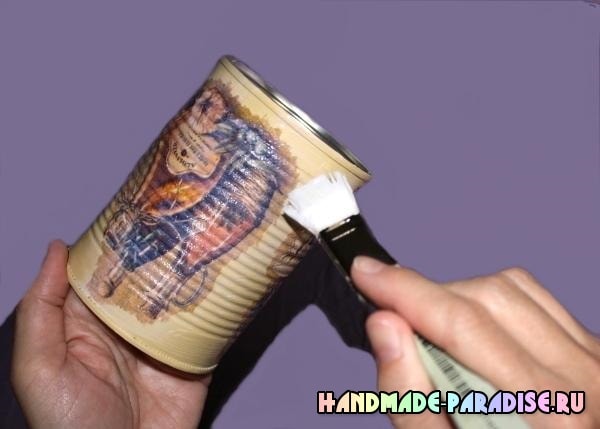
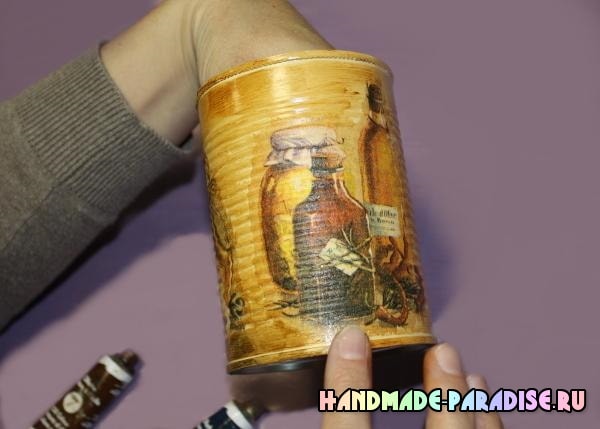
Getting to work. First of all, the jar must be well to wash and dry if it requires that. The next step is to degrease the tin jar using alcohol or any other alcohol-containing fluid. Now we take acrylic paint, the color coinciding with a tinge prepared for the decoupage of the napkin, and cover it with a jar in two layers. Do not forget about the time to dry out the first layer.

While our jar will dry, take a napkin and tear away from it like fragments for decoupage. Note: do not use scissors.
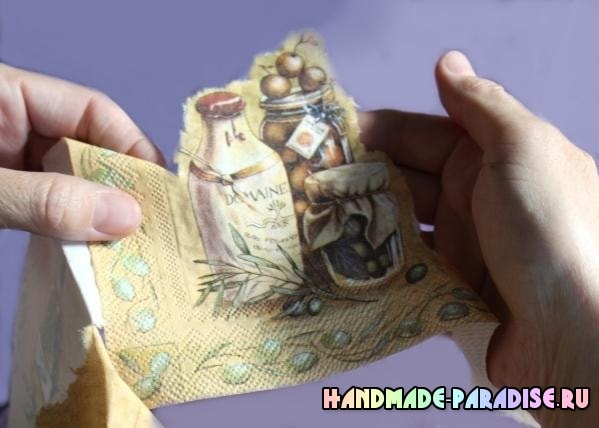
![]()
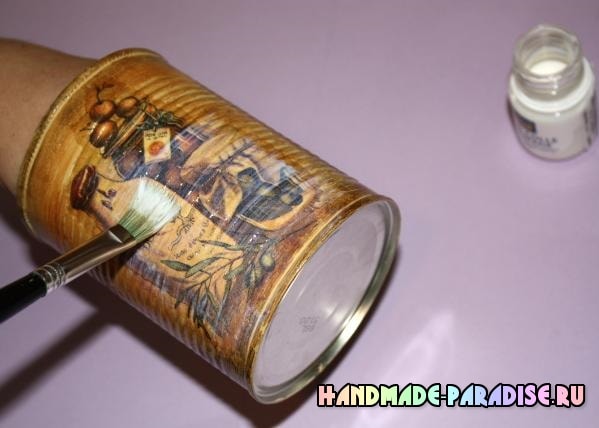
We take each fragment and separate the top layer of the napkins from the two below. Then we glue it to the jar with special glue for decoupage. The glue is applied on a jar of a very thin layer.
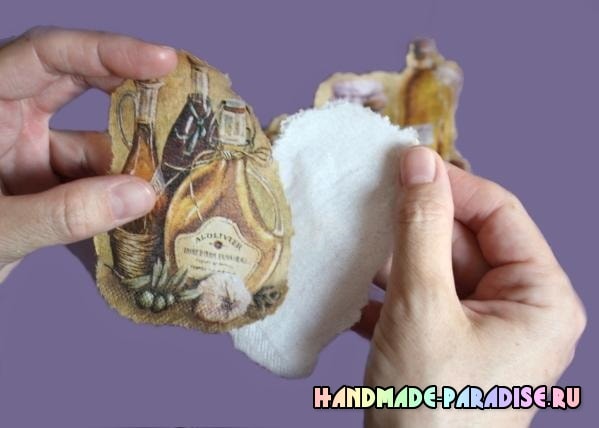
Tassel pushing all air bubbles from under the fragment. Next, glue the following fragment.


If the drawing on the jar is not quite noticeable and not bright, you can glue from above to the fragment one more layer with the same pattern.
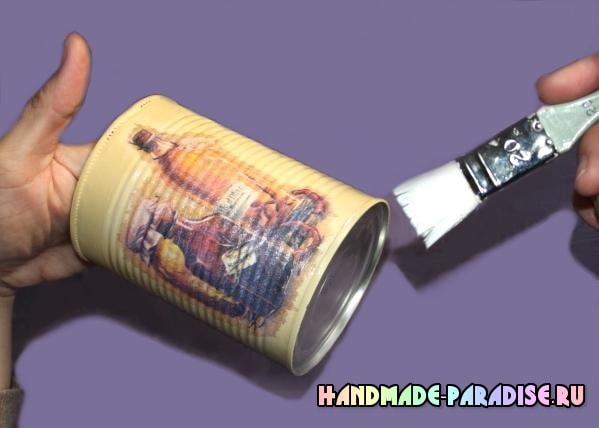
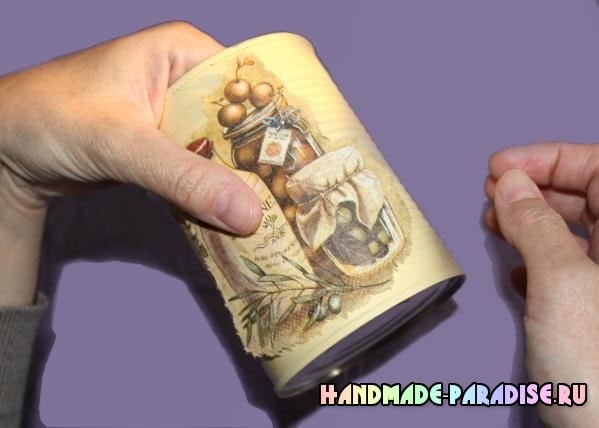

When the jar is completely plated with napkins and you will be satisfied with the result, you need to complete the work process - on top completely walk on the jar of the same glue for decoupage.

You can try advanced search for similar Packages by tags:
When copying an active link to mandatory!
You can send this post to social networks Bookmarks: