How to make a tree cover. How to make a notebook with a wooden cover? Making holes in paper with a single hole punch
This video tutorial explains how to make a notepad with the so-called Coptic bound- one of the most ancient methods of creating book covers, which was invented by the first Egyptian Christian Copts in the 2nd century AD.
The wooden cover will turn out to be heavy, so it is not suitable for diaries, but it will become an indispensable original solution for photo books or recipe collections - thanks to the type of binding, the pages open completely and immediately.
You will need:
Page paper
- thin board for the cover
- scotch
- twine
- piece of wax
- sandpaper
- pencil
- paper knife
- binding bone (a tool for smoothing and folding paper)
- awl
- wide eye needle
- roulette
- drill
If you don't have the right size piece of board for the cover, you'll also need a machine or a saw.
Instructions:
1. Attach paper to the future cover and measure the desired size. Cut two pieces of board the same size for the front and back covers. Sand the edges with sandpaper.

2. Glue both covers with a piece of tape and measure 2.5 cm from the bottom and top, stepping back about a centimeter from each mark, make another mark.
3. In the marked places, make four holes with a drill.
4. Prepare the pages. Any paper can be used (printer paper is used in the video). Using a bone binder or any other similar tool, fold the desired number of sheets in half, making several tabbed notebooks. For example, the video has five tabs of twenty pages each, which makes a total of one hundred pages of a notebook.
5. Now make pencil marks in the upper left corner of each tabbed notebook to make it easier to align all the pages. Also mark in the place where you will need to make holes.
6. Bend the sheets with the marks so that the marks are inside so that you can make holes on all the sheets of the tab from the inside, as shown in the video.
7. Treat the twine with wax - this will make it more tenacious and durable.

8. Thread the twine with needles into the adjacent holes of the inlay notebook from the inside, and then into the holes of the cover. Continue threading the rope as shown in the video until you get to another part of the cover. Tie the ends of the twine together on the inside. The Coptic style notebook is ready!
It often happens that you need a gift, but there is nothing suitable in stores. Or a person already has everything that the soul can desire. And he may have a favorite hobby, and you have a desire to give something unusual.
It can be combined and make a gift by yourself. In this case, I will tell you how to make a leather-bound notebook for fans of the game "Tanks" on your own, however, the pattern on the cover can be completely different if you master the techniques, there will be no restrictions for your imagination.
DIY notebook: tools and materials
- genuine leather (you can also take artificial or dense plain smooth fabric), about 30 × 45 cm in size
- paper, A4 size - 52 sheets (it is better to take a few more sheets in reserve). Suitable for plain white printer paper
- loose cardboard for endpapers and spine
- thick thick cardboard for the cover
- 2 strips of fabric not thick, 3x15cm
- glue "Moment Crystal" (1 small tube of 30 ml is used for a notebook)
- the threads are black (not so dirty) or beige. Better synthetic, No. 40-50
- ruler, pen, scissors, awl
- file or file
- thin brush for acrylic paints
- acrylic paints for fabric
- instant coffee
- newspapers
Pictures are printed on request.
To make the notebook more individual and interesting on the pages, you can print various drawings on a regular laser printer (ink from a dot matrix printer will spread).
In our case, screenshots and desktop wallpapers from the World of Tanks game, why not?
Pictures can be inserted into the Word program or any graphic editor, set the desired size for the location or slightly reduce the brightness. The layout of the sheet should be landscape.

If you want to make a notepad out of white paper, you can skip this step.
First you need to prepare a "solution" of coffee. For 1 liter of water, add 5-6 tablespoons of coffee. The more coffee, the darker the sheets will be. It should be noted that when dried, the sheets brighten by a couple of tones. Therefore, you should not dilute the solution with water if it seemed that the paper was too dark.
Pour the coffee solution into a baking sheet with high sides or a basin of the desired size.
We soak each leaf separately, dipping it in coffee on both sides. The paper should be evenly blotted and colored.

Let's "brew" for 10-15 minutes. During this time, we drive out all unnecessary household members, pets and everyone who can spoil the beauty from the territory and lay out newspapers for future paper drying. You need quite a lot of space. Therefore, if it is not enough, it is not worth soaking all the sheets at once, but in parts of 10-15 sheets at a time.
Carefully, so as not to tear, lay the sheets on prepared newspapers, while letting the liquid drain well into a baking sheet so that the paper dries faster.

After that, load a new batch of paper into the pan. Repeat the operation several times until all the paper (50 sheets for a notebook and 2 sheets for endpapers) is aged and acquires a pleasant buffy hue. It is better to change newspapers more often so that the paper dries faster.
Drying paper usually takes from several hours to a day, depending on the ambient humidity. Therefore, this stage is best done at night looking, so that everything has time to dry by morning.

Formation of a notebook from sheets of paper
When the paper has dried, we proceed to stitching the sheets into a notebook. To do this, we collect 5 sheets each (make sure that the drawings are correctly located) and bend in half into a notebook. The edges should be folded as evenly as possible relative to each other.
In total, you will get 10 notebooks of 5 sheets.
We put a stack of notebooks together, align and put under the press. You can pre-fix them with paper clips by placing something thick (cardboard) on both sides so that there are no marks left on the paper.


Under pressure, you can withstand up to several hours, as far as patience is enough, but at least 30 minutes, so that the sheets have time to cake.
Then, we pull out our block from under the press, remove the clamps, align the block and again clamp it on both sides, placing a piece of cardboard. This is necessary in order to make holes for the needle, under the seams. You can, of course, do this with an awl or pierce with a needle right away, but it will take much longer and not so neatly and evenly.

On the cardboard, we pre-mark 7 divisions of 3 cm each, as shown in the photo.
Then, opposite the strokes, we make incisions with a file, about 3-4 mm deep. Near the cut, we squeeze a pack of paper with our fingers so that the sheets do not diverge and the file is even.


We disassemble the block and begin to sew the sheets together.
We begin to sew on the left, from the bottom notebook (we will put the rest on top, this must be taken into account if the order of the drawings inside is important).
We pass the needle through the holes and move to the right. Do not forget at the very beginning to leave the tip of the thread 10-15 cm to secure the upper notebooks.
On the third and 5th gap between the holes we impose pre-prepared strips of fabric. They serve to better fasten the notebook block and to secure it to the endpapers.


When we reach the fabric, we draw the thread over it.

Thus, we sew the first notebook to the end, put the second one on top and continue to sew in the opposite direction. Do not forget to pull the thread well at each stage (but without fanaticism, so as not to tear the paper).
Only now, when we reach the fabric, we thread the thread over it crosswise.


When sewn to the right edge, you need to tie the working thread together and the tip left at the beginning to secure the notebooks. First, pull the threads well and tie a few tight knots.

We impose the third notebook and stitch to the left edge.
Now, you need to fasten the thread on this side. Again, we carefully pull and thread the needle between the two lower notebooks, catching the thread in the loop. We repeat several times.


Thus, we sew all 10 notebooks into a block.

To prevent the block from falling apart, it must be glued together so that there is no free space between the notebooks.

Glue in the spine area. The block must again be leveled as far as possible and secured with clamps.


Spread the glue evenly over the entire spine so that there is no excess, but there are no unsmeared parts left.


We leave the block smeared with glue to dry (you can put it under the press again for better bonding).
The indoor unit is ready, it remains only.
This master class will show you how easy it is to make an unusual notebook with your own hands. Let's age the sheets for the notebook manually. For work, we need the following tools and materials:
- plywood 5 mm thick;
- sandpaper coarse and finest;
- drill ;
- opening album rings;
- A4 printer paper;
- natural coffe ;
- a device for burning ;
- transparent water soluble odorless varnish;
- tassel;
- wide bowl;
- iron ;
- pencil or ballpoint pen;
- ruler ;
- copy paper ;
- single hole punch.
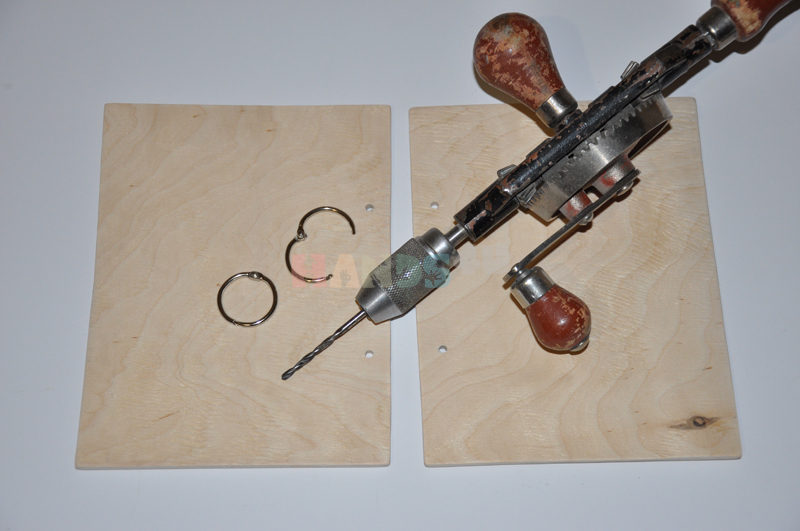
Cut out two pieces of A5 plywood for the cover. We clean the plywood with coarse sandpaper.

Then we process plywood with the finest sandpaper.

We smooth the corners and ends of plywood when processing with sandpaper.

We drill holes for the rings with a drill. The thickness of the drill should be slightly larger than the thickness of the metal of the ring.
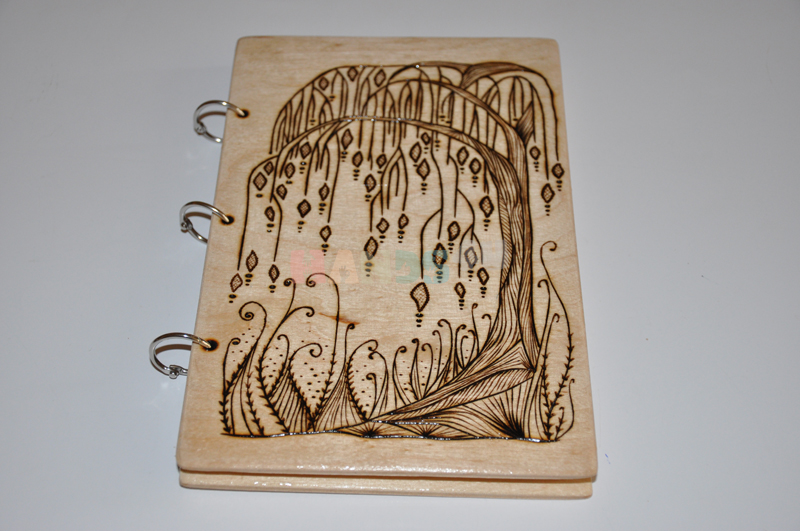
On the Internet we find an interesting monochrome drawing. We format it to the size we need and print it.

Using carbon paper, transfer the drawing onto one sheet of plywood.

Using a burning device, we direct the contours of the pattern on plywood.

We cover the sheets of plywood cover with a transparent, odorless, water-soluble varnish.
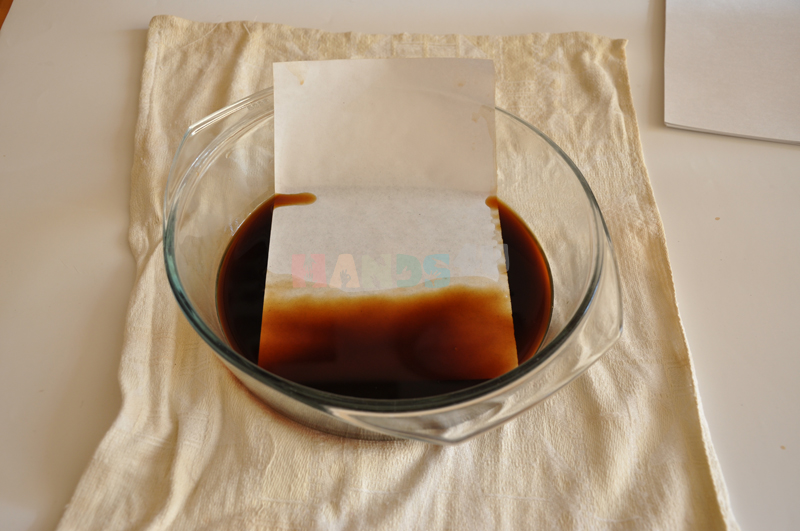
We brew strong coffee. To do this, put 4-5 teaspoons of natural ground coffee in a standard cup and pour boiling water over it.

While the coffee is cooling, prepare the sheets.
Under the ruler we will pick office paper of the desired size. So that the sheets do not protrude beyond the edges of the cover, we make them smaller by 1 cm less at the top and bottom. And 1 cm less on the side.
Strain into a bowl of coffee.

Soak each leaf in coffee.
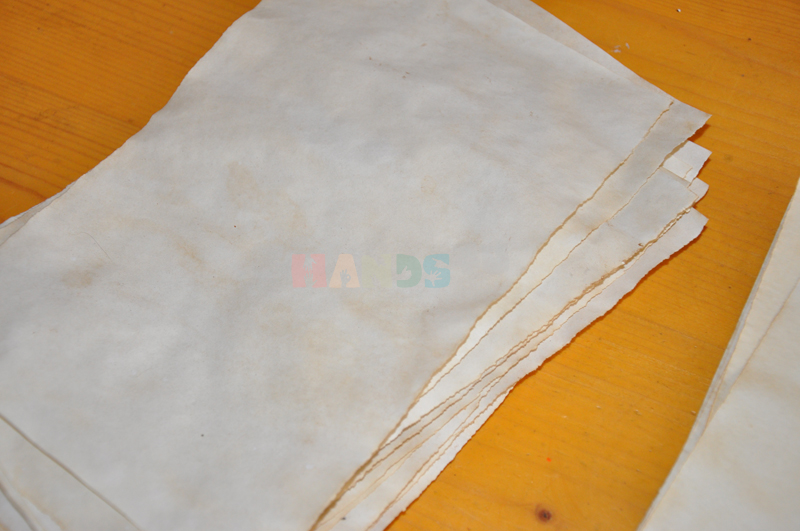
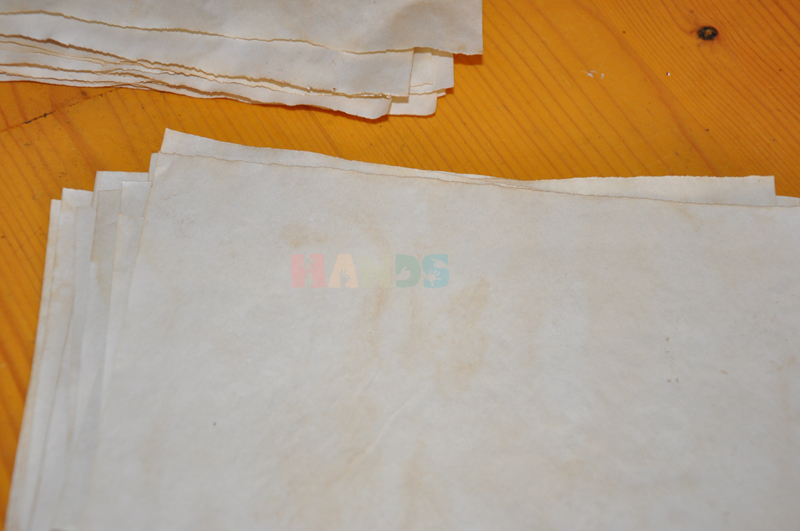
Wet and already fragrant sheets are laid out to dry on clean old towels.
We finally dry the sheets in the oven at a temperature of no more than 50 degrees Celsius.

The result is crumpled, slightly brown and streaked sheets with a slight coffee aroma.
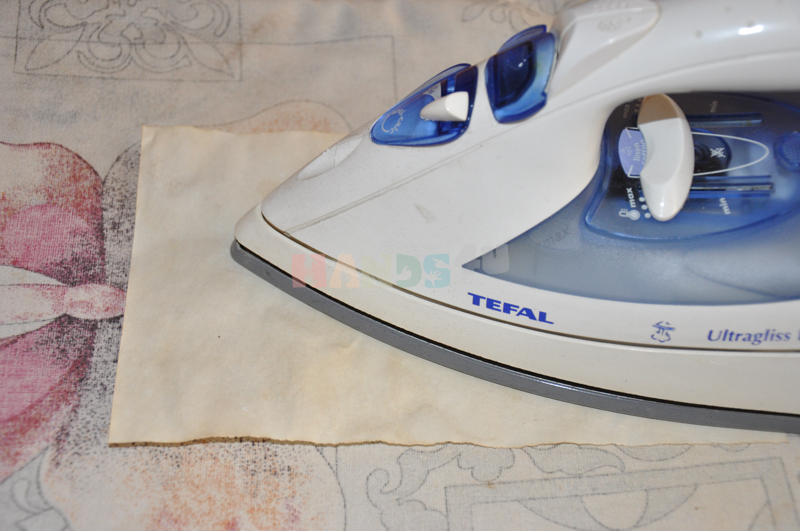
You can leave it like that, but it is better to iron them.
We put a stack of sheets between sheets of plywood cover and mark the holes on the paper.
We make holes in the paper with a single hole punch.

We collect a notebook on rings.


The result is a unique notebook or notepad.
Unusual design and handmade notebook will emphasize your individuality.
A well-chosen drawing and a light aroma of coffee can make such a book an excellent personalized gift for any holiday.
In addition, opening rings will make it possible to replace the sheets with new ones. And this notebook will serve for a long time to come.
Hello, my darlings!
And what have I prepared for you!))) Do you remember, I asked you what kind of MK from me you would like to see? So, among the wishes was this - to make a master class on creating a wooden cover. Well, the man said - the man did it, promised - did it) I did it a long time ago, I can show it only now).
Yesterday you could already see this MK in the Fantasy blog, for which it was written. Now sharing here. And the notebook itself can be viewed in more detail.
The network has many options for creating imitation of wooden surfaces. You can use masks, stencils, crackle varnishes, you can make scratches with knitting needles and other improvised means. I will show you one of the options for creating such a surface (it is also not new and was not invented by me).
In addition to the fact that such covers look spectacular and can be made for different works. Such covers are great for cookbooks (they are practical, they can be wiped with a damp cloth), for themed albums (for example, for a pirate theme). Pirate I already showed you, details

Planks made in this way can be used in New Year's projects (tags, postcards), there are a lot of options. I repeat, as always - fantasize!)) And I’ll tell you a secret - on the joint venture pop-up album Graphic45 I’m preparing something similar for you, but for what and why - you’ll find out))

I also like these covers because they can be made literally from the remnants of binding cardboard. I usually have it from album pages, from cardboard projects, etc. Cardboard from albums with kraft paper may also come up, there are covers made of such cardboard).
To create a cover we need:
- binding cardboard
- burlap (a small piece)
- stationery knife + mat + metal ruler
- glue
- acrylic primer (black)
- acrylic paints: Neapolitan orange, dark brown, black, orange
- candle
- brushes
- sponge for dishes (new)
To design the cover we need:
Chipboard with plant elements
- embossing powder (color suitable for the project)
- adhesive pad for embossing
- punching and embossing machine
- flower soft
- glossy accent
Shall we start?)
1. Let's prepare the details from the binding cardboard. Because the size of my notebook is 10 cm * 7.5 cm, then I prepared the details of the following size:2 pieces - 10.5 cm * 7.5 cm
1 piece - 10.5 cm * 3.2 cm (for spine).
I cut the boards from the leftover cardboard from the previous project). I cut them in different thicknesses, so they will look more natural.

2 . Details. which will be "planks", we give an even more natural and slightly shabby look. Because my idea is to make the tree look "worn out", then I "plan" each plank with a clerical knife. I create irregularities. The degree of these unevenness depends on what object your boards are for. Rougher ones are perfect for men's work, for a pirate theme. For more delicate work, it is better to plan the planks without fanaticism))).
The size of my boards is 2-3 mm smaller than the details of the cover

3. We glue our blanks onto the prepared piece of burlap, at a distance of about 5 mm from each other

I also generously grease the ends with glue ...

And I go through the folds - grooves with a creasing stick. I let the workpiece dry. I prefer it to dry naturally.

4. Glue the boards on the dried workpiece

The butt will also be "wooden", I fit two boards here too)

5. Coating the cover with black acrylic primer

Please note that inside the edges of the cover are also covered with primer. At this stage, you can use an embossing dryer to dry the cover. I dried naturally.

6. Now let's get to the fun part.) Layer by layer we will create weathered wood. We take a piece of a candle and rub our boards over the entire surface. Do not forget to process the edges of the boards, the edges of the entire cover and the spine. We also process the hollows between the boards.

7. Excess grains of wax must be removed. I do this with a brush (I have a separate one for such work). Don't rub hard, just brush off excess. Wax should not lie in pieces.

8. We apply a layer of paint of a different color. I chose Neapolitan orange for contrast.

After applying the first layer of paint, without letting it dry, I apply the second layer. The photo shows the difference: on the right - paint in one layer, on the left - already in two.

Painted on the inside too.

9. At this stage, I recommend drying the workpiece only in a natural way. From the hair dryer, the wax under the paint heats up and starts to bubble (along with the paint). Subsequently, this may affect the quality of painting the boards. The drying time depends on the paint you choose (usually the instructions indicate the time). My workpiece dried for about 1.5 hours.

10. Now we take an ordinary household sponge for dishes and rub our boards with the hard side. We do this carefully so as not to wipe the cardboard holes)).

11. We brush off the remaining paint with the back of the sponge and proceed to the next step. Again we process the entire surface of the cover with a candle, brush off the excess and paint with black primer (can be replaced with black paint). Let it dry naturally and again remove the layer of paint with a sponge. Here is what I get

12. Because I chose an autumn palette for the mini, then the final version of the color of the boards will be autumn, warm. I do the final touches - I treat the surface with a candle, apply Neapolitan orange paint again, rub it with a sponge. I apply wax and cover the cover with dark brown paint. After rubbing with a sponge, I get this surface

13. Because there will be no brads on my cover, then at this stage I glue the flyleaf

14. Let's start decorating the cover. First, I glued the lace ribbon. Then I decorate with a chipboard and cutting. On the reverse side, a part of the tape will be buried with a chipboard from a set of paper.