What to sew for a dog with your own hands. The simplest pattern of overalls for your pet! The right material for dog clothes
We offer you master classes that will tell you how to sew clothes for dogs with your own hands: blanket, overalls, vest, hat, boots.
Clothes for dogs - how to make a vest

First you need to take measurements from your pet. It's better to do it together. Let one person treat the dog with something tasty, and the second takes measurements. Here's what you need to know to sew a vest, and subsequently a jumpsuit:
- the length of the back from the neck to the root of the tail;
- chest circumference (the widest point of the sternum);
- volume of the abdomen;
- neck circumference (at its widest point);
- distance from the point of growth of the paws to the beginning of the neck;
- the length of the segment from the hind to the forelimbs;
- girth of the thigh of the hind leg;
- girth of the front paw;
- neck height;
- length from the front paw to the penis (for boys);
- head girth.

The presented pattern of clothes for dogs will help you sew a vest for your pet - this is one of the easiest outfits for a four-legged dog.

First of all, you need to determine the size of the side of the square in the drawing. To do this, divide measurement No. 1 (the length of the back from the neck to the root of the tail) by 10. Let's say this first value is 20 cm, divide by 10, it turns out 2. This means that the sides of all squares will be equal to two cm.
Take tracing paper, drawing paper or a special "graph paper" for patterns. Draw here the longitudinal and transverse segments. For the back, you should have 11 squares horizontally and 7 vertically. For the front - the same number horizontally and 3 vertically.
On the upper segment, set aside the length of the back. Where it says “head” on the pattern, you need to set aside the girth of the neck. In this example, it is 26.5 cm: 13 cm on the back and 3.5 on the breast.
If your dog has different proportions, make adjustments to the pattern, do not forget to add cm to the measurements for a loose fit, since clothes for a dog should not be tight.
Transfer the measurements of the volume of the abdomen and the girth of the front paw to the pattern. Please note that you will be imposing the pattern on the fabric, which you have previously folded in half. The front of the vest is made with a fold, and 2 parts are cut out for the back.
Similar patterns for dogs will help you sew comfortable and comfortable clothes for your animal. The vest is best made from fleece. This fabric is practical, soft, does not fray. In such clothes, the animal will not be cold to take a walk on a dry autumn evening.
Further, these patterns for dogs - the front and back of the vest, need to be transferred to the fabric folded in half. Redraw the contours of the details, adding to the free fit. Cut along the stroke leaving 7mm for a seam allowance.
Stitch the sides, matching point C with C and D with D. Pierce the neckline, armholes, bottom of the vest with a contrasting fabric. Stitch a zipper on the back and it's time to put on a new thing for your pet.

Velcro can be sewn on the back instead of a zipper.
If you know how to knit, these patterns for dogs will help you make a knitted vest. Using the same scheme presented, create another new thing.
First you need to knit a sample, determine how many loops are in 1 cm. Dial the right amount and start working from the waistline from the back. Periodically apply your work to the pattern to determine where to cast off and where to cast on.
But it is better to knit a one-piece dog vest, you can sew buttons on the tummy. Start with an elastic band, decorate the sleeves and neck with it. If you knit braids on the back, then the vest will turn out even more beautiful.

How to sew a jumpsuit for a pet?
This pattern is suitable for a toy terrier or other small dog.

If you will sew an autumn or winter fleece overall, then it is enough to make it in one layer. This will be comfortable in dry, not very cool weather. If you need warm clothes for dogs, you can sew a winter overall consisting of three layers with your own hands:
- upper waterproof (for example, from bologna fabric);
- synthetic winterizer;
- linings.
Speaking about how to sew a jumpsuit, it must be said that it can be made from unnecessary things - a bologna jacket, an out-of-fashion coat.
If you do not have such things, then you will need
- waterproof fabric;
- the lining is silk or flannel (you can take the diaper left over from the baby);
- synthetic winterizer;
- lightning;
- piece of plastic
- rubber.

How to determine the scale, you already know. Redraw the pattern on paper. Now you need to attach it to two types of fabric (lining and main) and to the synthetic winterizer. Cut out with seam allowances.
Sew the overalls from the main fabric. And for the second half, put the parts from the padding polyester on the parts from the lining, sew the second jumpsuit.
Stitch it with the first one so that the seams are inside - between the main fabric and the lining, connecting at the sleeves, at the bottom of the panties. Turn right side out through the unsewn top of the jumpsuit.
Postpone the bottom of the sleeves, panties, insert an elastic band into these drawstrings. From plastic, cut a visor according to the pattern. Insert it between exactly the same parts of the main fabric and lining, stitch along the edge.
Insert the visor between the two layers of the hood, sew. If you do not want to do it, then stitch the hood around the edge and insert a tie or elastic here so that it fits snugly enough to the head. Here's how to sew a pet jumpsuit at home.
We sew a hat, boots, a blanket with our own hands
After the dog clothes are made, sew beautiful shoes with your own hands. Indeed, in the cold season, reagents are scattered on the streets of cities. To prevent dogs from stepping on them, sharp stones, fragments with their paws, protect the legs of animals with shoes.

In order to sew shoes, take:
- warm dense fabric (fleece or drape);
- skin;
- threads;
- ribbons and limiters for them;
- hole puncher.

You can also sew shoes for dogs with a thread and a needle, without the help of a machine. Stitch the details. Make holes on the top of the tops with a hole punch. If this tool is not available, use a knife. Thread strings through here to tie your shoes. Place stops or tie knots at the ends of the ropes.

And for such a pattern of hats for dogs, you need a transparent sheet of paper or a file. Enlarge the presented scheme, redraw.

Attach one and the other half of the hat to the back. Run along the dotted line. Sew on the visor so that it holds its shape, put cardboard or plastic inside. This hat is two-layer, consists of the main and soft lining fabric.
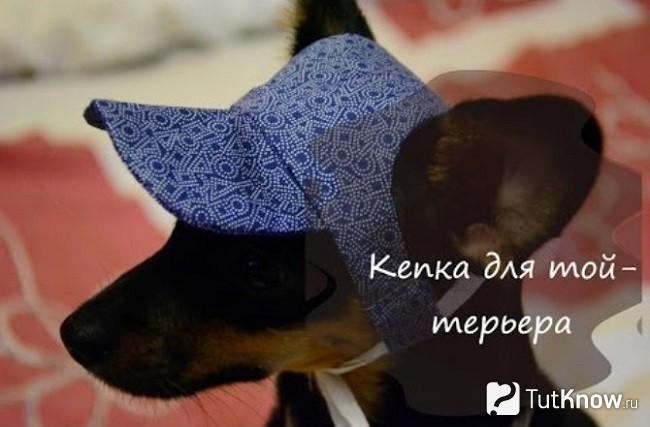
If you want to tie a headdress on an animal, then shorten the sidewall pattern, and sew ribbons just below the visor.

For beginners, seamstresses can be advised to make a blanket for a four-legged friend. In such a cape, the dog’s body will not freeze, it will not be afraid of wind and a slight cold snap.

This dress is very easy to make. With your own hands, the patterns need to be redrawn on paper, putting the dimensions of your dog.

As you can see, the blanket is cut out in the form of an apron. Ribbons will help tie it on the animal. Such a cape can be sewn from one fabric or make a blanket with two or three layers.
Now you know how to make clothes for dogs with your own hands using a pattern. If you adore your pet, make a house or a soft couch so that he can rest there.
How to make a house, a bed for animals?
You can make a shelter for a medium or small dog out of a cardboard box. See how the parts are arranged.

You need to unfold the box, fold its bottom and sides so that they make a floor, 2 walls and two halves of a gable roof. From small sides, make 2 narrow acute-angled sidewalls on the roof, cutting a round hole in one of them so that the animal can freely pass into it.
Make the dog house so that the animal fits freely there, can stretch out to its full length and turn around.
Cardboard housing is the easiest option. Sew the house out of thick foam rubber so that it holds its shape. To do this, take:
- thick fabric;
- foam rubber 5–8 cm thick;
- wide braid for finishing;
- scissors;
- pencil;
- a pair of compasses or a frying pan lid.
Focusing on the previous photo, reveal the details:
- one - sex;
- two - wide walls;
- 2 - roofs;
- two - narrow walls (one of them with an opening for entry).
Also decorate the details of the roof, sidewalls. From the entrance side, cut a hole along the lid from a frying pan or other template, wrap it around with braid.
The entrance to the house can be either round or rectangular. If you wish, cut it into an arch shape.
Sew the details together, focusing on the photo hint, and you can invite your pet to celebrate housewarming in a new home!

There are also simpler options for decorating a dog's resting place. Make a bed for your pet. It consists of a bottom and three or four sidewalls. If they are tall, make 3 so that it is comfortable for the dog to enter here.
Bottom - oval, round or rectangular. It is sewn from the upper and lower dense fabric. Soft foam rubber is placed inside. Now you need to measure the perimeter of the bottom and cut out the sides of the couch of such a length.
Sew the side one-piece, consisting of the upper and lower fabric, put foam rubber inside. If the bottom edge is square, topstitch at the corners. Then the sides will have a shape.
Here's how to make a dog bed or dog house. It remains to tell you how to sew a bag, because owners of small animals often carry dogs. It is not very convenient to hold them in your hands, it is much better to transport them in a special bag.
Buy a carrier or make your own?
See how interesting it is to sew such a thing with your own hands. For her you will need:
- durable fabric (you can take a raincoat);
- thin foam rubber or cardboard;
- lining fabric;
- centimeter;
- thread with a needle;
- pins;
- crayon;
- ruler;
- scissors.

- In order to sew a dog carrier, you need to measure the height, length, width of the pet. Add a few cm so that it does not hinder the movement of the animal. In this example, the height of the bag is 28 and the width is 20 cm. For this, you need to cut out a canvas measuring 76 by 35 cm, plus 3 cm seam allowances (since the stitch slightly reduces the canvas).
- To make the bag quilted, place the lining on the front side, on it - the cardboard of the same size, and on it - the main fabric, right side up.
- Pin the resulting "sandwich" with pins around the edges. Use chalk and a ruler to draw horizontal and vertical lines to make squares. They may be small, but to make it easier to work, make them large, for example, with sides of 7–9 cm.
- Sew the lines along the markings, remove the pins. Now fold the canvas right sides, pulling the smaller edge to the same (35 cm). Make a seam on one side and symmetrical on the other side. Bottom, on the wrong side, stitch 4 corners. They will mark the bottom and sides. At the same time, we detach two corners on one side and 2 on the other.
- Insert a zipper. If you want your dog to occasionally lie down in the bag to rest, then don't make a recess for the head. If you want to decorate this detail, make a semicircular cutout at the top of the small sidewall, process it. But it should not be too big so that the dog, for example, being frightened of something, could not jump out of the carrier.
- Make the handles of the bag a comfortable length for you so that you can hang it on your shoulder if you wish.
Today, fashionistas and fashionistas are found not only among people, but also among animals. This is especially true for dogs, for which, lately, many needlewomen have been sewing more and more fashionable handmade clothes. Clothes for dogs are not only practical, but also beautiful overalls and other products that not only protect your pet from weather troubles, but also emphasize the style and taste of its owner.
Today it is not a problem to choose and purchase interesting knitted or knitted clothes for a dog, especially since many manufacturers produce it. Recently, there has even been serious competition between them. But clothes for dogs, sewn or knitted with your own hands, will always be more comfortable, warmer and more beautiful than store-bought!
Especially popular are small, so-called "pocket" dogs, which you can easily take with you.
Clothing for these breeds is in demand. At the same time, it cannot be said that there is a clear pattern between the style and convenience of clothes for a pet - dog owners can sew high-quality and beautiful clothes even for every day, but as a rule, a dog does not really like too frequent changes in his wardrobe - he gets used to a comfortable blanket or a warm jumpsuit and waits for the hostess to put on her exactly this thing, soaked in the "native" smell.
dog wardrobe usually includes many things. For boys, as a rule, create overalls and sets of jackets and pants, for girls - overalls and dresses or skirts. In addition, overalls and blankets for dogs that have already become familiar are especially popular. In order to make it clearer to you how do-it-yourself clothes for dogs are created, we have prepared for you master classes with a detailed description of the stages of work and the corresponding patterns.
The choice of fashionable clothes for dogs, like the choice of fashionable clothes for people, is striking in its diversity. However, "dog" tailors tend to use several standard patterns. Each pattern is made according to the parameters of a particular animal. For example, when creating a jumpsuit for a dog with your own hands, it is important to know the length of the animal's back - the distance from the collar to the tail. You also need a chest depth equal to the distance between the ribs and the front paws of the dog. After that, based on the standard scheme of the overalls, a model is made for a particular animal. Using simple calculations, the size of each square needed to build the final pattern is calculated.
Already in the process of fitting adjustment of parts that will be located on the paws is made. For example, the elastic band is pulled to a suitable size. Do not forget about the dog's genitals and its tail - there should be appropriate processed cutouts under them. Further, the overalls can be decorated, for example, with a belt or an original trim of the openings.
The same scheme is suitable for knitting blankets for a pet with your own hands, however, the ability of knitted items to stretch should be taken into account. 
When choosing a material for sewing clothes for a dog, you should give preference to a waterproof top, for example, raincoat fabric, and a warm inner layer, for example, knitwear or baize.
How to sew a jumpsuit for a dog with your own hands, a vest, as well as a blanket and shoes. Stages of work and patterns.

Beautiful, comfortable and practical clothing for dogs, made by hand. Overalls for a dog and a pattern.
You can often meet people on the street walking their pets on a leash, dressed in overalls. The cost of such overalls in the store is quite high. If you are thinking of dressing up your pet, we suggest sewing a jumpsuit.
The pattern of dog overalls is universal. It suits dogs whose proportions are close to "square". These are Yorkshire Terriers, Schnauzers, Poodles, Toy Terriers. For such breeds, it is enough to download the pattern. For breeds with a more stretched body shape, the pattern needs to be adjusted a little (the instructions describe in detail how to do this).
You only need one measurement - the length of the body. This is the distance from the edge of the base of the tail to the edge of the collar (47 cm in this particular case).
The product consists of 4 parts:
find the answer
Having a problem or question? Enter in the form "Breed" or "Name of the problem" press Enter and you will find out everything about the question you are interested in.- Sidewall - 2 pcs.;
- Lower insert for chest and abdomen - 1 pc.;
- Gate - 1 pc.
Printout of the key elements of the pattern
To complete this item, basic knowledge of office programs is sufficient:
- Download 2 patterns (right-click the bear on the link, select "Save as.", Specify the path);
- Copy the elements of the pattern, paste them into the MSExcel document;
- Click on the picture, in the menu that opens, select "Size and properties";
- Set the checkbox - "scale in width and height" - 100% in the input window;
- Press the "Print" button or hot keys CTRL+P.
The software will break and print the template. Take glue, scissors, fold and glue it.
Scheme two: 
The best option is below: 
Preparation of materials and tools
At this stage, you need to stock up on everything you need for work:
- Main fabric (for these measurements, you need a cut of 120 cm * 150 cm (L * W));
- Fabric for a warm lining (can be made removable and used for underwear);
- Chalk or pencil for cutting;
- Collar closure (button or button);
- Lavsan threads;
- Elastic band - 2 m (you can choose a rubber band, it stretches less in the toe);
- Lightning along the length of the back (tractor fastener has wear-resistant qualities);
- Cotton batting;
- Scissors;
- Centimeter.
When choosing a fabric, it is better to stop at a light fabric with a water-repellent effect. A good option is a membrane material, the bottom layer of which consists of a loose perforated film glued to the base. To save time on processing seams, it is advisable to choose a fabric whose edge does not fray or fray.
As a lining, it is better to use smooth materials (satin, twill.). Do not use the net, it can tangle and damage the hair, causing discomfort to the dog.
Manufacture and connection of the main parts
We transfer the pattern to the material. To do this, the fabric must be folded in half inside out. Put a sample of the sidewall on top. To avoid distortion of the finished product, it is necessary that the line of the back runs parallel to the lobar thread of the fabric.
We apply the lower insert with a dotted line along the fold. Templates are pinned or tacked. We outline the fixed pattern with chalk, taking into account small allowances (0.5 cm - 1 cm) for the seams. When the pattern is transferred to the fabric, we evaluate it visually and cut it out.
For fidelity, it is advisable to initially sweep the product by hand in order to try it on a pet. You need to start sewing from the sides. The legs are sewn together first. The tucks on the back are laid in the center, stitched along and across for strength (the length of the tuck is 7 cm). Next, we connect the sides by sewing on the bottom insert, which covers the stomach and chest.
The prepared parts are ground on a typewriter with a linen seam (used for sewing bed linen, sliders.).
It is the most suitable because:
- Lasting;
- The edges do not need additional processing;
- Eliminates tangling of wool.
We independently take measurements for a pattern of dog overalls: 
Zipper insert with placket
We sew a zipper along the back line. It should be taken into account that it is more convenient if the movement of the lightning slider is carried out from the tail to the neck. Under the zipper, of course, you need a strap. We cut it out of the main material, a loose batting is inserted inside the bar. If you need a completely waterproof option, you can make a valve. It will prevent moisture from getting into the middle of the overalls in rainy weather.
The bar performs the following functions:
- Gives the product rigidity;
- Facilitates fastening;
- Helps to avoid discomfort and friction on the skin of the back.
Cut out a rectangular strip. Its dimensions are 10 cm * back length + margin 2-3 cm (to go to the collar and hide the edge of the fastener). We fold the finished strip along, but not in the middle, but with a shift (it is necessary that the lower part be 2 cm wider than the upper one). That is, the lower part is 6 cm, the upper part is 4 cm. The gap will allow you to wrap the zipper from the wrong side, hiding its edges and batting. It will also solve the problem of "wool-collector".
The zipper should be shorter than the bar on 2 sides. The part of the bar that protrudes is placed edge to edge over the wrong side of the side along the back line and sewn. Then, having folded the front sides, the zipper itself and the side are sewn together. The seam is turned inward and stitched with an additional securing seam at the edge of the zipper. The second part of the castle is sewn in the same way, only without the strap.
If the dog is walking in a collar, then a hole for a leash is provided in the overalls. If the dog walks with a harness on, then it is more acceptable to make the bar long.
Attaching to the neck of the stand-up collar
The stand-up collar is cut out similar to the bar. This is a rectangle, the width of which is 10 cm, the length is equal to the length of the neckline. The width of the stand will be 4 cm. From the inside, the collar is fixed with an adhesive pad. The part is folded in half inside out, shorter edges are sewn together. After the collar is turned inside out and, making an indent of 0.5 cm, a line is laid along the seams on the front side. If the volume of the pet's neck is much smaller than the neckline, then you need to make darts, or trim the fabric to the required size.
The edge of the armhole and the edge of the collar are folded with the front sides and grinded. The collar is turned inside out, the seam is fixed with an additional line and processed with an overlock. On one edge of the collar, a button / button is sewn, on the other - a loop of elastic or fabric / button.
Video
Final finishing works
The bottom of the legs is tucked inward twice, an elastic band is inserted into the lapel. If you need to adjust the width of the bottom of the leg according to the situation, you can replace the elastic with a narrow drawstring with a drawstring or a cuff with a clip. You can also finish the edges with an elastic bias tape.
The cutout for the tail is trimmed with piping and elastic so that the jumpsuit fits the dog's body. The male needs another obligatory hole - for a pip, so that he can normally relieve himself (cut out and processed in this way).
Editing a pattern to size
If the length of the pet's back is more or less than 47 cm, it is enough to make a simple calculation:
- the length of your pet's back;
M is the number in percent that is displayed in the zoom window in the MSExcel file.
For example:
If \u003d 50 cm, then M (according to calculations) \u003d 50 * 100 47 \u003d 106.4
It is advisable to initially sew a “trial” jumpsuit from an old duvet cover or sheet. This will insure you against damage to the main material, help to identify errors in the pattern, because each dog is unique, it is impossible to create a universal pattern.
Possible problems at the cutting stage
If your pet is not quite standard sizes, there are nuances:
- Wide, long, short or narrow front legs;
- The lower insert has sagged;
- The discrepancy between the length of the step and the crotch.
To correct the pattern, additional individual measurements are taken. The dog must be brought to a standing position. The centimeter tape is not pulled, otherwise, the dog will be uncomfortable and cramped in the outfit.
Additional custom measurements:
- Half-girth of the neck (POSH);
- Half bust (POG);
- Semicircumference of the hips (PHB);
- Lateral length (BD) - measured along the side of the abdomen between the thigh and shoulder.
The overalls are tight in the abdomen and chest
We calculate the height of the sidewall (WB):
WB \u003d (2 * POG - insert width) *
As a result, we get a value that is added along the entire length of the back. This type of adjustment of the pattern is fraught with the expansion of the neck. To reduce it to the desired size, it will be necessary to pick up the fabric of the armhole along the width or use the darts located on the same level with the trachea.
Jumpsuit short on the sides
We retreat from the cutout of the front and back legs by a few centimeters and draw 2 perpendicular lines from the extreme points of the belly line upwards. We cut the template along them, push the sides apart so that the distance between the cutouts for the paws is equal to the length of the side line and a couple of centimeters (margin).
Together with the length of the sides, the length of the back will increase. This can be corrected by making grooves at the incision site. In the future, they will allow the pet to feel freer in overalls.
Narrow leg coverage in overalls
You can expand the coverage of the leg if you add equivalent segments along the seam line B on both sides.
We calculate the increase (P):
P \u003d (2 * POB - length along the seam B) *
We shift the sidewall pattern a width P back and add centimeters to the front edge of the leg.
4.8 / 5 ( 21 voice )
In the cold season, a person, trying to keep warm, puts on a warm coat, wears winter boots and a hat. A dog - the closest and most devoted friend - can also get sick or catch a cold. Since representatives of fine-haired breeds especially suffer from cold during the off-season, it is the duty of a person to protect and take care of tamed smaller brothers. To make your pet comfortable in autumn and winter, now is the time to think about creating suitable conditions for him, for example, buying an appropriate jacket in a specialized store. But it is much more interesting and cost-effective to make clothes for the dog with your own hands.
To make your pet comfortable in autumn and winter, now is the time to think about creating suitable conditions for him.
In order to start work correctly for amateurs, first of all, we determine the sequence of future actions. Read the step by step guide.
- We take measurements. It is necessary to calculate the volumes of the chest, neck, waist, the length of the back and limbs of the pet.
- We transfer the calculations to paper, make patterns.
- We cut out, transfer the patterns to the selected fabric.
- When cutting the fabric according to the patterns, leave 2 cm for internal seams.
- Baste the product at the seams, make a fitting.
- Finish clothes on a sewing machine, decorate the finished product with pockets.
Gallery: clothes and shoes for dogs (25 photos)


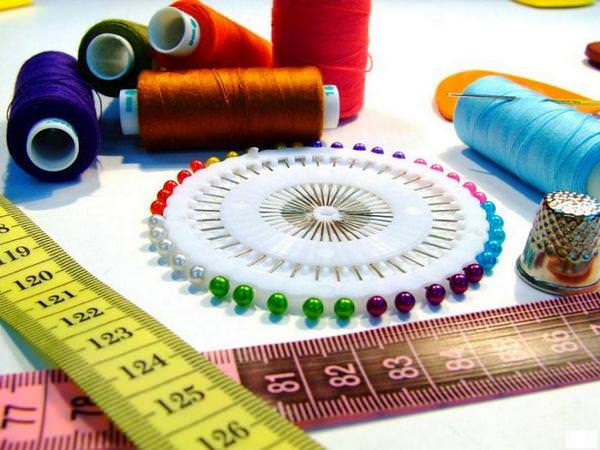
What you need to sew dog clothes
- Fabric, a pattern of a style, a suitable shade of a thread, a needle;
- Pins for fixing the details of the product;
- Elements for decorating finished clothes, buttons or Velcro;
- Sewing machine.
It doesn't take much to sew.
- Magazine patterns are given without fabric allowance for seams. In order not to get confused once again in the details of the pattern, mark the name of the details on the wrong side with a small piece or a piece of soap and conditionally draw a dotted stitching line.
- Clothes with embroidery are made by applying decor from the inside.
- Saving fabric consumption will allow the initial pattern of larger parts, then small ones.
- We fasten the paired details of the clothes with pins.
- We make the lining identically to the patterns of the main fabric parts.
To avoid shrinkage of the selected fabric, it is advisable to wash it before sewing.
Clothes for dogs from old things (video)
Clothes for dogs of small breeds with their own hands: a charming suit for a chihuahua
Small dogs are most susceptible to colds. Representatives of small breed animals - dachshund, French bulldog, Yorkie, Chihuahua, are especially sensitive to hypothermia, because by nature they have small thin paws and a short-haired coat. Therefore, it is very important to take care of tailoring a suit for your pet in time before the onset of cold weather. Below is a detailed instruction on how to make a sports-type suit for a Chihuahua, a pug or a small puppy.
Necessary:
- Fleece fabric (you can use the fabric of an old jacket);
- Sintepon or plush lining;
- Velcro or lock;
- Threads, needle, scissors;
- Pattern paper, pencil;
- A piece of soap.
How to do:
We take measurements from the animal - the length from the collar to the tail (DS), the girth of the neck in place of the collar (OH), the girth of the chest behind the paws (OG).

- We transfer measurements to paper according to the scheme
- For convenience, mark the seam allowance around the edges, about 2 cm. Cut.
- With soap, redraw the dimensions on the fabric.
- Carefully sweep the fabric along the edges marked with letters, try on. It is very important to make sure that your pet is comfortable in clothes.
- Using the same pattern, make a lining, tack to the main fabric blank, try on again.
- Sew a fastener to the suit.
- Carefully hem the joints of the fabric.
Decorate the finished product with decorative elements.
How to sew shoes for a dog: a master class
with sole
You will need:
- The fabric is dense and warm (you can use a flap from old things);
- A piece of leather for the sole, felt;
- Needle, thread;
- Elastic bands, retainer, threads for decoration.
How to do:
- Take measurements - put the foot on a thick fabric, circle the size with a pencil, taking into account the allowance of the outer seam.
- Attach the cut fabric to the skin, make identical blanks for the sole. Sew to fabric blanks.
- Measure the volume of the sole. In the future, the measure will be useful for modeling the circumference of the tops of the boots.
- Considering the peculiarity that for larger dogs it is necessary to make the tops longer, decide on the size of the height of the boot.
- Cut out the top, sew it with the outer seams to the sole.
- To decorate the seams, you can sew them with a knitting thread.
- We bend the top of the bootleg in half, fix it with a seam, retract the elastic band and fix it with a latch.
Without sole
We take the measurement of the paws: the diameter with claws at the widest point, the height from the fulcrum to the carpal joint, the length of the workpiece from the surface. Since there is a possibility of dimensional error, it is recommended to measure each paw individually.
We draw a pattern according to the scheme, where the radius BC is the height of the future shoe, AB is the diameter of the paw, the dotted line is the location of the wrist joint, from the dotted line to the second circle is the opening for the elastic band.

Further actions:
- Transfer the pattern to the fabric, marking all the necessary points plus 1 cm seam allowance.
- Cut four more identical strips from the fabric - drawstrings with a hem of 0.5 cm.
- Overcast the edges of the boot, try on. In order for the shoes not to wear out quickly, sew a piece of hard, elastic material along the diameter AB.
- Sew on the drawstring at the required height of the product, retract the elastic band of the latch.
The sole for dog boots can be made from a piece of rubber or old shoes, fixing the workpiece between the seam of the shaft and the insulation. This sole is very comfortable for dogs of large breeds. For smaller dogs, the insert is inconvenient.
Do-it-yourself dog jumpsuit
Dog overalls are a very comfortable thing for a pet to protect from weather conditions. To prevent hypothermia of the extremities, we will make the overalls warmer by sewing a lining into the sleeves.
Necessary:
- Fabric - raincoat fabric;
- Sintepon for lining;
- Threads, needle;
- Paper, pencil;
- Scissors, centimeter;
- Rubber band and buttons.
What to do:
We take measurements according to the scheme: back length to tail (1), collar circumference (2), chest circumference (3), waist (4), belly distance of the female (5) male (9), chest volume (6), paw length (7.8), ear distance (10), head volume (11), muzzle volume (12). Measurements of the distance between the ears (10), the volume of the head (11), the volume of the muzzle (12) - for the hood.

We transfer the measurements to paper: ZK \u003d 1/8 \u003d the length of one cell in cm according to the pattern. We divide the paper into cells with a given side size. Crosses mark the original designations. Transfer measurements. When transferring to the fabric, we make an allowance of seams on the ZAVK 3 cm long. For movement, it is better to make an allowance on the legs a la trousers.

Further actions:
- Make two parts of the fabric blank ZKDILGBNMZH. Then, separately, ZhBNM and GDIL blanks are a lining for the trousers of the future product.
- Sew up the inside of the trousers with the lining.
- From measurements 3, 4 subtract the difference between the real figure of volumes and the image plane. The number indicates the width of the insert on the stomach.
- Sew the belly insert to the product, assemble the entire jumpsuit. To tightly press the fabric to the body, put an elastic band in the seam in the place of the ZHZ, close the opening with a button in the area of the KD neck.
- Bottom MN, LI flash with rubber bands. Insert a zipper on the peritoneum.
- We model the measurements of the hood on the workpiece as follows: fold the fabric in half, take half the distance 10, from the designation point measure the measurement 11 and the length according to the dimensions 12, plus allowances for the internal seams. Sew.
Fix the hood on the jumpsuit, sewing it to the level of the neck (can be done with buttons).
Jacket for a large dog
To sew a light windbreaker or blouse for a pet, it is necessary to carefully take full-size measurements so that the future product does not hamper the movement of the dog. For a jacket, any fabric that is comfortable to wear all the time is suitable. For subsequent sewing of the product, be sure to add 2 cm for internal seams.
How to do:
We draw a figure according to the scheme:

When getting a dog, you should remember that in winter it may need very warm clothes, because many of the breeds have long been dissimilar to their ancestors and are not adapted to walks in winter.
Taking measurements for a pattern
First of all, before you start sewing, you need to make a pattern for the future overalls. To do this, you will need to take measurements from the pet. In this case, you should not go to the Internet and copy the dimensions from there, and there are several reasons for this, related to the structure of the dog's body:
- Chest width.
Each breed has its own chest width. The placement of the front paws depends on it. That is, the wider the dog's chest, the greater the distance between the forelimbs.
- Irregular back curve.
Dogs, like humans, can have back problems that are not breed specific. This fact must be taken into account. After all, if the back of the pet is, for example, an arc, then the back of the suit will cause him severe inconvenience.
- Features of the body of males.
No, it's not the cutout under the genitals. Often sold in stores, overalls have a structure that does not allow males to lift their hind legs, thereby causing serious discomfort to the pet.
- Weight problems.
Some owners, in their desire to feed their pet heartily, are often very zealous, which can lead to obesity. A dog with such an ailment may fit into a jumpsuit, but it will be more difficult for her to walk in it.
- Features of the pet's behavior.
Some dogs have one character trait: dislike of clothes in any form. Such animals often try to quickly pull off the legs from their paws, because of which the latter can tear. For such individuals, it is better to sew overalls with sleeves slightly shorter than usual, and insert special lacing under the armpits.
- Clothes "for growth".
When tailoring clothes for growth, it is important to consider the breed to which the dog belongs. After all, each species develops in its own way, and it is worth predicting in advance where you will need to leave a fold or lacing, which will allow you to increase the suit in the right place over time.
- The need for a harness or collar.
Each owner decides for himself how he walks his dog: on a collar or on a harness. When tailoring, this must be taken into account. Each type needs its own "technical" holes, allowing you to quickly and freely attach a leash.
- Neck options.
The dog's neck, like the chest, can be of completely different sizes: wide or narrow, short or long. An incorrectly tailored jumpsuit can strangle a pet or, conversely, hang too loosely on it, which can blow the dog out.
If the jumpsuit is sewn to order, then you should take into account the temperament of your pet, and immediately warn the master that the dog may bite. It should also be mentioned that the dog is very active, this can also interfere with taking measurements.

Knowing all the tricks, you can start removing marks from the dog. Some "specialists" take only one measurement - the length of the back. This is a fundamentally wrong decision. The reasons for this are indicated above.

Masters take measurements according to a small instruction or as shown in the figure above:
- From the back.
- Lower (closer to the chest) and upper (closer to the muzzle) girth of the neck, as well as the distance between them. For dogs with a short neck, only the lower girth is needed.
- The girth of the chest behind the front legs.
- Waist.
- From back to front paws.
- The front of the chest between the front paws.
- The length and girth of the front legs.
- The length and girth of the hind legs when standing and sitting.
- For dogs: the distance from the armpits to the genitals.

All necessary measurements have been taken. Now it is important to choose the material of which the future costume will consist. Incorrectly selected fabric can cause inconvenience to the pet: hinder movement, rub or get wet. It is also important to choose the right accessories: buttons or zippers, elastic bands and a collar (harness) that will be built into the overalls.

Materials for overalls
Overalls are sewn exclusively for winter and autumn wear and should retain heat well, unlike various light summer suits, so you should not choose knitwear or cotton fabric when cutting. An important property of the overalls is moisture resistance, so the best option would be to choose raincoat fabric or bologna. You can also insulate the product by additionally sewing a lining made of fur, synthetic winterizer or fleece. In addition to the jumpsuit, if it is not insulated, in winter it is also recommended to additionally wear a sweater knitted from a thread on the pet, the percentage of cotton in which should not be lower than 40%, the same with respect to wool.

In addition to the fabric, you need to immediately determine the location of the fasteners. If they pass along the dog's stomach, then it is better to use buttons. If the suit closes on the back, then the zipper is the most convenient solution. Most often, it is the 2nd option that is used. It is better to choose a wide clasp made of plastic, this will allow you to easily and quickly put on and take off the overalls from the dog. As a collar for a suit, fabric tape is more suitable than other materials. For its fastening it is necessary to use fastex locks. They allow not only to speed up the removal or putting on of the suit, but also to adjust the width of the collar to the required value.
Before you start sewing a costume, it is worth analyzing one more nuance: making a layout. The layout of the overalls will allow you to understand and correctly sew all the details of the costume, and, if necessary, correct the mistakes made. In this case, the main fabric will not be damaged. Any non-stretch fabric is suitable for making a layout.

Applying elements to mock-up fabric
It is necessary to apply markings on the previously selected material, according to which the pattern will be cut. The size of the piece of fabric that you may need should be approximately 2 times the length of the dog's back in width, and 4 times the height from the shoulder blades to the floor in length. A piece of fabric must be bent in half and draw a markup, as shown in the figure.

First, the legs are drawn, their height depends on how the pet is accustomed to wearing various outfits. For those dogs that do not like costumes, it is recommended to shorten the legs. As a standard, their length should correspond to the length of the legs. The width of the future "pants" in the widest part is equal to the girth of the paws. As you can see, the figure shows only half of the cuttings of both paws.
After the paws, you can proceed to cutting the body. To do this, you need the length of the back and the distance between the front and rear limbs of the dog. The shortest distances from the spine to the abdomen, the middle of the chest, and the neck will also come in handy. All data must be transferred to the body, based on the fact that the segment AB is the distance between the front and hind legs.
The last details will be the lower and neck parts. The width of the lower part varies from the widest B1 or C1 indicating the distance between the front legs. Up to segments A1, D1, the width of which is 2-3 times less, and they are closer to the ends and middle of the product. The need for a neck section depends on how long the neck of the dog on which the overalls are sewn. The length of such a section should correspond to the length of the neck between the upper and lower girths, and the width to half of the girths of the necks.

Stitching parts of the layout
After marking, you need to double-check all the data. It is worth remembering that you need to cut out 2 parts at once (on the left and right sides): this applies to everything except the bottom. For this, a piece of fabric was bent before marking. The final step will be trimming the details. Smooth edges are more convenient to sew to each other, in addition, the risk of wrinkles during work is reduced. After cutting out the pattern, you can proceed directly to sewing the layout. This can be done manually. This option will take a little longer, but after trying on such a suit can be easily disassembled into stencils.
First of all, the lower part and 2 parts of the torso of the suit are sewn together. To do this, it is necessary to combine the lines AB and A1B1 shown in the diagram. When stitching, it is important to apply the fabrics with the right side to each other. This will allow you to hide all the seams in the future. After the first line is done, connect the DC and D1C1 lines. In no case should you stitch the gap between CB and C1B1. Legs will be sewn to this part of the costume. Sewing the front legs with the body is quite simple: a leg pattern is attached to the suit turned inside out at an angle of 45 degrees with the wrong side up. Next, the details are swept away with each other. After the front, sew on the back pair of legs. They, unlike the previous ones, need to be placed at an angle of 90 degrees. After everything is sewn, and before proceeding with the manufacture of parts, it is necessary to carry out a preliminary fitting, which will identify possible problems. Instead of zippers in layouts, buttons can be used as a temporary solution.

Sample layout
Mostly fitting is necessary in order to determine in which particular places of the suit amendments are needed. Often, when sewing, the owners do not take into account such details as the width of the step, the volume of the wool and the presence of a lining. Because of what, even a suit sewn according to the correct marks can rub and cause severe discomfort to the pet.
When trying on, the dog must be in a standing position. This will allow you to go around it from all sides and examine everything more carefully. If the dog is small, then when trying on it is better to put it on the table so that it is more convenient to examine.
After checking, if any problems are revealed, it is necessary to disassemble the layout again and refine its design, and then repeat the whole process with stitching and fitting. If, as a result, the costume layout sits like a glove, then you can start cutting out ordinary fabric.

Cutting and sewing the entire suit
After a successful fitting, the layout is disassembled into stencils, according to which the pattern of the final jumpsuit is marked. Further, everything is exactly the same as with stitching the layout, but with some features:
- When sewing the body and paws, if the dog does not like to dress in different costumes, you should insert an elastic band. She will prevent the animal from taking off the suit ahead of time.
- Instead of buttons, a zipper is sewn to the top of the suit, it is important not to confuse the wrong side with the front side and, by chance, not to sew the zipper upside down. This is a common rookie mistake.
- The last step is to attach the cervical spine, if required. To do this, you need to sweep 2 halves of the neck of the suit and attach the resulting part with the front side inward, with the wide part to the main one, turned inside out, and stitch. When stitching, do not forget about the hole, which is necessary in order to attach the leash to the collar. It is usually left on the back of the neck.
- In the event that the cervical region is not required, a collar made of fabric tape must be sewn to the same place. He won't let the dog take off his overalls.
If the suit needs an insulating lining made of fur, fleece or synthetic winterizer, this part is sewn according to the same pattern. Only at the inside of the paws should be 2-3 cm longer.

After everything is sewn, and before proceeding with the connection of the internal and external parts, it is necessary to carry out the last preliminary fitting, which will reveal the last flaws.
When the final check is passed, you can begin stitching the insulation to the outer part of the suit. To do this, turn the front part inside out, and the insulation with fur inside. Next, pass the outer part inside the insulated one and stitch around the neck. Stitch around the back as well. Turn the resulting design through one of the legs. Further, the longer legs of the inner layer are folded outward and swept away with the outer ones.
The overalls for the dog are ready. Now the pet will be satisfied and will be able to frolic calmly even in the cold season. But it is important to remember that before dressing a pet for a walk in the winter, it is necessary to carry out a preliminary fitting every year. After all, a dog can grow or get better in a year.